
Temporary Renovation Network: Protect Cables Before Demolition
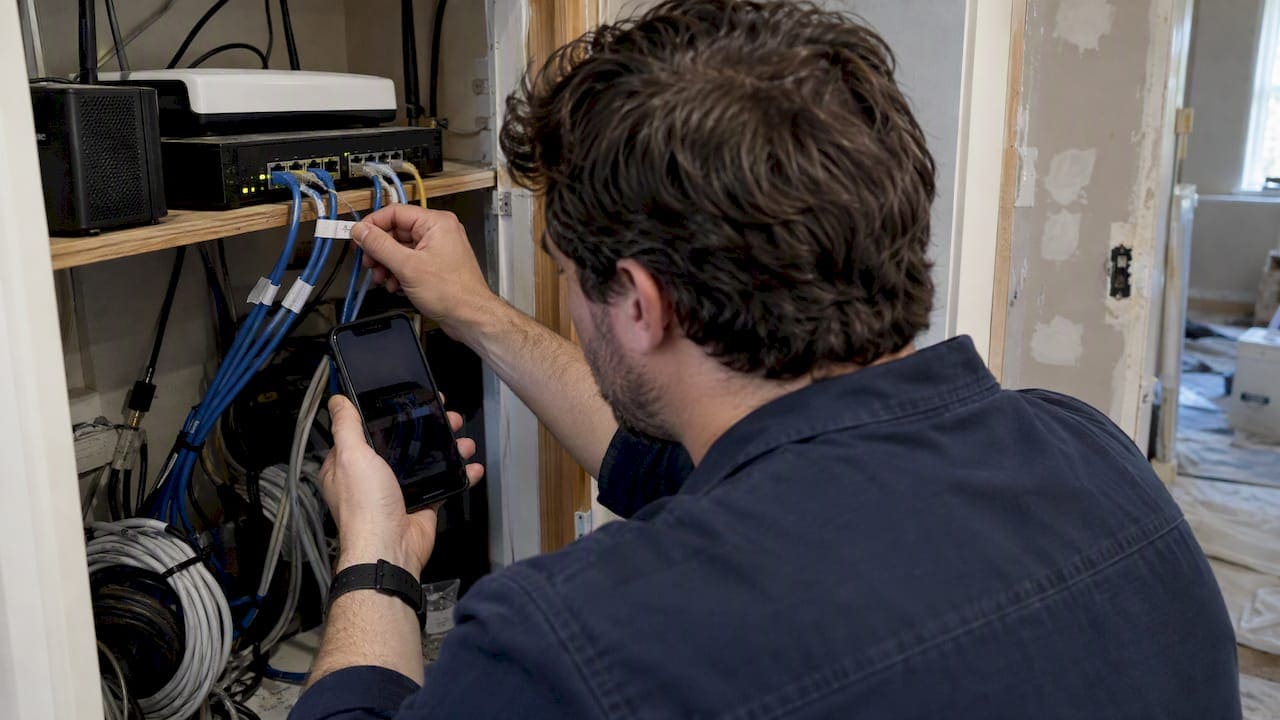
Use a mobile hotspot or a short-term fixed broadband plan to stay online right away, and protect every permanent cable run so the finished network is clean and testable. Before demolition starts, check the essentials: whether your plan has a data cap, where temporary power will come from, and how construction crews will avoid damaging cable.
TL;DR:
- Use a phone hotspot for days, a dedicated hotspot or short term plan for weeks, and fixed broadband for months; check data caps.
- Compare broadband labels for price, data allowance, speed, and overage fees; get a firm installation date and test service before disconnecting your network.
- Place access points above the floor, away from dust and metal enclosures; use a wired link between mesh nodes when possible to preserve throughput.
- Run permanent cable before walls close, protect it from staples and sharp bends, label both ends, and request verification plus certification reports when required.
- Hire a cabling professional for work across floors, fire blocking, warranty coverage, or certified results; schedule the crew after framing and before insulation or drywall.
What are your temporary internet options during a renovation?
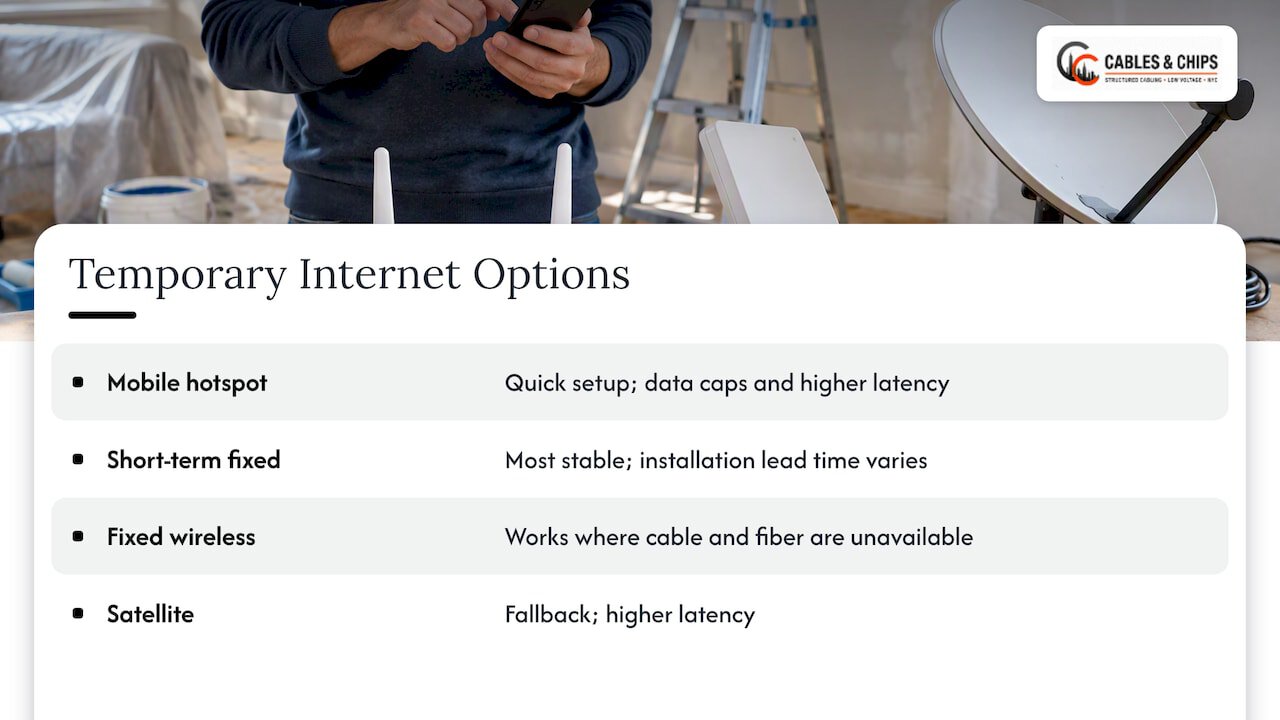
You have several realistic choices: a mobile hotspot, a short-term fixed broadband install, fixed wireless, and satellite. The right one depends on how long the work lasts, how much data your household uses, and whether anyone works from home.
A mobile hotspot is the fastest fix. You can use your phone’s hotspot feature or buy a dedicated hotspot device with its own plan. Setup is quick, and you can move it to whichever room is not under construction. The tradeoff is that mobile plans are frequently subject to data caps and higher latency than fixed broadband, which can hurt video calls and large file transfers.
A short-term fixed broadband plan from a cable or fiber provider gives you the most stable connection. Ask the provider whether it offers month-to-month service with no long contract, and how long installation takes. Lead times vary by address, so ask for a firm date before you commit. Also ask whether the installer can place the modem somewhere that stays out of the work zone.
Fixed wireless delivers internet from a nearby tower to an antenna on your home. It works well where cable and fiber are not available, and it avoids running new lines through a house that is already torn open. Satellite is the fallback when nothing else reaches your address. Expect higher latency, which makes real-time video and gaming feel sluggish, but it will keep email, streaming and browsing running.
How do you compare short-term plans?
Federal rules help here. The FCC requires broadband providers to show consumer labels at the point of sale that disclose the monthly price, data allowances and speed. The FCC’s data cap guidance adds that the label must say how much data is included and disclose any extra fees or slower speeds once you pass that amount. Use the label to compare plans line by line instead of relying on a sales pitch.
Check before you sign: the label’s “Data included with monthly price” section tells you whether a plan will throttle or charge you for heavy use.
Quick checklist before demolition
- Setup time: get a written install date from the provider, and have a hotspot ready as a backup.
- Monthly cost: compare the label price against any install or equipment fees, and ask if a short-term plan costs more per month than a standard one.
- Data cap warning: confirm the cap, the overage charge, and whether speeds drop after you pass it.
- Speed test: run a speed and latency test at the spot where the modem or hotspot will sit, and repeat it in the room where you will work.
- Backup path: keep one second option active, such as a phone hotspot, in case the primary service drops.
Test everything before work begins. Finding a weak signal after the walls are open is far more stressful than finding it while the house is still intact.
How do you build a temporary Wi-Fi setup around construction?
For a small house or apartment, a travel router or portable mesh kit may be enough. When you have several floors, thick masonry walls, or a work zone that cuts your home in half, deploy multiple nodes so each living area has a clear signal.
Position matters more than gear. Cisco recommends mounting access points close to users and avoiding metal-rich enclosures or cabinets, because those environments severely degrade coverage and reliability. On a jobsite, that translates to a few rules:
- Keep access points out of metal cabinets, toolboxes and utility closets.
- Keep them clear of dust, drywall sanding and paint overspray.
- Never block the vents on a router or mesh node. Heat builds up fast in a closed space.
- Set them on a shelf or stand at about chest height instead of on the floor, where debris collects.
Why use a wired backhaul?
If you can run a short patch cable between the main router and a second node, do it. A wired link between nodes avoids the wireless hop that eats throughput in mesh systems, and it reduces interference with your own devices. A temporary cable laid along a baseboard or taped along a wall edge is fine for a few weeks. Keep it out of walkways and away from where trades will be working, and never run it under a door that gets opened and closed all day.
Wi-Fi density also matters. As a rule of thumb in open layouts, an access point can cover a substantial area, though Cisco recommends a site survey or predictive simulation to confirm it. Walls, floors and appliances shrink that figure in a real home, so treat it as an upper bound.
How do you add and test a node?
- Place the new node about halfway between the main router and the weak area, within a clear line of sight where possible.
- Connect it by patch cable if you can, or plug it in near an outlet that will stay live during the work.
- Power it on, wait for the status light to show it has joined the network, and connect your phone to it.
- Walk through the work area and the rooms you use most, running a speed test in each.
- Move the node a few feet if a room is weak, retest, and repeat until every room you need has a steady signal.
Cisco’s Wi-Fi 7 planning guidance describes the same loop: install provisionally, run throughput and roaming tests, then adjust power and placement until measured coverage matches your goals.
Pro Tip: Walk the whole house with a video call running on your phone. If the call stutters when you cross a doorway, that is where the next node belongs.
Powering and protecting temporary gear
Most home access points run from a standard AC adapter, but a PoE injector lets one cable carry both data and power, which keeps clutter down. Battery-powered units suit short jobs in rooms without outlets. Whatever you choose, keep adapters off the floor, away from water, and covered against dust. A zip bag with the cable exiting a corner can protect a router, as long as vents stay open.
How should you handle wired prewire and cabling during renovation?
Open walls are the cheapest time to add cable you will want for years. Running permanent runs during rough-in costs a fraction of fishing cable through finished drywall later, and wired connections outperform Wi-Fi for desktops, TVs, game consoles and access points.
Start with the distribution center, the central point where every cable run lands. Fluke Networks advises mounting it in a climate-controlled location near a dedicated power source. That usually means a utility room, basement or interior closet, not an attic or garage that swings with the weather.
How do you protect cable from construction damage?
Cable fails in quiet ways. A staple that pinches a jacket or a tight bend behind a stud can produce intermittent problems that show up months later. Protect your runs with these habits:
- Use conduit, sleeves or pull strings where cable passes through framing so it can be replaced without opening walls.
- Keep bends gentle. Sharp bends damage the pairs inside the jacket.
- Keep cable away from nail and screw zones near studs and outlet boxes.
- Leave extra length at each end for termination, then coil and bag the ends.
- Label both ends of every run before drywall goes up.
Fluke Networks notes that terminated cables can be bagged and labeled until trim-out, which keeps dust and paint off the connectors.
What is the difference between verification and certification?
Verification confirms that a cable is connected correctly: the pairs go to the right pins, and nothing is open or shorted. Fluke recommends performing it during rough-in so wiring faults are fixed before the walls close. Certification goes further. It measures the cable against a published performance standard and produces a pass or fail report you can keep. Verification catches wiring mistakes. Certification proves the installation meets the standard it was built to. Certification reports also matter when a warranty or specification requires proof of performance.
DC resistance unbalance is one measurement that shows up in certification work. Fluke Networks explains that it is often caused by installation practice and cable quality, and that proper bend radius, maintained pair twists and quality cable avoid the problem.
How should cable be terminated?
Termination is where good cable is most often ruined. Fluke Networks recommends keeping the original pair twists as close to the termination as possible, and removing only as much sheath as you need. Untwisting more than that degrades performance, particularly on category 6.
Key limit: keep untwisted pairs as close to the connector as possible.
Homeowner handoff checklist
At the end of the wiring phase, ask for the following:
- Every run labeled at both ends, with labels that survive painting.
- Test reports for each cable, saved as a file or printed copy.
- A short as-built sketch showing where each cable goes.
- A plan to leave final patching and equipment installation until after finishes are done.
Our guide to commercial WiFi cabling best practices goes deeper on routing and access point cabling, and the principles apply at home.
When should you hire a pro, and what should you ask?
Hire a professional when the job spans more than one floor, when you want certified test results, when you need a warranty, or when your cabling has to be coordinated with electricians, drywall and HVAC. A single short run in an open wall is a reasonable DIY project. A whole-house network behind finished walls is not.
Use this decision checklist:
- Scope: more than a few drops, or any run that crosses floors or fire blocking.
- Performance: you want CAT6A or fiber and need results proven on paper.
- Warranty: you want written coverage on workmanship and materials.
- Coordination: several trades need access to the same walls on a tight schedule.
Which questions should you ask a contractor?
- Do you perform a site survey before quoting, and is it free?
- Will you provide verification only, or full certification with reports?
- Which cable types do you recommend for my layout, and why: CAT6, CAT6A or fiber?
- How will you label runs and document them when the job ends?
- How will you protect cable already installed while other trades finish?
- What is your change order policy if the scope grows?
- What is the expected timeline, and how does it fit around my general contractor?
Our cabling contractor vetting checklist expands on these questions, and our piece on managing a cabling subcontractor covers what happens once work begins.
What do professional results look like?
You should receive a test report for every cable, labels that match the report, and an as-built drawing. These documents reduce rework because the next person to touch the network can see exactly what was installed and how it performed. If a run fails later, a report from day one tells you whether the problem began at installation.
How do you coordinate the visit with your renovation?
Schedule the cabling crew after framing and electrical rough-in but before insulation and drywall. That window lets them route cable cleanly and test it while walls are still open. A tool such as The Build can help you and your contractor share schedules, task lists and material lists so the cabling visit does not collide with other trades.
Pro Tip: Ask your general contractor to put the cabling walk-through on the written schedule, with a “do not close walls until cabling is signed off” line.
How do you power temporary networking equipment safely?
Power is where a temporary network most often fails, because jobsites unplug things. Plan it before you place a single device.
PoE (Power over Ethernet) sends power and data over one cable. Budget carefully: every access point draws a set wattage from the switch or injector, and the total must stay under the device’s limit. Installers often treat the practical safe cable distance as shorter than the theoretical maximum, because long runs lose power and leave less margin. Our own reference on PoE rules installers use to avoid callbacks covers the wattage numbers in detail.
Follow these habits:
- Put the router, switch and modem on a circuit that does not share load with saws, compressors or heaters.
- Use a surge protector, since jobsite power spikes are common.
- Keep AC adapters off the floor and out of walkways where they can be kicked or soaked.
- Use battery-powered access points only for short stretches and recharge them on a schedule.
- Keep dust and heat in mind: covering a live router in plastic can cook it.
- Label temporary circuits and outlets so no one unplugs the router to run a tool.
- Secure all cables with tape or clips so they cannot be tugged loose.
Why trust this advice?
Ken contributes to our work at Cables & Chips, a New York City low voltage and data network contractor. Our team installs structured CAT6 and CAT6A cabling, fiber optic infrastructure, WiFi access point cabling, and CCTV, access control and A/V wiring. We also handle cable testing and certification, cable cleanup, and network closet organization.
The guidance in this article reflects how we plan and document cabling work on active sites. If you want more detail, our services page lists everything we do. You can also request a site consult if your renovation needs more than a hotspot and a few patch cables.
How do you keep devices online and manage data caps?
If your temporary connection has a cap, treat data like a budget. Start by checking the label for the allowance and the penalty for going over, then monitor usage weekly through your provider’s app or your router’s dashboard.
Practical ways to stretch a cap:
- Move large downloads, game updates and cloud backups to a night or to a location with unlimited data, such as an office.
- Lower streaming quality from 4K to HD, which cuts data use noticeably.
- Pause automatic updates and photo uploads on phones and laptops.
- Connect only the devices you need. Smart TVs and cameras can consume data in the background.
- Keep a second connection, such as a phone hotspot, for emergencies.
If you work from home, put your work laptop on the most reliable connection and let the family devices share the backup.
How do you disconnect and reconnect your existing network safely?
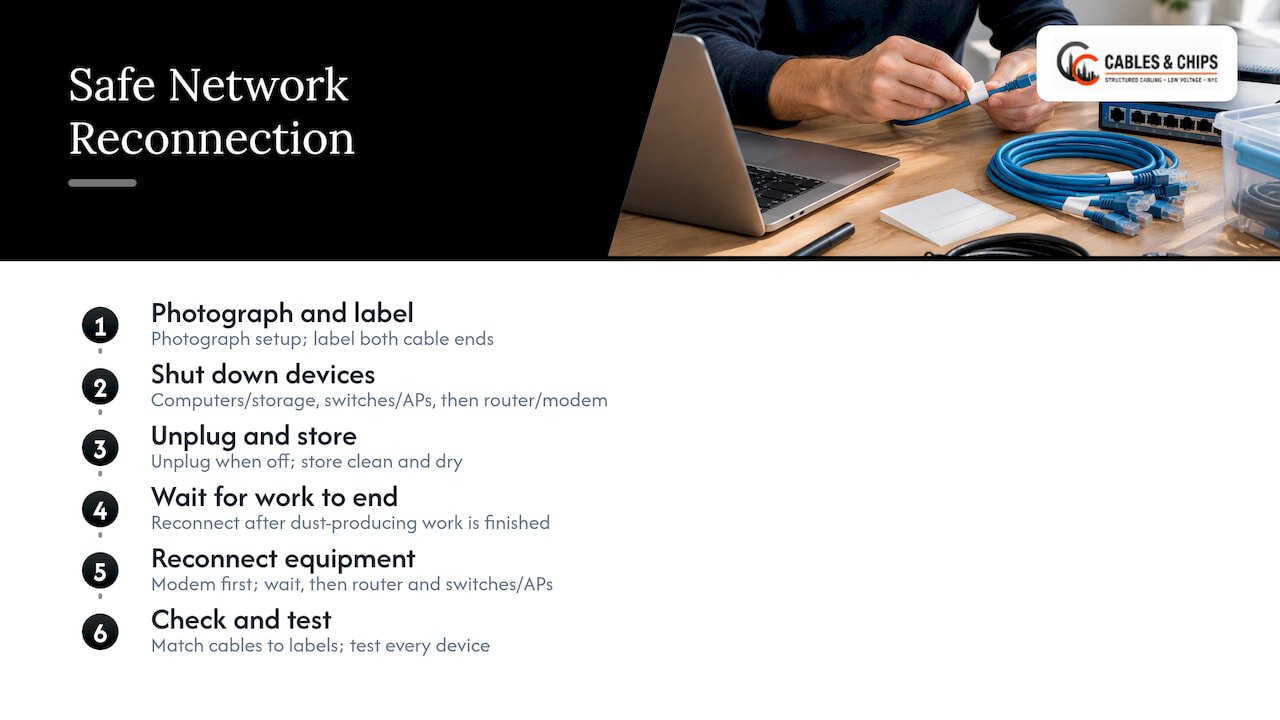
Before demolition, photograph your current setup so you can see exactly which cable goes where. Label each cable at both ends with tape and a marker, and note which port on the router or switch it uses.
Shut down devices in order: computers and storage first, then switches and access points, then the router and modem. Unplug power only after everything is off. Coil the cables, bag each device with its adapter, and store it in a clean, dry room away from the work zone, not on the floor.
When it is time to reconnect, reverse the process. Power the modem first, wait for it to settle, then the router, then switches and access points. Check each cable against your photos and labels, and test every device before closing the job. Do not reconnect until dust-producing work is finished, or you risk clogging vents and contaminating connectors.
How do you minimize downtime during the switch to a temporary network?
Downtime usually comes from doing the switch in a hurry. Set up the temporary connection before you disconnect the old one, then test it for a day or two with the devices you rely on most.
Follow this order:
- Activate the temporary service and confirm it works on your phone and one computer.
- Move work-critical devices first, such as your work laptop and phone.
- Move smart home hubs, printers and TVs next.
- Keep the old network running until everything has moved, if your service allows it.
- Write down your Wi-Fi name and password so you can match them on the new network. That way devices reconnect without reconfiguration.
If you work remotely, schedule the switch for a weekend or an off-day. Keep a hotspot charged and within reach as a fallback. Tell your household when the switch will happen, so no one starts a big download that fails midway.
What security steps does a temporary network need?
A temporary network is still your home network, and contractors, delivery people and neighbors will be close to it. Treat it with the same care as a permanent one.
- Use WPA3 encryption if your router supports it, and WPA2 if not. Never leave a network open.
- Set a long, unique password. Do not reuse your old one or share it on a taped note on the wall.
- Create a separate guest network for contractors and visitors so they cannot see your computers, storage or cameras.
- Change default router login credentials before you plug anything in.
- Turn off remote administration unless you need it.
- Remove contractor devices from your network when the job ends and change the guest password.
- Keep firmware current, especially on a new hotspot or travel router.
If you have security cameras or smart locks, move them to the protected network and keep them off the guest network.
How do you connect your temporary setup to the permanent network after renovation?
The goal is a clean handoff. Once finishes are done, install the permanent equipment in the distribution center, connect labeled runs to the switch, and test each one against the as-built sketch and test reports.
Then retire the temporary gear in stages. Keep the temporary router running until the permanent network is verified, so you never have a gap. Move access points to their final positions and rerun the speed and roaming checks described earlier. Reuse your old Wi-Fi name and password if you want devices to reconnect automatically.
Finally, return temporary equipment, cancel short-term service on its end date, and update your records. Our WiFi design service can help confirm final access point placement, and our as-built documentation guide shows what a finished handoff package looks like.
What do temporary networks cost, and how long do they take?
Timelines and costs vary by provider and location, so use the label and the quote, not general estimates. A hotspot is the fastest option, often active quickly. A short-term fixed plan depends on installer availability, so ask for a firm date. Fixed wireless and satellite installs each require an installer visit and equipment.
For costs, compare four items for each option: the monthly price, any install fee, any equipment fee, and the penalty for passing a data cap. A hotspot may look cheaper per month but cost more if you go over its allowance. A fixed plan may carry a one-time install fee that makes a short stay expensive.
Match your choice to your renovation’s length. For a few days, a phone hotspot is usually enough. For weeks, a dedicated hotspot or short-term fixed plan fits better. For months, a full fixed plan is usually the better value, because stable service and generous data matter more than a lower setup cost. For current pricing, see our website.
A contractor’s view: the usual renovation problems and simple fixes
We see the same surprises on site after site. Prewired cable gets stapled, crushed under a stack of drywall, or cut by a trade who did not know it was there. The fix is cheap: sleeves and pull strings, bagged and labeled ends, and a quick walk-through before walls close.
Access points suffer too. Crews set them on the floor, and sanding dust and paint overspray follow. We stage them away from the work zone and cover them loosely until the last coat dries.
The bigger lesson is coordination. Tell your electrician, drywaller and painter where the cabling lives, and put it on the schedule. Plan for the cabling visit to require access for an extended period, and plan for a second short visit at trim-out. A little planning saves a lot of rework.
— Ken
How does Cables & Chips turn a temporary network into a permanent one?
Once your walls are open, we can make the permanent network right the first time. We handle renovation cabling from rough-in through trim-out, and we document every run so nothing is guesswork later.

Our renovation-friendly services include:
- Prewire and structured CAT6 and CAT6A installation
- Fiber backbone installation
- WiFi access point cabling and placement
- Verification and certification testing
- Distribution center setup
- Network closet organization and cable cleanup
A site survey is the first step. We walk your project, review your layout and renovation schedule, and recommend where cable and access points should go. On a short wiring project, we can discuss your documentation and testing needs. See everything we offer on our services page, then request a no-obligation site survey so your finished network is clean, tested and ready.
FAQ
How hard is it to run an Ethernet cable through walls?
It depends on the wall. With open studs during renovation, it is straightforward. In finished drywall, you need to fish cable past fire blocks and insulation, which is much harder. Running cable before walls close is the easiest and cheapest time.
What do I do if my house doesn’t have an Ethernet port?
Run a new cable from your router to the room, or use a mesh system with a wired backhaul. If you cannot run cable, a powerline adapter or mesh node can help in a pinch. Have a professional add runs during renovation.
Is Cat6 overkill for home use?
No. CAT6 gives you headroom for faster speeds and costs little more than older cable, especially when installed during rough-in. It is a sensible choice for runs you cannot easily replace later. Many homeowners choose CAT6A for longer runs or future needs.
Is there a downside to Ethernet?
The main drawback is that you need a cable to reach each device, which is easy during construction and harder afterward. Wired connections are generally more stable and faster than Wi-Fi. For fixed devices, wiring them is usually worth the effort.