
Conference Room Microphone Cabling: A Planning Guide
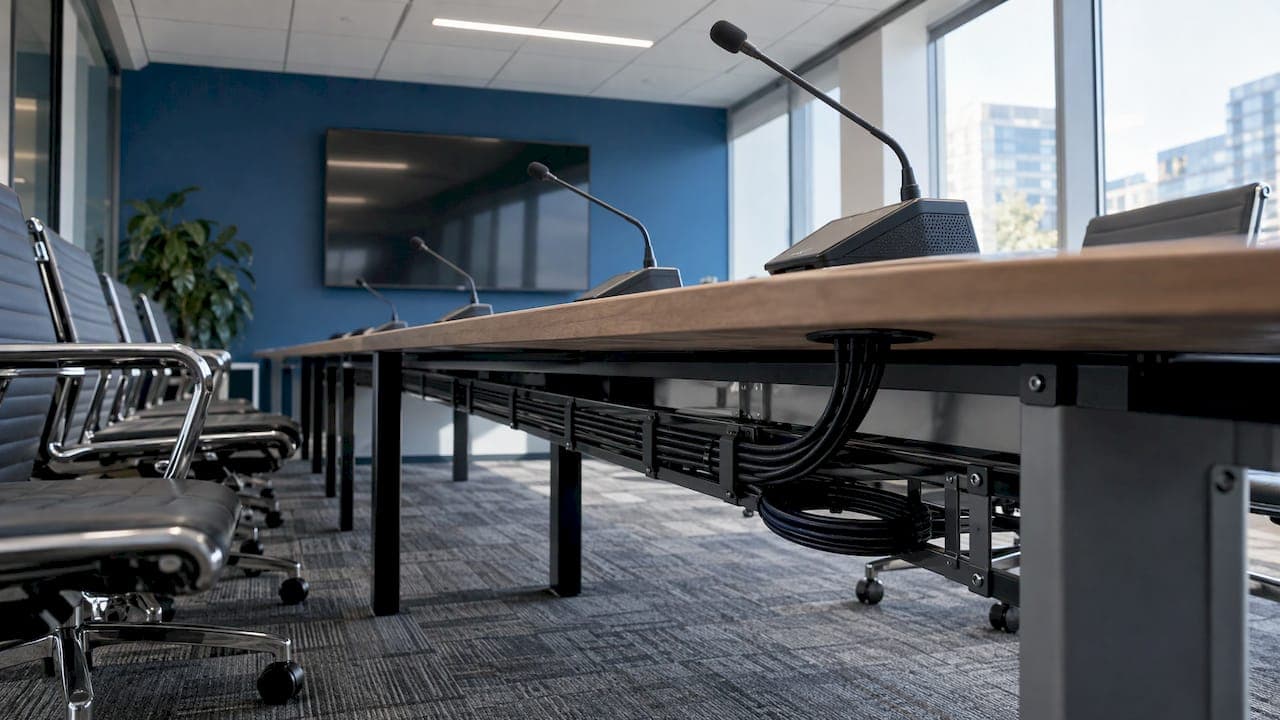
Conference room microphone cabling comes down to three decisions: whether the system is analog or digital, which cable and connector that choice requires, and how the cable is routed, terminated, labeled and tested. Analog systems use balanced XLR cable. Digital and networked systems use shielded Cat5e or Cat6 with RJ45 connectors. Most audio complaints blamed on “bad microphones” trace back to a cable, a connector or a switch setting that was never checked.
This guide is for office managers, IT directors, facilities teams and general contractors who need microphones that work on the first call and keep working. It covers what to specify before walls close, how to avoid interference and dropouts, and how to hand over a room that someone else can maintain.
TL;DR
- Analog microphones use balanced, low-impedance XLR-3 cable. Digital and networked microphones use shielded Cat5e or better with RJ45 connectors.
- Check run length before you pull cable. Some table microphones are limited to 100 ft (30 m), and Ethernet-based audio runs top out at 100 meters.
- For Dante-enabled microphones, the network switch matters as much as the cable: gigabit ports, PoE support and Energy Efficient Ethernet turned off.
- Label both ends, terminate with proper connectors (no pass-through plugs), and test pin-out and continuity before the ceiling and furniture go back.
- Plan microphone pathways during the buildout, alongside power, video and network drops, not after the table arrives.
Start with the system: analog or digital
The microphone system decides the cable. There is no universal “microphone cable” for a meeting room, and mixing assumptions between the two families is the most common planning error.
| System type | Typical cable | Connector | Where it runs |
|---|---|---|---|
| Analog, balanced | Shielded twisted-pair microphone cable | XLR-3 | Microphone to mixer, DSP or audio interface |
| Analog, unbalanced | Shielded single-conductor cable | Phone plug or mini-plug | Short runs to consumer-grade equipment |
| Digital, daisy-chained | Shielded Cat5e or better | Shielded RJ45 | Unit to unit, then to a control unit or processor |
| Digital, networked (Dante or AVB) | Cat5e/Cat6 | RJ45 | Microphone to PoE switch |
According to Shure’s audio systems guide for meetings and conferences, the choice is driven by whether the system is digital or analog: digital systems call for shielded Cat5e or Cat6 with RJ45 connectors, while analog systems use XLR-3 for balanced connections or phone plugs and mini-plugs for unbalanced ones. The same guide stresses that inputs and outputs must be matched for impedance and balancing, or performance suffers.
If you are choosing a system now, ask the AV consultant or integrator for the connection type of every device in the room before cable is ordered. If the system is already purchased, read the installation manual first. It will name the cable category, the maximum length and any shielding requirement, and those lines belong in the cabling scope.
Analog microphone cabling: why balanced XLR is the standard
Balanced low-impedance XLR-3 connections remain the professional standard for analog microphones in meeting rooms. The reason is practical. A balanced cable carries three conductors: hot, cold and ground. Noise induced along the run hits both signal conductors equally and is cancelled at the input, a behavior known as common-mode rejection. Shure’s guide describes this as the reason balanced XLR is preferred for microphone-level signals.
In a conference room, that matters because the cable lives next to things that generate noise: power circuits, lighting dimmers, display power supplies, and in a Manhattan office building, often a ceiling full of other trades’ work.
Practical points for analog runs:
- Keep the run as short as the layout allows. Microphone-level signals are weak. The longer the run, the more exposed they are to interference, so terminate close to the DSP or mixer where you can.
- Match connectors to equipment. A balanced output feeding an unbalanced input, or the reverse, gives up the noise rejection you paid for.
- Use floor boxes or table boxes with XLR panels where microphones are fixed. Loose cable across a carpet is a trip hazard and a failure point.
- Separate microphone cable from power. Cross power conductors at right angles rather than running parallel with them.
Digital microphone cabling: shielded Cat5e, Cat6 and RJ45
Most new conference rooms use digital microphones, either daisy-chained conference units or networked ceiling and tabletop arrays. These look like data cabling, and they are, but they are less forgiving than a typical desktop drop.
Cable category and shielding
Manufacturers spell this out. The Vaddio TableMIC manual calls for Cat-5e or better, and recommends shielded cable when it is coiled, run tightly alongside other cables, or placed near electromagnetic-interference sources. A conference table is exactly where those conditions meet: coiled slack under the table, bundles with HDMI and power, and an AV rack nearby.
Our recommendation follows from that: specify shielded cable for table-level microphone runs unless the manufacturer says otherwise, and bond the shield correctly through shielded connectors and jacks. Shielding that is not terminated at both ends gives you the cost of shielded cable without the benefit.
Daisy chains
Some systems connect units in sequence. The Shure Microflex Complete guide describes conference units linked through RJ45 ports, with shielded Cat5e carrying power, control data and audio from unit to unit. That has two consequences for your design:
- Power travels over the same cable. A bad termination can cause intermittent resets, not just crackly audio.
- One failed link can take down every unit after it. The first thing to check when several seats go silent is the cable between the last working unit and the first dead one.
The same guide notes shorter point-to-point limits between chained units than you would expect from a standard Ethernet run, in the range of 10 to 33 feet depending on the product. Read the limit for your specific model and design the table layout around it.
Terminations and connectors
Shielded RJ45 connectors are required for stable performance in many digital conference systems, and installers are often told to follow EIA 568-B wiring for them, per the Shure Microflex Complete guide. Legrand AV’s Vaddio manual adds a specific warning: avoid pass-through RJ45 connectors, because improper crimping can cause intermittent connectivity and signal degradation (TableMIC manual).
Intermittent is the word to remember. A cable that fails outright gets replaced. A cable that works for a week and drops audio during the quarterly board meeting generates a service call nobody can reproduce.
Distance, power and pin-out: what to verify before pulling cable
Four checks save the most rework.
1. Maximum length. For the TableMIC, the manual limits cable to 100 ft (30 m) (Vaddio). For Ethernet-based microphone systems such as Dante or AVB, the standard 100-meter channel limit applies to most runs, per the Shure Microflex Complete guide. Measure the real pathway, including vertical drops and service loops, not the straight line on the floor plan.
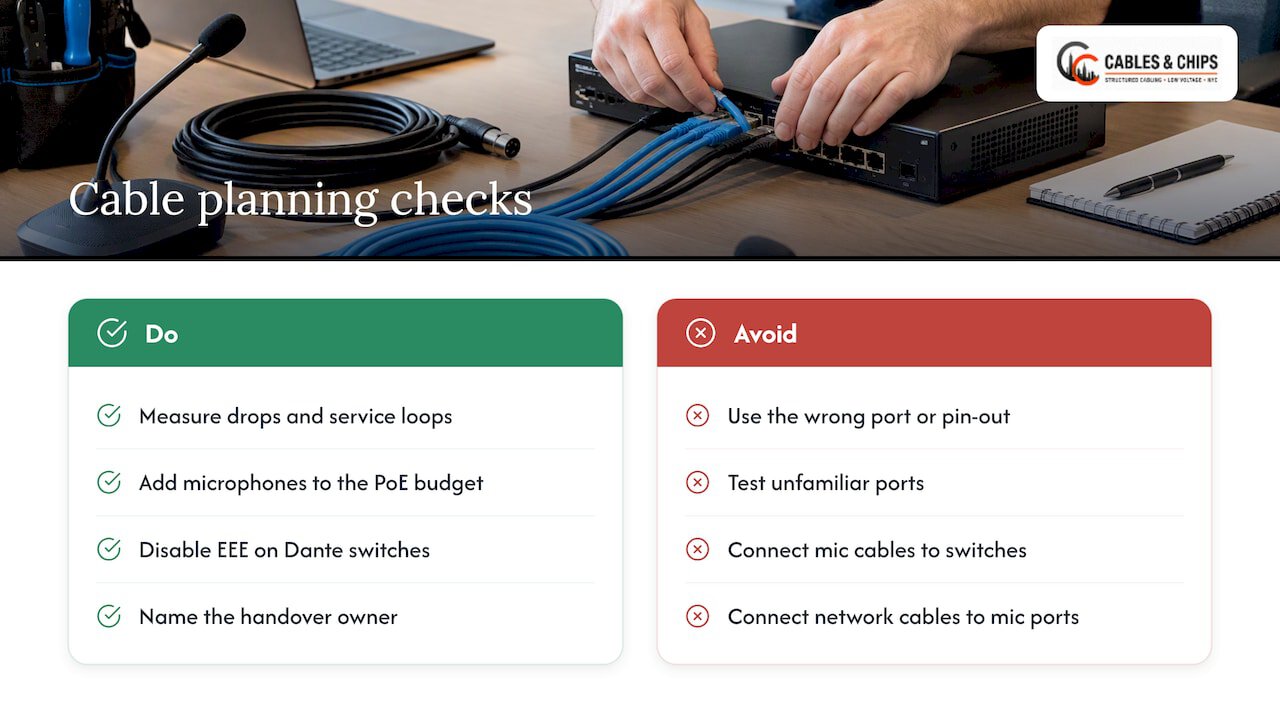
2. Pin-out and port. The TableMIC manual warns that connecting to the wrong port or using the wrong pin-out can damage equipment and void the warranty. Some proprietary microphone ports look like standard Ethernet jacks but are not. Never plug a microphone cable into a network switch, or a network cable into a microphone port, to “see if it works.”
3. Power budget. Networked microphones are usually powered over Ethernet. Add them to the switch’s PoE budget along with access points, cameras and phones. Our PoE power budget guide walks through a 24-port calculation with a 20% buffer.
4. Switch configuration. For Dante-enabled systems, the Shure MXA310 datasheet recommends switches with gigabit ports and PoE or PoE+ support, and with Energy Efficient Ethernet (EEE) disabled to prevent audio dropouts and clock synchronization problems. This is an IT setting, not a cabling one, and it is often missed because the cabling contractor and the network administrator never talk. Put it in the handover checklist and name who owns it.
Routing microphone cable in the room
Good routing is mostly about deciding early where the cable goes and who else needs that space.
Table and floor pathways
Table microphones need a path from the table to the wall, floor or ceiling and on to the equipment rack or credenza. Options include:
- Floor boxes with separate compartments for power and low voltage, which keep microphone cable away from power conductors.
- Table boxes or grommets at the table, with cable dropping to a floor box or wall plate.
- Wall plates with a dedicated microphone or network jack for rooms where the table can move.
Some microphones are designed to mount flush. The Shure MXA310 guide describes mounting through a 1-inch hole in the table, with the cable routed underneath and secured with a cable tie. Decide on table hole locations with the furniture supplier before the table is built or delivered. Drilling a finished conference table on site is a good way to ruin it.
Ceiling microphones
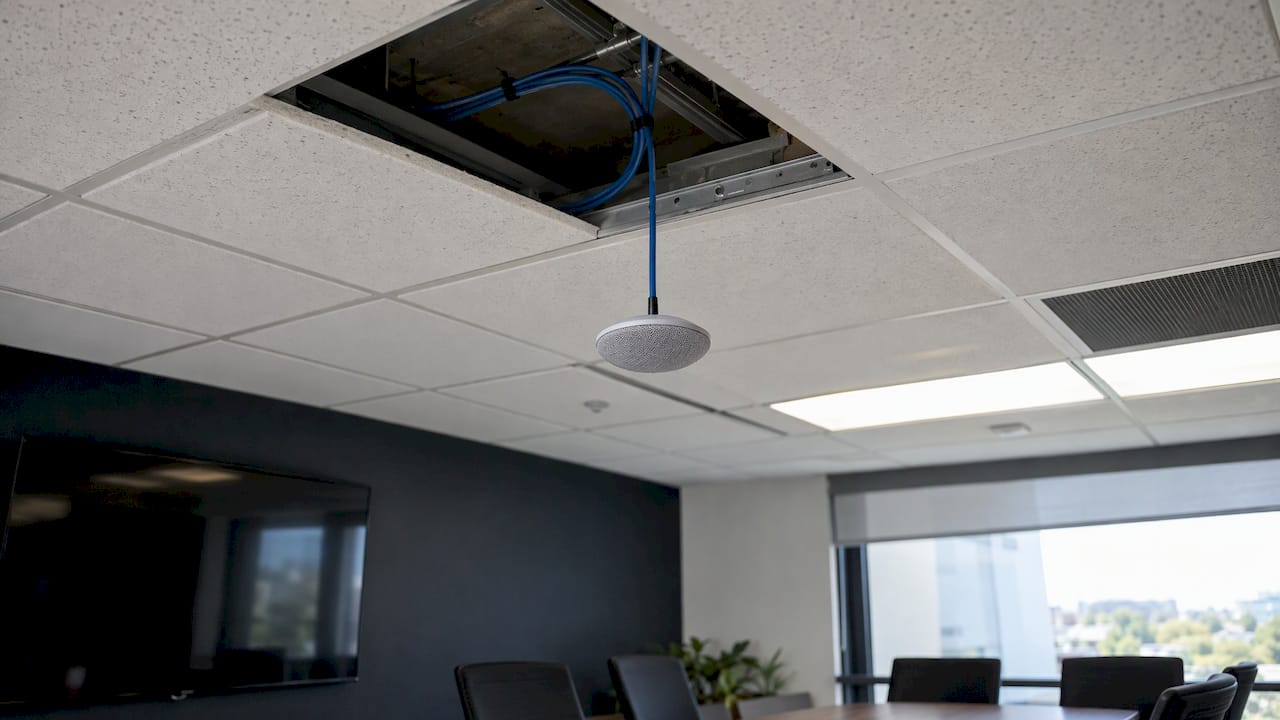
Ceiling arrays need a drop to each unit location, typically a home run to a PoE switch in the nearest IDF or a rack in the room. Locate the drop where the microphone will actually hang, centered over the table, not where the ceiling grid happens to be convenient. Leave a service loop above the tile so the unit can be lowered for maintenance.
Coordination with other trades
Microphone cable shares pathways with power, lighting, HVAC controls, video and network cabling. Conflicts get expensive once drywall and ceilings close. Coordinate cable tray, conduit and J-hook routes with the electrical and mechanical contractors during the buildout. For the rack end, tidy cable management matters as much as the room itself: this overview of rack cable management and when custom fabrication helps is useful when the AV equipment has to fit a space that stock enclosures do not.
Plenum spaces and local code
When cable runs through a ceiling plenum, plenum-rated cable is generally required, and requirements differ by building and jurisdiction. Confirm cable ratings, firestopping and pathway rules with the authority having jurisdiction and the building’s own work rules before you buy. Many NYC commercial buildings add their own requirements on top of city code, including approved contractors, after-hours work windows and certificate of insurance rules. Ask property management early.
Installation practice that prevents callbacks
A short sequence applies to almost every room.
- Confirm the equipment list and manuals. Get model numbers, cable category, maximum lengths and port assignments in writing.
- Mark device locations on the plan. Table, ceiling, wall and rack, with the route between them.
- Rough-in cable before ceilings and walls close. Leave slack at both ends for termination and future re-termination.
- Terminate with proper tools and connectors. Use quality connectors and a crimping tool, not pass-through plugs, as the TableMIC manual specifies.
- Label both ends. The TableMIC manual recommends labeling cables at both ends. Use the same label on the cable, the patch panel port and the documentation.
- Test before connecting equipment. Check pin-out and continuity on every run. For Cat6 runs that are part of the structured cabling, use a certifier and keep the report.
- Power up and verify audio. Test each microphone with the actual conferencing platform, not just a level meter.
- Document. As-built drawings, cable IDs, switch port assignments, firmware versions and settings such as EEE.
For a deeper room-level view, our conference room AV cabling checklist for a certified handover covers the full room, and our guide on how to wire a conference room for video calls places the microphone in context with cameras, displays and network.
Troubleshooting hum, dropouts and dead microphones
Start with the cable, because that is usually where the fault is, and work outward.
| Symptom | First checks |
|---|---|
| No audio from one microphone | Cable seated at both ends, pin-out and continuity, mute state, firmware |
| Several seats dead in a chain | The link between the last working unit and the first dead one |
| Intermittent dropouts | Crimp quality (especially pass-through connectors), switch settings such as EEE, PoE budget |
| Hum or buzz (analog) | Balanced connection end to end, proximity to power cable, ground path |
| Noise near equipment (digital) | Shielding continuity, coiled slack, tight bundles with power or other cables |
The TableMIC manual’s basic order is sound: confirm the cable is connected at both ends, verify its pin-out and continuity, check whether the microphone is muted, and update firmware if needed (manual). If those pass and the system is networked, look at the switch before replacing the microphone. Shure’s own guidance treats switch configuration as critical to real-time audio stability (MXA310 datasheet).
A documented room makes this fast. If cables are labeled and the as-builts exist, a technician traces a fault in minutes. If not, they trace it by hand through a ceiling.
Perspective
Most microphone problems we see in New York offices are not microphone problems. They are cabling problems that were invisible on day one: a pass-through connector that works until someone moves a chair, a shielded cable terminated unshielded, a run that was 20 feet longer than the manual allows, or a switch nobody configured for audio.
That is why we treat conference room audio as low voltage work first and AV work second. The same discipline that goes into structured cabling applies: planned pathways, proper terminations, labeled ends, tested and documented runs. When the cabling is clean and certified, the AV integrator and the IT team both get a room they can support without guessing.
Our position is simple. Have one contractor responsible for the physical layer, coordinate it with the electrical trade and the network team before the walls close, and hand over documentation with the room. Your network is only as strong as the infrastructure behind it, and a microphone is part of that network now.
Ken
When to bring in a low voltage specialist
Some rooms are simple: one table microphone, one short run, a manual that is easy to follow. Others are not. Bring in a specialist when:
- The room is part of a buildout or renovation and cable must be coordinated with other trades.
- The system is networked and PoE, VLANs or switch settings are involved.
- There are multiple rooms and consistency matters for support.
- Walls, ceilings or floors are finished and routing needs to be concealed.
- The space is secure or enterprise and documentation is required.
We explain why in more detail in why AV cabling needs a low voltage specialist, and our AV system cabling types guide helps IT managers write the spec. For a real example, see our boardroom AV upgrade project.
Have the cabling planned and installed by Cables & Chips
We design, install, test and document the cabling behind conference room audio for commercial offices and secure facilities across New York City: structured CAT6 runs, PoE-ready network drops, AV cabling, rack setup and certification. Our process starts with a no-obligation site survey, so the pathways, lengths and equipment requirements are settled before work begins. See our conference room installation service or review all low voltage services, then schedule a site survey.
We are licensed and insured, and we bring more than 40 years of experience in commercial environments in New York City. Our work emphasizes clean, documented and organized installations.
FAQ
What cable do conference room microphones use?
It depends on the system. Analog microphones typically use balanced XLR-3 cable, while digital and networked systems use shielded Cat5e or Cat6 with RJ45 connectors, according to Shure’s audio systems guide. Always check the manufacturer’s manual for the exact category, shielding and length limit.
How long can a conference room microphone cable be?
The limit is set by the product. The Vaddio TableMIC allows up to 100 ft (30 m) per its installation manual, and Ethernet-based systems generally follow the 100-meter channel limit. Daisy-chained units can have shorter limits between units, so check your model’s specification.
Do I need shielded cable for microphone runs?
Often, yes. Vaddio recommends shielded cable when cables are coiled, bundled tightly with other cables or near electromagnetic interference sources (manual). Many digital conference systems also call for shielded RJ45 connectors, so follow the manufacturer’s requirements.
Why does my networked microphone drop out even though the cable tests fine?
Check the network switch. For Dante-enabled microphones, Shure advises gigabit ports, PoE support and Energy Efficient Ethernet disabled to avoid dropouts and clock problems (MXA310 datasheet). Also confirm the PoE budget is not exhausted.
Can the cable run above the ceiling?
Usually, but plenum spaces generally require plenum-rated cable, and rules vary by building and jurisdiction. Confirm with the authority having jurisdiction and your building’s management before installation.