
WiFi Site Survey: How to Plan, Run and Use One

A WiFi site survey measures the radio environment inside your building so access points go where they will perform, not where a ceiling happens to be convenient. For a commercial office, the survey decides how many access points you need, where they mount, how they are configured and where the cable has to run. It is also the step that keeps you from pulling cable twice. We design wireless networks and the cabling behind them in New York City, and the surveys we see pay off most are the ones tied to the cabling plan from day one.
TL;DR
- A site survey collects real RF (radio frequency) data to decide access point count, placement and settings. It is the basis of the cabling plan, not a separate exercise.
- There are three types: predictive (before you move in), passive (after build-out) and active (while the network runs, usually to find performance problems).
- Survey with the space furnished and staffed, walk the whole floor at least twice, and record signal, noise, SNR, interference and throughput, not just signal bars.
- Validate after installation: a good-looking heat map is not proof of good service until roaming, capacity and cabling tests agree.
- Get the survey done together with the cabling design. We offer a no-obligation site survey for NYC commercial spaces.
What a WiFi site survey tells you
The goal is simple. One RF site survey guide describes it as gathering information on the RF environment and the business requirements so a wireless network can be designed with the coverage and capacity it needs, which ultimately determines how many access points to install, where, and how to configure them.
In a commercial office that translates into concrete answers:
- Where the signal is strong, weak or absent, floor by floor.
- Which neighboring networks and non-WiFi devices interfere on your channels.
- How walls, glass, elevator cores, mechanical rooms and furniture change coverage.
- Whether the design can carry the number of users, laptops, phones, video calls and badge readers you plan to have.
- Which cable drops, switch ports and PoE (power over Ethernet) capacity each access point needs.
The heat map is the output most people picture. As TechTarget’s overview of Wi-Fi mapping explains, it uses color gradations to show where coverage is strong, weak or average, and good mapping goes beyond “how many bars”. It characterizes the signal, the interfering signals and the way space geometry, building materials, people and furnishings combine at each spot.
When you need a survey
In practice, offices call for a survey in four situations:
- A move or new build-out. You have floor plans but no network yet.
- An expansion or reconfiguration. Headcount, seating density or conference rooms have changed.
- A complaint. Dropped video calls, slow roaming, dead corners or a floor that works only when half the staff is out.
- A hardware refresh. Moving to Wi-Fi 6E or Wi-Fi 7 changes range, channel plans and often the cabling.
On the last point, a StateTech article on government networks describes the Wi-Fi 7 workflow: predictive designs first, then onsite surveys that validate the models and reveal where access points should move, where more are needed and where interference must be addressed. The same sequence applies to a single floor on Park Avenue or a full building.
For a New York office there is an additional reason. Older buildings mean dense masonry, steel, elevator cores and tenants stacked on every side. Your neighbors’ networks occupy the same airspace, and the only way to know what you are competing with is to measure it in the space.
The three types of WiFi site survey
TechTarget identifies three survey types. Pick by where the project stands.
| Survey type | When it fits | What you get |
|---|---|---|
| Predictive | Before moving in or building out, using floor plans and modeled wall materials | An estimated access point count and placement, and a first cabling plan |
| Passive | After the space is built or an existing network is in place | Measured signal strength, noise and interference throughout the space |
| Active | While the network is running, to investigate problems | Measured performance on specific signals: connection quality, throughput and retries |
Most commercial projects use more than one. A predictive model gets the budget and the cabling plan started. A passive or active survey after installation confirms that the real building behaves like the model. If you are only fixing a complaint, start with a passive survey of the problem floor and add active testing where users report trouble.
The access point test method
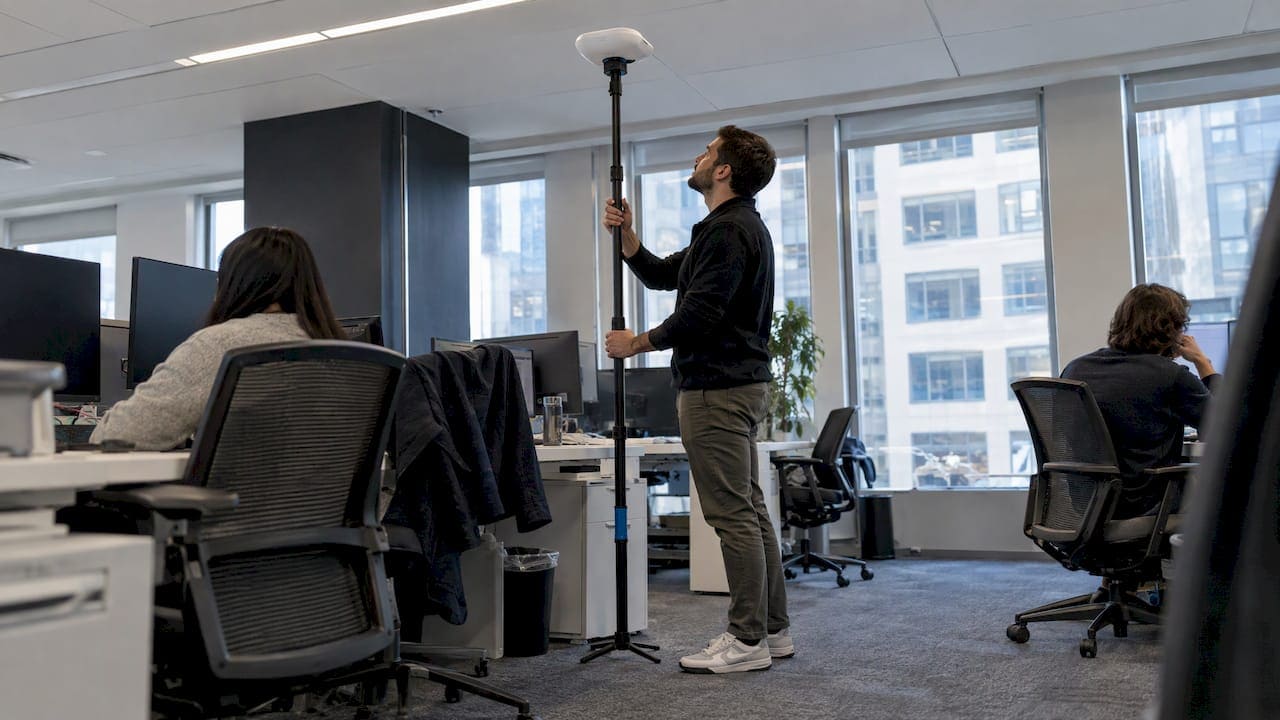
In spaces where the model is uncertain, a temporary access point can be mounted at a planned location and measured. We have a page on the AP-on-a-stick survey that explains how it works and when it is worth using, for example in spaces with unusual construction or high-density seating.
What to gather before the survey
Surveys go wrong most often before anyone picks up a device. Settle the requirements first. The Oscium guide groups them as business requirements (what the network is for, device counts and types, BYOD, applications, budget and timeframe), technical requirements (performance, users, coverage, roaming, existing LAN equipment, facility limitations), security requirements and available resources such as power, closets, switches, floor plans and the internet service plan.
Translate that into a pre-survey package:
- Current floor plans with a correct scale. A wrong scale carries through the entire survey.
- Seating and room plans. Conference rooms, open areas, phone booths, reception and any space that will see high density.
- Device inventory. Laptops, phones, VoIP handsets, printers, cameras, badge readers, wireless presentation systems and guest devices.
- Application list. Video conferencing, voice over WiFi and large file transfers need more from the network than email.
- Closet and riser information. Where the MDF and IDF rooms are, what switch capacity and PoE budget exist, and where cable can physically travel.
- Building details. Construction materials, ceiling types and heights, fire-rated walls and any restrictions from building management.
- Security policies. Authentication method, guest network separation and any rules for secure areas.
Cisco’s site-survey guidelines add an initial walkthrough to assess the building type and anticipate difficult zones, a choice of survey model (data, voice or location), and a decision on whether deployment will be dense or nomadic, and predictive or actual. They also name the tools: digital floor plans, a spectrum analyzer and professional survey software. A spectrum analyzer shows all radio energy in a band, not just WiFi, which is how you find a non-WiFi interferer.
The professional certification body for wireless design lists the same groups of pre-survey work: business and technical requirements, project documentation and environmental factors such as building materials, attenuation values and ceiling heights, plus a scan of the existing wireless environment.
How to run a WiFi site survey, step by step
Here is the process we would follow for a typical office floor, with the places it usually goes wrong.
1. Define the target
Write down the minimum service you need at the edge of each cell: a signal level, a signal-to-noise ratio (SNR, the gap between signal and background noise) and a throughput or application target. Voice handsets are stricter than laptops. Cisco’s guidance for its 7925G handsets specifies a minimum 25 dB SNR and a noise level no higher than -92 dBm for a -67 dBm signal. Your own target depends on your devices, so take it from the device and application requirements, not from a generic number.
Where it goes wrong: surveying with no target. Without one, the heat map is a picture, not a pass or fail.
2. Walk the space first
Do an initial walkthrough before measuring. Note construction, glass partitions, kitchens, mechanical rooms, elevator banks and anywhere a microwave oven or cordless phone could interfere. Cisco’s checklist includes a walkthrough inspection for interferers like these.
Where it goes wrong: treating the walkthrough as optional. It is where you find the areas that need extra attention.
3. Build the predictive plan
Load the scaled floor plan, mark wall types and heights, and place access points in the model. This gives a first count and a first set of cable drop locations. Stagger placements across floors rather than stacking them. Cisco warns that signal bleed-through between floors can cause co-channel interference and push access point radios to low power, and it recommends checking the radio neighbor list to confirm bleed-through from other floors.
Where it goes wrong: copying the same grid onto every floor. Floors above and below each other interact.
4. Measure on site
The on-site measurement follows a pattern that Netgear’s survey white paper describes: place a test access point, record data rate, signal strength, background noise and SNR, move away until the signal drops below the threshold, mark the acceptable coverage boundary on the floor plan, and identify dead spots. Along the way, document neighboring access points, their channels and any interferers.
TechTarget’s vendor-neutral guidelines add that you should expect at least two walkthroughs, more in challenging geometry, and that you should test while people are in the space, because occupancy changes reception. A quiet office before the workday can produce very different results than the same office at full capacity.
Keep the method consistent:
- Hold the measuring device at the height and orientation your users’ devices will have.
- Walk both sides of thick walls and around corners.
- Repeat any reading that looks off.
Where it goes wrong: inconsistent technique. Survey software can turn sparse readings into a smooth, convincing picture, but it cannot repair careless source data.
5. Check more than signal
A bright map is not proof of good service. A room can show strong signal and still suffer from interference, poor SNR, overloaded channels, weak roaming or low throughput. Evaluate signal strength, SNR, noise, channel overlap, data rates, retries and, where voice matters, VoIP quality indicators.
6. Decide the final layout
Use the results to move, add or remove access points, adjust power and channels, and confirm cable routes. This is the moment the survey becomes a cabling plan: each access point gets a labeled drop back to an IDF, with the switch port and PoE capacity accounted for. Our guide to the WiFi access point cabling plan walks through that stage, and the article on commercial WiFi cabling best practices covers what to specify.
7. Install, then validate
After installation, run a validation survey. Netgear notes that the annotated floor plan helps you verify that the deployment matched planning assumptions, and that troubleshooters should look for user-brought interfering devices or rogue access points and confirm controller features such as load balancing and dynamic channel selection are working. Test the cabling too: a failed run looks like a WiFi problem. If your existing runs are older, our page on testing existing runs for Wi-Fi 6E explains what to check before choosing Cat6A.
Where it goes wrong: skipping validation. A design that worked in the model can fail in a furnished, occupied floor.
WiFi site survey checklist
Use this as a working list for a commercial survey or for reviewing a report you have been handed.
Before the survey
- Scaled, current floor plans for every area in scope
- Written requirements: users, devices, applications, security, budget, schedule
- Frequency bands to cover (2.4, 5 and, where relevant, 6 GHz)
- Survey method agreed: predictive, passive, active, or a combination
- In-scope and out-of-scope areas confirmed (stairwells, elevators and mechanical areas are common questions)
- Building access, after-hours windows and escort arrangements
- Closet, riser and PoE switch capacity documented
During the survey
- Initial walkthrough completed and interferers noted
- Measurements taken at user-device height, in normal occupancy conditions
- Both sides of thick walls covered
- Neighboring networks and channels recorded
- Spectrum analysis completed for non-WiFi interference
- Questionable readings repeated
In the deliverable
Cisco’s list of what to request from a survey provider is a good yardstick: heat maps of RF coverage at the target cell-edge signal level, of SNR at the target, and of noise floor, each with a legend, plus spectrum-analysis screenshots. The Oscium guide recommends a report with a purpose statement, customer requirements analysis, spectrum analysis results, RF coverage analysis, performance and capacity analysis, hardware placement and power information, and security and authentication recommendations.
If a report gives you only one coverage map in pretty colors, it is incomplete.
After installation
- Validation survey completed against the same targets
- Access point locations, cable labels and port assignments recorded on the as-built plan
- Cable test results on file
- Periodic re-survey scheduled. Floor plan changes, new equipment and new applications all change signal needs.
Tools and equipment, by type
Professional surveys use a laptop or tablet with survey software, a measurement adapter or purpose-built survey sensor, and a spectrum analyzer. TechTarget’s tool roundup says to look for readable heat maps with drill-in, data from varied access points and client devices, predictive modeling based on a walkthrough, and advice on moving, adding or removing access points. Passive-only tools collect what is already in the air. Tools that also run active tests measure what a user actually experiences.
Two points matter more than brand choice:
- The tool has to match the job. An active throughput test or a six-GHz-capable adapter may matter more than the number of heat map views.
- The operator matters more than the tool. The same software produces useful or misleading results depending on scale settings, device height and how carefully the floor was walked.
On a full commercial floor, the survey is usually combined with design and cabling work, which is why we handle WiFi design and the cabling behind it together.
What affects the cost of a survey
There is no single price, and we do not publish one. The factors that move a quote are consistent:
- Floor area and number of floors. Fieldwork time scales with the area to be walked.
- Survey type. A predictive survey is mostly desk work. A full passive and active survey with validation takes more field hours.
- Environment. Dense construction, high-density seating or secure areas add time.
- Deliverables. Basic heat maps cost less than a full report with spectrum analysis, placement drawings and remediation recommendations.
- Access. After-hours work, building rules and escorts affect scheduling.
- Whether cabling and design are in the same scope. One scope for survey, design, cabling and testing avoids duplicated site visits.
Because scope drives price, the sensible first step is a site visit that defines the scope. We offer a no-obligation site survey for commercial spaces in New York City.
Using the results: placement, capacity and cabling
Three outputs should come out of the survey.
An access point plan. A count, locations and mounting heights per floor, with staggered placement between floors. Our guide to enterprise WiFi design covers how those placements are turned into a design for an NYC office.
A capacity view. Coverage alone does not carry a full conference room. Device counts and applications determine how many access points a zone needs. We cover this in WiFi capacity planning for offices.
A cabling and closet plan. Every access point needs a tested run, a labeled patch panel port, a switch port and power. If the survey says you need more access points than you have drops, you need to know before the ceiling is closed. During a build-out or renovation, the page on a temporary renovation network explains how to protect cabling before demolition.
For background on how the pieces connect from the access point to the closet, see our 2026 guide to how wireless infrastructure is wired.
Why the survey and the cabling belong together
Wireless is only as good as the wired network behind it. Cabling is where a good survey turns into a working network, or doesn’t. A survey that places an access point at a location with no practical cable path, or that assumes a switch with PoE capacity that is not there, produces a design that cannot be built as drawn.
So a commercial survey should answer cabling questions as it goes:
- Can a run reach this location within the cable length limit?
- Is there pathway through the ceiling, riser or wall?
- Does the IDF have port and PoE capacity?
- Are the existing runs tested and fit for the speeds the access points support?
For many offices, the practical answer is one contractor for survey, WiFi design, cabling, testing and documentation. We are a low voltage and data network contractor at 20 Vesey Street in Lower Manhattan with more than 40 years of experience in commercial environments in New York City. We emphasize clean, documented, organized installations, which means the access point locations from the survey end up on drawings your IT team can use years later.
Where we stand
We see the survey as the first step of the cabling job, not a separate deliverable. A heat map that nobody connects to a cable route, a closet and a switch is a drawing. A survey that ends with a labeled drop for every access point is a network.
Our view is that the best results come from one team that designs the wireless layout, pulls and terminates the cable, tests it and documents it. When the people who surveyed the floor are the people who see where the cable will run, fewer assumptions survive into the installation.
We would rather start with a site visit and a clear scope than with a generic estimate. Your network is only as strong as the infrastructure behind it, and that infrastructure starts with measuring the real space.
Ken
Plan your survey with us
Our WiFi design service covers wireless design for commercial offices in New York City, alongside structured cabling, cable testing and certification, and MDF/IDF cleanup. We offer a no-obligation site survey, and we serve commercial offices, secure facilities and enterprise environments, so the survey, the cable and the documentation come from one team. See our services or schedule a site survey.

If your project also involves older cable, our guide to replacing outdated Cat5 with Cat6 is a good companion read. For new runs, we install structured CAT6 cabling for commercial spaces.
FAQ
How much does a WiFi site survey cost?
The cost depends on floor area, number of floors, survey type, the building environment and how detailed the report needs to be. A predictive survey is mostly desk work, while a full passive and active survey with validation takes more field hours. We scope a commercial survey during a no-obligation site visit, so the quote matches your space.
How long does a WiFi site survey take?
It depends on the size and complexity of the space. A small single-floor office is quick to walk, while multi-floor offices need multiple walkthroughs and measurements taken while staff are present. Plan for fieldwork plus time to analyze data and write the report, and for a validation survey after installation.
Do I need a survey if I already have access points?
Yes, in three cases: you are getting complaints, you have changed the layout or headcount, or you are upgrading to newer WiFi standards. Floor plan changes, new equipment and new applications can all change signal needs, so periodic surveys keep the design matched to how the office is used. An active survey is the usual choice when investigating performance problems.
What is the difference between a predictive and a passive survey?
A predictive survey is a model built from floor plans and wall materials before you move in. A passive survey measures the signals actually present in the built space. Most commercial projects use the predictive model to plan and cable, then a post-installation survey to confirm the result.
When should a survey happen during a build-out?
As early as the floor plan and ceiling plan are known, and always before cable is pulled. That way access point locations, drops, switch ports and PoE capacity are set while changes are still inexpensive. Validate again once the space is furnished and occupied.
Sources
- Site Survey Guide (Oscium)
- Evaluate Wi-Fi mapping tools and best practices (TechTarget)
- 3 types of wireless site surveys and how to conduct them (TechTarget)
- Understand Site Survey Guidelines for WLAN Deployment (Cisco)
- Certified Wireless Design Professional (CWDP-304) Objectives
- Wireless Site Surveys: The Secret to Great WLAN Coverage (Netgear)
- Wireless Site Surveys Are Critical for Government (StateTech)