
Server Rack Options for Enterprise Environments: IT Guide

TL;DR:
- Choosing the correct rack frame depends on workload density and deployment environment, with standards like 19-inch EIA-310 for general-purpose and 21-inch open-frame options for high-density AI workloads. Proper planning requires early decisions on rack type, depth, rail compatibility, and PDU strategy to avoid costly field adjustments and thermal issues, while security, cable management, and integration are vital for reliability and compliance. Engaging experienced providers like Cables and Chips can streamline deployment, ensure standards compliance, and reduce errors in complex enterprise environments.
For enterprise environments, the right rack frame depends on workload density and deployment model. Standard enterprise compute and colocation deployments belong in 19" EIA-310 cabinets, the globally dominant frame standard with the widest hardware compatibility. High-density GPU and AI accelerator workloads call for 21" OCP ORV3 or deeper open-frame variants with integrated busbars and wider IT apertures. Telecom rooms, IDFs, and edge deployments are best served by 2-post or 4-post open-frame racks sized to the space and patching volume.
Three one-line verdicts to orient your decision:
- Datacenter colo / enterprise general-purpose: 19" EIA-310 enclosed cabinet, 42U, 1200 mm depth, with metered or monitored PDUs and front-to-back airflow.
The widest hardware compatibility and the easiest path to compliance with ANSI/TIA-942-C. - On-prem high-density GPU/AI: 21" OCP ORV3 or deep open-frame (≥1200 mm), busbar power shelf, liquid-cooling manifold clearance, and factory-integrated cabling. Power densities at this tier can exceed 40 kW per rack, requiring active cooling beyond standard air.
- Telecom/IDF and edge: 2-post open-frame or shallow wall-mount, 12U–24U, with top-of-rack patching and structured CAT6 or fiber trunks feeding access-layer switches.
Before any procurement, lock these four decisions: frame standard (EIA-310 vs. OCP/ORV3), depth (1070 mm vs. 1200 mm vs. deeper), rail-kit compatibility with your specific hardware SKUs, and PDU strategy (basic vs. metered vs. switched, single vs. redundant feed).
What types of server racks work best in enterprise settings?
Enterprise rack deployments span five distinct form factors, and choosing the wrong one creates problems that are expensive to reverse once hardware is installed.

| Rack type | Best for | Typical U height | Depth range | Key trade-off |
|---|---|---|---|---|
| Enclosed 4-post cabinet | Enterprise compute, colo, secure facilities | 42U–48U | 1200 mm | Best security and airflow control; higher cost |
| Open-frame 4-post | High-density AI/GPU, staging, lab | 42U–48U | 1200+ mm | Maximum serviceability; no physical security |
| 2-post relay rack | Telecom, IDF, patch-heavy | 7U–24U | Shallow (—) | Lightweight and low cost; limited load capacity |
| Wall-mount cabinet | Edge, small IDF, branch office | 6U–24U | — | Space-efficient; not suited for heavy compute |
| OCP ORV3 / Open Rack | Hyperscale, AI accelerator, busbar power | 21" wide, 48U+ | 1200+ mm | Wider aperture and busbar support; limited vendor ecosystem |
Enclosed 4-post cabinets are the default choice for enterprise data centers and colocation deployments. Perforated front and rear doors support front-to-back airflow, locking panels satisfy physical security requirements, and the 19" EIA-310 rail pattern is compatible with virtually every rackmount server, switch, and storage array on the market. The trade-off is cost and weight: a fully populated 42U cabinet with PDUs and cable managers can exceed 1,500 lbs, which has real civil and slab implications.
Open-frame 4-post racks sacrifice physical security for serviceability. Technicians can access hardware from any angle without removing doors, which matters in high-density GPU deployments where rear-plane liquid manifolds, blind-mate power connectors, and dense fiber trunks all need simultaneous access. Three dominant rack frame lineages — 19" EIA-310, 21" OCP ORV3, and Open Rack Wide — each carry different implications for power busbars, usable width, and long-term upgradeability. OCP ORV3 adds roughly 50 mm of usable width over EIA-310, which is enough to accommodate wider sled chassis and integrated busbar rails that eliminate individual power cords at the server level.
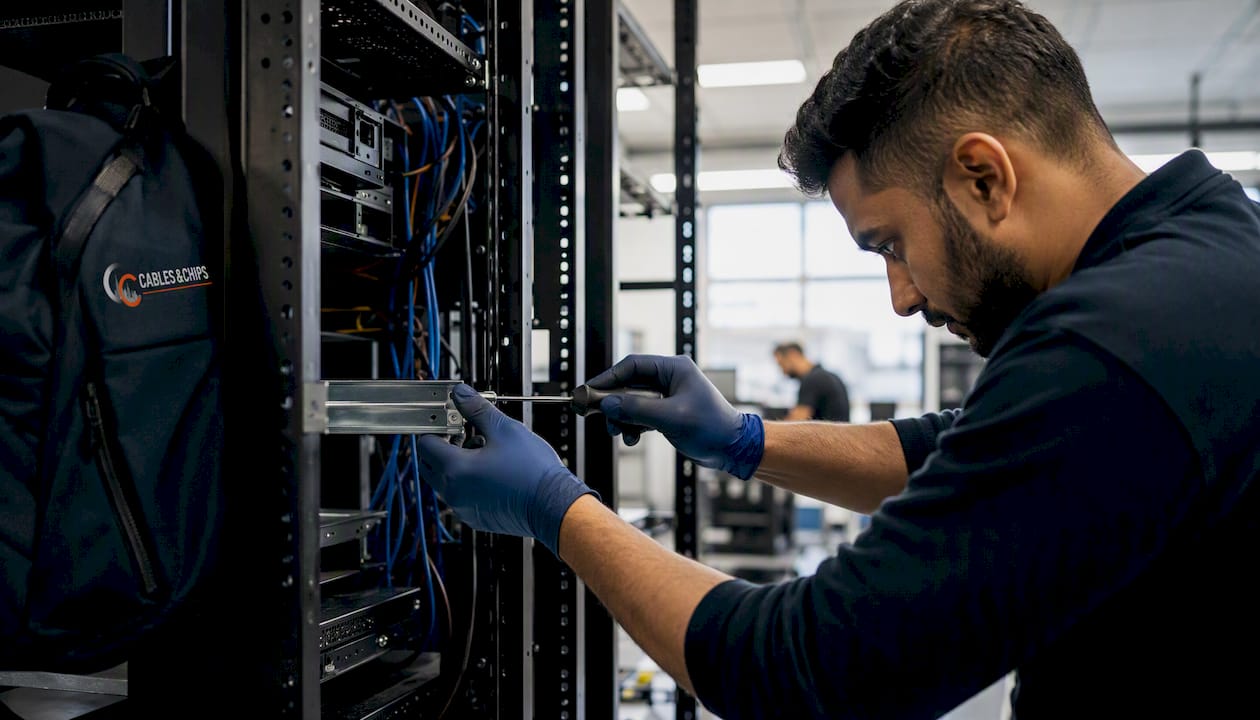
2-post relay racks are the right answer for telecom rooms and IDFs where the load is patch panels, switches, and fiber distribution hardware rather than servers. They are lighter, cheaper, and faster to install. Wall-mount cabinets extend that logic to branch offices and edge closets where floor space is genuinely unavailable.
A few use-case rules that hold across most enterprise projects:
- Use enclosed cabinets wherever physical access control is a compliance requirement (PCI-DSS, HIPAA, SOC 2 audits).
- Specify open-frame only when the room itself is access-controlled and serviceability outweighs security.
- Never mix 2-post and 4-post hardware in the same rack without verifying that the equipment’s rail kit supports both post configurations.
- For OCP ORV3 adoption, confirm your hardware vendor ships ORV3-compatible sleds before committing to the frame.
How do you spec rack dimensions for enterprise hardware?
Getting dimensions wrong at the procurement stage is one of the most expensive mistakes in a rack deployment. A frame that is 100 mm too shallow cannot be corrected in the field.
Standard unit measures and width
One rack unit (1U) equals 1.75 inches (44.45 mm). A 42U cabinet provides approximately 73.5 inches of usable vertical space. The 19" EIA-310 standard defines a usable mounting width of approximately 450 mm between the inner rail faces. OCP ORV3 expands that to 21", adding roughly 50 mm of usable aperture for wider sled designs and integrated busbar channels.
Depth: the spec that most teams underestimate
Historical enterprise racks shipped at approximately 1000 mm depth. Modern enterprise racks commonly move to 1200 mm to accommodate rear-mounted liquid cooling manifolds, PDUs, and cable clearance. AI and accelerator racks are pushing beyond 1200 mm because the rear plane now houses liquid manifolds, blind-mate power connectors, and dense cabling, all of which add depth that did not exist in previous generations. Deeper racks increase floor footprint and can trigger civil engineering reviews for slab loading.

Spec 1200 mm depth when any of the following apply: rear-door heat exchangers, liquid cooling manifolds, 0U vertical PDUs on both front and rear posts, or servers deeper than 900 mm.
Load capacity and rail-kit compatibility
| Spec dimension | Standard enterprise | High-density AI/GPU | Telecom/IDF |
|---|---|---|---|
| U height | 42U | 42U–48U | 12U–24U |
| Depth | 1200 mm | 1200+ mm | — |
| Load capacity | 1,500 lbs | 2,500–3,000 lbs | 200 lbs |
| Rail pattern | EIA-310 (19") | EIA-310 or OCP ORV3 | EIA-310 or 2-post |
| PDU mounting | 0U vertical, rear | 0U vertical + busbar shelf | 0U vertical or basic |
Rail-kit compatibility is a common failure point. Hardware vendors ship multiple rail-kit SKUs for the same server model, and the wrong kit either does not fit the post spacing or requires adapter brackets that consume usable U space. Always request the vendor’s rail-compatibility matrix for your specific frame before finalizing the purchase order.
Pro Tip: Reserve 150–200 mm of rear-plane depth for 0U PDUs, vertical cable managers, and liquid cooling manifolds. A rack elevation diagram that omits these accessories is functionally useless for procurement and field installation.
Procurement spec checklist:
- Frame standard (EIA-310, OCP ORV3, or Open Rack Wide)
- Interior depth with rear accessories installed
- Static load rating (not just the frame’s rated capacity — include PDUs, cable managers, and blanking panels)
- Rail post pattern (square hole, round hole, or threaded)
- Finishing and EMI bonding requirements
- Seismic zone and anchoring options
- Grounding lug locations and bonding strap compatibility
How does rack choice affect cooling and airflow management?
Rack selection and internal organization are both thermal decisions. The frame type determines what cooling strategies are available; what goes inside the rack determines whether those strategies actually work.
The primary airflow controls for any enterprise rack are blanking panels, perforated doors, and containment. Blanking panels fill unused U spaces to prevent hot exhaust air from recirculating to the cold aisle. A single empty 1U gap in a densely populated rack can create a localized hot spot that trips thermal alarms on adjacent hardware. Abandoned cables and improper bundles create pressure imbalances that lead to hot spots and reduce cooling efficiency, according to the U.S. DOE’s best practice guide for data center design. That finding applies equally to new deployments: a rack dressed with oversized cable bundles blocking the rear airflow path behaves like a partially blanked rack.
Hot-aisle/cold-aisle containment is the standard approach for enterprise rows. Cold-aisle containment (CAC) captures supply air and forces it through equipment front-to-back; hot-aisle containment (HAC) captures exhaust and routes it directly to return plenums. Either approach requires consistent front-to-back airflow orientation across every rack in the row, which means no mixing of front-exhaust and rear-exhaust devices.
For racks approaching or exceeding 25 kW, passive air cooling reaches its practical limit. ANSI/TIA-942-C notes that at around 25 kW per rack or lower, data centers can keep equipment cool via passive air-cooled methods. Above that threshold, rear-door heat exchangers, in-row coolers, or direct liquid cooling become necessary. ASHRAE Class H1 liquid-cooled systems are now specified for GPU clusters and AI accelerator racks where per-rack power regularly exceeds 40 kW.
Practical airflow checklist:
- Install blanking panels in every empty U space before powering on.
- Orient all equipment front-to-back; never mix airflow directions in the same row.
- Route vertical cable managers along the side channels, not across the rear airflow path.
- Keep cold-aisle supply temperature within the design range; do not compensate for hot spots by lowering supply temperature across the whole row.
- Inspect for ad-hoc cable bundles that bridge the hot and cold aisles through gaps in containment.
Pro Tip: Treat rack organization as a thermal control. Planned cable pathways, full blanking coverage, and separated power/data routing materially reduce hot spots and can recover cooling capacity without touching the mechanical plant.
How do you manage power distribution and PDUs in enterprise racks?
Power is where rack deployments most often fail silently. The most common error is sizing PDUs and UPS capacity against nameplate power ratings rather than measured draw.
Server nameplates list maximum power consumption under full load. In practice, most enterprise servers operate at 40–60% of rated load, which is also the range where power supply efficiency peaks. The U.S. DOE analysis estimates that improving PSU efficiency from 75% to 85% for 10–25 kW racks can yield $2,000–$6,000 per year in savings at $0.12/kWh. Sizing PDUs against nameplate figures wastes circuit capacity and skews phase balancing calculations.
Power verification steps before commissioning:
- Measure actual draw per server using a clamp meter or intelligent PDU during a representative workload run.
- Sum measured draw per rack, then add 20% headroom for burst loads and future hardware additions.
- Verify that the PDU’s per-outlet and total amperage ratings exceed that sum.
- Confirm UPS capacity covers the full rack draw plus the recharge load.
- Check phase balance across all three phases; no single phase should carry more than 80% of its rated amperage.
- Document breaker assignments and label every PDU outlet before the rack ships or goes live.
PDU types and their enterprise use cases:
- Basic PDUs: fixed outlet strips with no monitoring. Acceptable for low-criticality edge racks where power events are tolerable.
- Metered PDUs: display total current draw. Minimum spec for any production rack; allows capacity planning without additional instrumentation.
- Switched PDUs: per-outlet remote on/off control. Useful for racks with mixed hardware requiring independent power cycling.
- Monitored/intelligent PDUs: per-outlet metering, SNMP/HTTPS telemetry, environmental sensor ports. The right choice for enterprise data center racks where power data feeds into DCIM platforms.
- Busbar/48V OCP-compatible power shelves: used in OCP ORV3 racks to eliminate individual power cords at the server level. Requires hardware with compatible power connectors.
For redundant power, the standard enterprise approach is an A/B feed from separate UPS or PDU circuits, with each server’s dual PSUs connected to separate feeds. A 2N design provides full redundancy; N+1 is acceptable for lower-criticality tiers. Physical planning must account for 0U PDU mounting on both front and rear posts, quick-disconnect routing for liquid cooling manifolds, and adequate cable slack for blind-mate power connectors.
Why cable management is a reliability strategy, not just housekeeping
Cable management directly affects cooling performance, fault isolation speed, and the time it takes to swap hardware without triggering adjacent failures. Separating power and data cables and using top-of-rack patching reduces cable congestion and makes rack swaps faster and less error-prone, according to Schneider Electric’s cable management white paper. That separation also eliminates the electromagnetic interference that tight power/data bundles create in high-density environments.
High-density rack failures often stem from physical-layer disorder: tight cable ties and non-compliant bend radii on fiber create intermittent faults under thermal load. The fix is not complicated, but it requires discipline at installation time. Use hook-and-loop fasteners instead of zip ties on fiber and patch cables. Reserve correct bend radius pathways (typically a minimum radius of 1 inch for CAT6, 4× the cable diameter for fiber) using horizontal and vertical cable managers rather than routing cables across equipment faces.
Rack dressing checklist for on-site crews:
- Install vertical cable managers on both sides of the rack before any hardware goes in.
- Route power cables on one side (typically left), data cables on the other (right), using separate managers.
- Use horizontal cable managers at every 2U–4U interval to capture patch cables at the point of termination.
- Apply hook-and-loop ties; never use zip ties on fiber or patch cables.
- Label every cable at both ends before dressing — not after.
- Leave 20% spare capacity in every pathway for future adds.
- Document the routing in an as-built elevation diagram before the rack is accepted.
For how server rack cabling works at the component level, Cables and Chips has a detailed technical reference that covers termination standards and testing requirements.
Pro Tip: Factory integration (pre-termination, labeling, and testing in a controlled environment) is the single biggest lever for increasing install velocity and reducing field rework. Pre-terminated structured cabling and staging operations move the error-prone work off the data center floor and into a shop where conditions are controlled. For large deployments, the labor savings on-site typically justify the factory integration premium.
What physical security and protection does an enterprise rack need?
Physical security for enterprise racks is not optional. PCI-DSS, HIPAA, and SOC 2 audits all include physical access controls as testable requirements, and most enterprise insurance policies require documented access logs for server rooms.
Standard physical controls checklist:
- Locking front and rear doors with individual key or electronic lock per cabinet.
- Tamper-evident seals on side panels for racks in shared or colocation environments.
- Electronic access logs tied to card readers or biometric locks at the rack level for high-security deployments.
- Rack-level access control integration with the facility’s broader physical security system.
Seismic bracing applies wherever local building codes require it or where slab loading calculations show that a populated rack’s center of gravity creates a tip-over risk. In New York City, seismic zone requirements are relatively low compared to the West Coast, but anchor bolts and floor-mounting hardware are still standard practice for any rack exceeding 1,000 lbs populated weight. Confirm with your structural engineer before finalizing the floor plan.
Fire integration requires clearance for suppression system nozzles, unobstructed access to manual pull stations, and smoke/heat sensor placement that complies with NFPA 75 (IT equipment protection) and the facility’s fire suppression design. Never position racks directly under sprinkler heads without confirming the suppression system type; clean-agent systems (FM-200, Novec 1230) require different clearances than wet-pipe systems.
Environmental monitoring steps for rack-level protection:
- Install temperature and humidity sensors at the top and bottom of each rack (top catches hot spots; bottom catches cold-aisle temperature).
- Add water/leak detection sensors under racks in any zone with overhead or underfloor liquid cooling.
- Connect door sensors to the rack monitoring system so unauthorized access generates an alert.
- Integrate all sensor data into your DCIM or SNMP-capable monitoring platform.
- Set alert thresholds before the rack goes live, not after the first thermal event.
Which rack accessories actually improve uptime?
The accessory bill of materials for an enterprise rack is short but consequential. Missing the right items at procurement means field-ordering them under pressure during installation.
Core accessory inventory for a production enterprise rack:
- Blanking panels: 1U and 2U, enough to fill every unused space at initial population plus 20% spare.
- Vertical cable managers: one pair (left and right) per rack, sized to the cable count.
- Horizontal cable managers: one per 2U–4U of patch-heavy space.
- Brush panels: at cable entry/exit points to maintain airflow separation between zones.
- 0U vertical PDUs: metered or intelligent, quantity per redundancy design (typically two per rack for A/B feeds).
- Rail shelves and sliding trays: for non-rackmount equipment (UPS batteries, test equipment, console access devices).
- KVM switches or console servers: for out-of-band management access, particularly in racks without dedicated IPMI/iDRAC access on every device.
- Environmental sensors: temperature, humidity, water/leak, and door contact sensors per the security and monitoring requirements above.
Intelligent PDUs deserve specific attention. A metered PDU is the minimum for any production rack; an intelligent PDU with per-outlet SNMP telemetry feeds power data into DCIM platforms and enables remote power cycling without a truck roll. For organizing messy server rack cables efficiently, Cables and Chips provides a practical guide covering accessory placement and cable routing patterns.
When specifying accessories, verify SKU alignment with the rack frame and rail pattern. A cable manager designed for a 19" EIA-310 frame will not mount correctly in an OCP ORV3 frame without adapter hardware. Confirm compatibility at the same time you confirm rail-kit compatibility for servers.
How do you plan and execute a rack-and-stack deployment?
A rack-and-stack deployment that goes wrong on day one typically fails because of a mismatch between what was specified and what arrived on the floor. Confirming PDU/UPS capacity against actual draw, validating rail-kit compatibility, and establishing a rollback plan for DOA components are the three pre-install checks that prevent multi-day delays.
Pre-install verification
| Check | What to verify | Who owns it |
|---|---|---|
| Slab/load capacity | Populated rack weight vs. floor rating | Structural engineer |
| Frame and rail fitment | Rail kit tested in actual rack frame before hardware ships | IT/procurement |
| PDU/UPS capacity | Measured draw + 20% headroom vs. PDU and UPS ratings | Facilities/IT |
| Elevation diagram | All U positions, 0U devices, and rear accessories documented | IT/project manager |
| Cable pathways | Overhead or underfloor entry confirmed, tray/conduit sized | Cabling contractor |
Staging and factory integration
| Approach | Best for | Key trade-off |
|---|---|---|
| Dry ship (empty rack, field-terminated) | Smaller deployments, tight transit budgets | Lower transit risk; more field labor |
| Pre-terminated trunks, staged rack | Mid-scale enterprise deployments | Faster install; requires staging space |
| Factory-integrated L11 (wet, pre-filled coolant) | Large AI/GPU deployments | Fastest time-to-production; heavy rigging, higher transit fragility |
Factory-integrated L11 racks can ship wet (pre-filled coolant) for the fastest time-to-production but require heavy rigging and carry higher transit fragility. Dry racks avoid transit risk but require fill-and-leak-testing on-site, adding time to commissioning. For most enterprise deployments that are not hyperscale AI clusters, pre-terminated trunks staged in a warehouse or shop environment offer the best balance of velocity and risk.
Acceptance checklist:
- Power-up sequencing: UPS first, then PDUs, then servers in order from bottom to top.
- PDU load test: verify per-outlet and total draw against the pre-install measurements.
- Optics BER/soak test: run bit-error-rate tests on all fiber connections for a minimum 30-minute soak.
- Labeling verification: confirm every cable, port, and PDU outlet matches the as-built documentation.
- Burn-in: run a representative workload for 24–48 hours and monitor thermal and power telemetry.
- Rollback staging: keep at least one spare server, one spare PDU, and one spare rail kit on-site until burn-in completes.
Pro Tip: For scalable cabling infrastructure, pre-terminate and test all trunks off-site before the installation date. A single day of factory termination and testing eliminates two to three days of field labor and dramatically reduces the chance of a labeling error that takes hours to trace.
What questions should you ask vendors before buying enterprise racks?
Vendor proposals for enterprise racks frequently omit details that create expensive surprises at installation. These questions and red flags give procurement teams the language to close those gaps before signing.
Vendor question list:
- What is the frame lineage (EIA-310, OCP ORV3, or proprietary), and what rail templates are included?
- What integration level does the rack ship at (L11 factory-integrated, pre-terminated trunks, or dry/empty)?
- Is wet or dry shipping available, and what rigging and handling requirements apply?
- What testing and documentation are included (factory acceptance test, cable test reports, elevation diagrams)?
- What is the warranty term and what does it cover (frame, PDUs, cable managers, accessories)?
- What is the lead time from order to delivery, and what is the expedite option?
Red flags in vendor quotes:
- No rail-kit detail or a generic “compatible with standard 19” racks" statement without a tested compatibility matrix.
- No load rating specified for the frame or the rail kit.
- Unspecified clearance for PDUs, cable managers, or rear accessories.
- Vague warranty language (“manufacturer’s standard warranty”) with no defined response time or replacement process.
- No documentation package included in the base price.
TCO elements to include in every rack procurement:
- Frame purchase price plus accessories (PDUs, cable managers, blanking panels, sensors).
- Shipping and rigging costs, including any crane or lift equipment for heavy AI racks.
- Factory integration premium (pre-termination, staging, testing).
- Floor labor for rack-and-stack and commissioning.
- Service contract cost over the expected rack lifecycle (typically 5–10 years).
- Power cost differential between efficient and inefficient PSU configurations over the lifecycle.
For RFP language, specify rail-screw pattern (M6, M5, or 10-32 UNC), PDU mounting point dimensions, vertical cable manager allowance (minimum 75 mm per side), and rear-plane clearance (minimum 150 mm for accessories). Locking these dimensions in the RFP prevents substitutions that appear equivalent on paper but fail at installation. Review the infrastructure lifecycle cabling guide for additional procurement language covering cabling and documentation requirements.
Ready-to-use spec cards for common enterprise rack configurations
These three configurations cover the scenarios most enterprise teams encounter. Use them as baselines for vendor RFPs or internal procurement requests.
General-purpose 42U air-cooled rack
- Frame: 19" EIA-310 enclosed 4-post cabinet, 42U, 1200 mm depth
- Load capacity: 1,500 lbs minimum
- PDU: Dual 0U vertical intelligent PDUs (A/B feeds), metered per-outlet, SNMP-capable
- Cooling: Front-to-back airflow, perforated doors (≥63% open area), full blanking panel coverage
- Power draw: 8–15 kW typical; size PDUs and UPS for 20 kW with headroom
- Cable management: Dual vertical managers, horizontal managers every 2U in patch zones
- Rail pattern: Square-hole, M6 cage nuts included
High-density GPU/AI rack
- Frame: 21" OCP ORV3 or deep open-frame, 42U–48U, ≥1200 mm depth
- Load capacity: 2,500–3,000 lbs minimum; confirm slab rating before ordering
- Power: Busbar power shelf or dual 0U PDUs, 48V DC or 208V AC per hardware requirement; size for 40–80 kW
- Cooling: Rear-door heat exchanger or direct liquid cooling manifold; 150–200 mm rear clearance reserved
- Factory integration: L11 preferred; pre-terminated fiber trunks (MPO-24 or MPO-16), labeled and tested
- Cable management: Side-channel routing for liquid manifold hoses; dedicated fiber tray above the rack
Networking/core aggregation rack
-
Frame: 19" EIA-310 enclosed 4-post, 42U, 1000–1070 mm depth
-
U allocation: Top 4U for fiber patch panels and MPO cassettes; next 4U for top-of-rack switches; remaining U for aggregation and distribution hardware
-
PDU: Single or dual 0U metered PDUs; 4–8 kW typical draw
-
Cable management: Generous horizontal managers for high patch-cable density; overhead cable tray entry preferred
-
Documentation: Full port-by-port as-built diagram required at acceptance
| Configuration | U height | Depth | Power capacity | Cooling type |
|---|---|---|---|---|
| General-purpose compute | 42U | 1200 mm | 8–20 kW | Air-cooled, front-to-back |
| High-density GPU/AI | 42U–48U | ≥1200 mm | 40–80 kW | Liquid or rear-door HX |
| Networking/core aggregation | 42U | 1200 mm | 4–8 kW | Air-cooled, front-to-back |
Key Takeaways
Selecting the right server rack for an enterprise environment requires locking four decisions early: frame standard, depth, rail-kit compatibility, and PDU strategy — everything else follows from those choices.
| Point | Details |
|---|---|
| Frame standard first | Choose EIA-310, OCP ORV3, or deep open-frame before specifying any other dimension or accessory. |
| Spec 1200 mm depth | Modern enterprise racks need 1200 mm or deeper to accommodate rear PDUs, liquid manifolds, and cable clearance. |
| Verify power against measured draw | Size PDUs and UPS to measured load plus 20% headroom, not nameplate ratings. |
| Factory integration reduces field risk | Pre-terminated, staged, and tested cabling cuts on-site labor and eliminates most labeling errors. |
| Cables and Chips for NYC deployments | Cables and Chips provides rack installation, structured cabling, pre-terminated trunks, and testing documentation for enterprise projects in New York City. |
What most teams get wrong about rack deployments
The most persistent failure pattern in enterprise rack deployments is not a hardware problem. It is a documentation problem that becomes a hardware problem under pressure.
Teams invest in the right frames, the right PDUs, and the right rail kits, then ship racks to the floor with elevation diagrams that omit 0U PDU placements, cable manager depths, and rear-plane accessory clearances. The installation crew arrives, discovers that the 0U PDUs physically conflict with the rear cable managers, and spends two days improvising a solution that works mechanically but creates a cable routing nightmare that persists for the life of the rack. The fix costs more in field labor than the factory integration premium would have.
The second pattern is treating cable management as a finishing step rather than a structural decision. Cables routed across the rear airflow path because there was no vertical manager on the right side of the rack will create a hot spot that trips thermal alarms six months after commissioning, when the team that installed the rack is no longer on-site. Rack organization is a cooling strategy, and the decisions that determine whether it works are made at procurement and staging, not during the rack-and-stack.
The practical lesson: produce a complete elevation diagram that includes every 0U device, every cable manager, and every rear-plane accessory before the rack ships. Reserve 150–200 mm of rear depth for accessories in the diagram. Run a rail-kit fitment test in the actual frame before hardware ships to the site. These steps take hours at the planning stage and save days in the field.
Cables and Chips handles rack installation and cabling for NYC enterprise projects
Enterprise rack deployments in New York City carry constraints that out-of-market contractors routinely underestimate: building access windows, freight elevator restrictions, floor loading requirements in older commercial buildings, and the coordination overhead of working alongside active IT operations. Cables and Chips is a Lower Manhattan-based low voltage and data network contractor with more than 40 years of experience managing exactly these conditions.

For enterprise teams specifying racks alongside structured cabling, the advantage of a single contractor covering both is concrete: rack installation, CAT6 and CAT6A structured cabling, pre-terminated fiber trunks, cable testing and certification, and as-built documentation are all coordinated under one project plan. That eliminates the scheduling gaps between a rack vendor’s installation crew and a separate cabling contractor that routinely add days to a deployment timeline. Cables and Chips also provides network closet organization and cable cleanup for environments where existing infrastructure needs remediation before new racks go in.
For a complete reference on structured cabling system components and how they integrate with rack deployments, the Cables and Chips IT manager’s guide covers termination standards, testing requirements, and documentation practices. To request a site survey for your next rack deployment in New York City, contact Cables and Chips at cables.nyc.
Useful sources
The standards and guides below are the primary references for enterprise rack specification and data center infrastructure design.
- ANSI/TIA-942-C Telecommunications Infrastructure Standard for Data Centers — The governing standard for data center infrastructure, covering power, cooling, architecture, security, and telecommunications. Read this first for compliance requirements and rack density guidance.
- TIA-942 Standard Overview (TIA Online) — The official TIA product page for ANSI/TIA-942-C, with scope, revision history, and purchase information. Useful for confirming the current revision before citing the standard in RFPs.
- Best Practice Guide for Energy-Efficient Data Center Design (U.S. DOE) — DOE guidance on server, PSU, and cooling efficiency. The source for rack-level power efficiency analysis and the thermal impact of cable management.
- The Rack as Integration Unit (AI Data Center Guide) — Detailed engineering coverage of rack frame lineages, OCP ORV3, busbar power, and factory integration levels. Essential reading for AI and high-density deployments.
- Deployment Velocity and Cabling at Scale (AI Data Center Guide) — Covers pre-terminated cabling, staging operations, and factory integration trade-offs. Read alongside the rack integration unit chapter.
| Reading priority | Source | Why to read it |
|---|---|---|
| Read first | ANSI/TIA-942-C | Compliance baseline and rack density thresholds |
| Read second | U.S. DOE Best Practice Guide | Power efficiency and thermal management |
| Read third | AI Data Center Guide (rack integration) | Frame lineage, OCP ORV3, factory integration |
| For deployment teams | Global Smart Hands rack-and-stack guide | Pre-install checklist and rollback planning |
| For cabling teams | Schneider Electric cable management white paper | Power/data separation and accessory placement |
FAQ
What is the standard rack size for enterprise data centers?
The dominant standard is the 19" EIA-310 enclosed 4-post cabinet at 42U, with a depth of 1200 mm for modern deployments. Racks housing AI accelerators or liquid cooling equipment require depths exceeding 1200 mm.
How do you choose between open-frame and enclosed racks?
Use enclosed cabinets wherever physical access control is a compliance requirement (PCI-DSS, HIPAA, SOC 2). Open-frame racks are appropriate when the room itself is access-controlled and maximum serviceability for high-density hardware outweighs the need for per-rack locking.
What PDU type should enterprise racks use?
Metered or intelligent PDUs are the minimum for production enterprise racks. Intelligent PDUs with per-outlet SNMP telemetry feed power data into DCIM platforms and enable remote power cycling, which reduces truck rolls for routine power management tasks.
How does rack depth affect data center planning?
Deeper racks (1200 mm and beyond) increase floor footprint, affect hot-aisle/cold-aisle row spacing, and can trigger slab loading reviews. Reserve 150–200 mm of rear depth for 0U PDUs, cable managers, and liquid cooling manifolds when designing the floor plan.
Can Cables and Chips handle both rack installation and structured cabling?
Yes. Cables and Chips provides rack installation, CAT6/CAT6A and fiber optic structured cabling, pre-terminated trunk installation, cable testing and certification, and as-built documentation for enterprise projects throughout New York City. Coordinating both scopes under one contractor eliminates scheduling gaps between installation crews and reduces overall deployment time.