
Stop Floating Your Server Rack: Rack Grounding for Home Labs
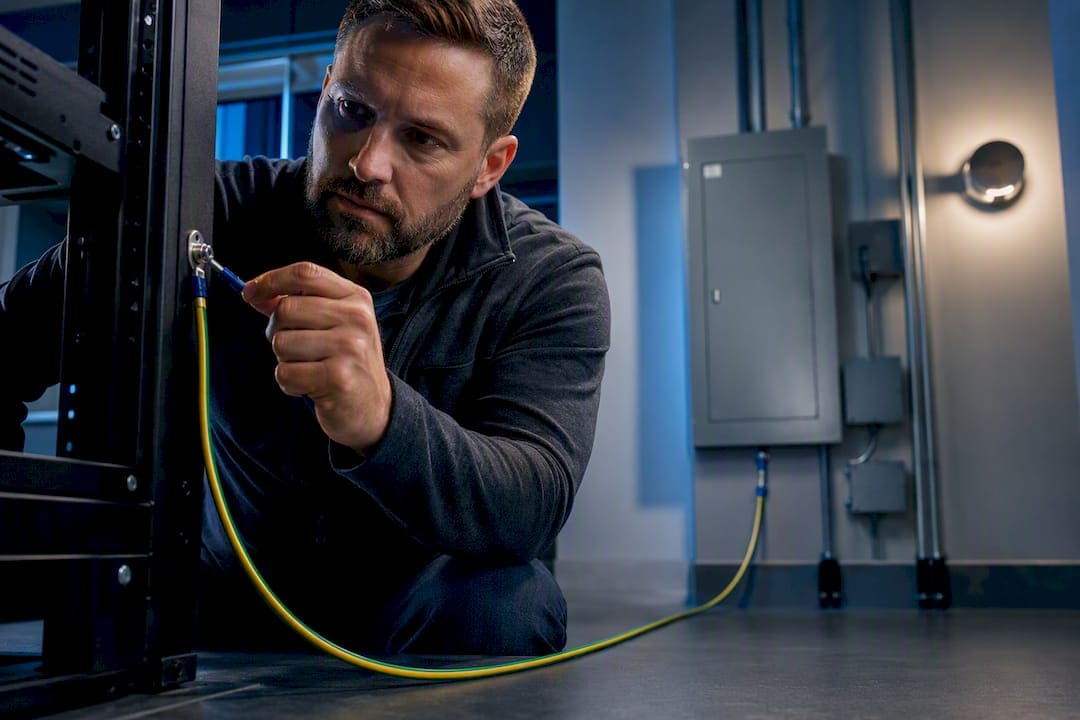
Yes, your rack needs to be bonded to the building’s effective ground-fault current path, not left floating on a coat of paint and good intentions. The preferred method is bonding it to the building’s equipment grounding conductor or the main service ground, using a dedicated conductor and a properly torqued connection. If your service panel is hard to reach, the wiring looks unfamiliar, or you’re not sure what you’re looking at, stop and call a licensed electrician before you touch anything.
TL;DR:
- Bond each rack to the building’s equipment grounding conductor or main service ground using a dedicated conductor and properly torqued connection for effective fault clearance.
- Verify connections by removing paint or oxide and ensuring hardware is torqued according to manufacturer specifications to prevent resistance buildup over time.
- Use conductor sizing tables from NEC Article 250 and high-quality UL-listed hardware to ensure proper and code-compliant grounding paths.
- Regularly check visual and electrical continuity to confirm the rack is properly grounded, especially after equipment moves or maintenance.
- Consider professional grounding inspections if the building’s grounding system is complex or uncertain, to ensure safety and code compliance.
Quick Action Checklist for Rack Grounding
Before you pull out a wrench, get the basics in order. Working through rack grounding requirements out of sequence is how people either get hurt or end up with a connection that looks fine but does nothing under fault conditions.
Safety first:
- Cut power to the circuit you’re working near, and confirm it’s off with a meter, not a guess.
- Don’t do this alone. If something goes wrong, you want another set of hands and eyes nearby.
- Wear basic PPE: insulated gloves and eye protection cost less than a trip to urgent care.
Gather your parts:
- A UL-listed grounding lug rated for your conductor size
- Appropriately sized bonding conductor (copper, stranded)
- Star washers or a way to remove paint at the contact point
- A torque wrench and a multimeter or clamp-on tester
Decision point: for a single rack on its own branch circuit, bonding to that circuit’s equipment grounding conductor is usually sufficient. For multiple racks or a shared network closet, bonding to the main service ground gives you one clean reference point. If you’re staring at a ground rod and wondering if that’s the answer on its own, it isn’t, and that’s worth reading before you drive one into the ground.
Grounding vs. Bonding: What’s Actually Different
Grounding and bonding get used interchangeably, and that’s exactly where mistakes start. Grounding connects a system to earth through a grounding electrode, like a ground rod or metal water pipe. Bonding connects metal parts to each other so they act as a single, continuous conductive path back to the source.
For a rack, bonding is the piece that actually matters day to day. Your chassis, rails, and connected equipment all need to be electrically tied together so a fault current has a low-resistance route back to the panel, tripping the breaker instead of energizing the case someone leans on.
A few things worth locking in:
- Grounding gets you a reference to earth potential; bonding gets you fault clearance.
- Both together form what NEC Article 250 calls an effective ground-fault current path, the whole point of the exercise.
- Poor bonding doesn’t just create a shock hazard. It also leaves rack-mounted gear more exposed to electromagnetic interference, since a solid metal-to-metal bond helps drain induced noise the same path handles fault current.
Three Ways to Bond a Rack, Step by Step
Most home labs and small offices land on one of three approaches. Here’s how each works and where it fits.
Method A: Bond to the branch-circuit equipment grounding conductor. This is the simplest option for a single rack fed by its own outlet or circuit.
- Confirm the circuit is de-energized.
- Run a dedicated conductor from the rack’s grounding point to the outlet box’s grounding terminal or the EGC in the junction box.
- Terminate with a listed lug, torqued per spec.
This works because the branch circuit’s EGC already ties back to the panel, giving you a short, direct path.
Method B: Bond to the main service ground. When you have multiple racks or want one authoritative reference point, running a conductor to the service equipment ground is the stronger choice. It’s also the point where hiring an electrician earns its cost. Panels are unforgiving, and a mistake here isn’t limited to your rack.
Method C: Driven grounding electrode (ground rod). A rod belongs in the grounding electrode system, tied into the same network as the service ground. It is not a substitute for bonding back to the panel, and a rod installed in isolation gives you a false sense of security without the fault-clearing path that actually protects you.
Making the mechanical connection:
- Use the rack’s dedicated grounding point, often an M8 insert or ground lug called out in the manufacturer’s manual.
- Remove paint or anodizing at the contact surface, or use a star washer to bite through it. Vertiv’s rack documentation specifies this step explicitly for a reason: paint is an insulator, and a bonded joint through paint is not bonded at all.
- Secure the ring terminal and torque hardware to the manufacturer’s spec, roughly 10 N·m (90 lb·in) on Vertiv racks.
- Run one dedicated conductor per rack. Don’t daisy-chain grounds from rack to rack; each one needs its own path back to source.
Pro Tip: A torque wrench costs less than $40 and takes the guesswork out of “tight enough.” An under-torqued lug loosens over months of thermal cycling; an over-torqued one can crack the terminal. Either way, you get exactly the failure you were trying to prevent.
Choosing the Right Conductor and Hardware
Sizing your bonding conductor isn’t a place to eyeball it. NEC Article 250 provides specific tables (250.66, 250.102, 250.122) for conductor sizing based on the circuit’s overcurrent protection and conductor size feeding the equipment. If you’re not fluent in reading those tables, that’s a legitimate reason to loop in a licensed electrician rather than guess and hope.
What you can control without an electrician on speed dial is hardware quality. Use a UL-listed grounding lug, not a generic hose clamp or a wire twisted around a bolt. Size ring terminals to match the actual bolt diameter on the rack’s grounding point, and use star washers or clean the contact surface to bare metal before making the connection.
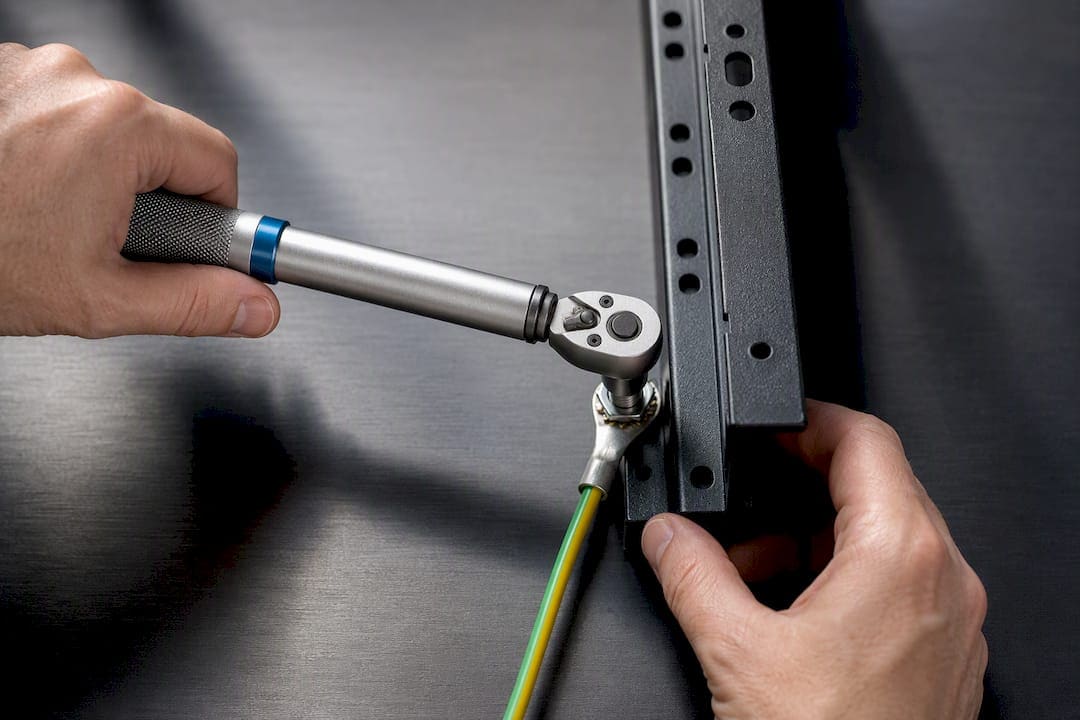
Each rack should carry its own dedicated protective-earth conductor rather than sharing one with a neighboring rack, as explained in detail on how to organize cables in the rack to maintain clean and effective grounding paths. Vendor documentation on rack systems is consistent on this point: daisy-chaining protective-earths defeats the purpose of an independent fault path for each enclosure. And whatever conductor you land on, torque it to the terminal manufacturer’s spec. Under-torqued connections develop resistance over time, which is a slow, invisible way for a ground path to stop working exactly when you need it.
How to Verify Your Rack Is Actually Grounded
A bond that looks right can still be wrong. Before reaching for a meter, run through a visual pass:
- Confirm the lug is seated flush against bare metal, with no paint or oxide layer trapped underneath.
- Check that hardware is torqued and not just hand-tight.
- Verify a single dedicated conductor runs from the rack, not a shared or spliced one.
Once the visual check passes, move to electrical testing. A basic multimeter continuity check between the rack chassis and a known ground point should read close to zero ohms. That confirms metal-to-metal contact, but it doesn’t confirm the path can handle real fault current. A clamp-on tester can check for loop impedance or unexpected leakage current, catching problems a simple continuity reading misses entirely.
If continuity reads unexpectedly high, or you need an actual earth-electrode resistance measurement, that’s a job for a licensed electrician with the right test equipment. The same goes for anything involving the grounding electrode system itself. This is one area where NFPA’s guidance is clear: a low-resistance reading at rest doesn’t guarantee performance under fault conditions, which is exactly what loop-impedance testing is designed to catch.
Pro Tip: If you’ve recently swapped a PDU or moved gear during a network closet cleanup, recheck continuity. Grounding wires attached to rack doors or panels are easy to disconnect during maintenance and easy to forget to reconnect.
Safety Rules and Where Codes Actually Apply
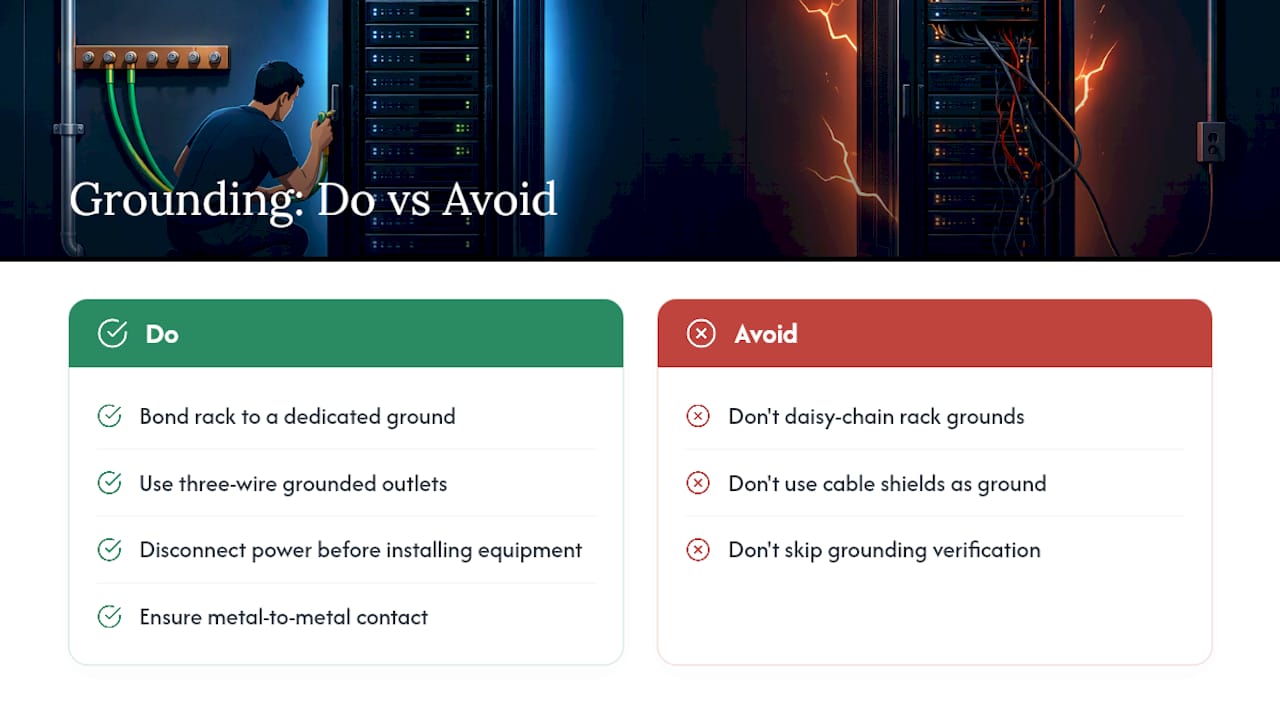
A few mistakes show up again and again in home labs and small offices. Daisy-chaining rack grounds is the most common. Relying on a cable’s shield as your ground path is another. Shielded cabling helps with EMI, but it was never designed to carry fault current, and treating it as your bonding path leaves you exposed.
Loose hardware and inadequate metal contact round out the list, both usually traceable to skipping the star washer or paint removal step. Beyond mechanics, manufacturer PDU documentation is direct about connecting equipment only to three-wire grounded outlets and disconnecting power before installation whenever grounding can’t be confirmed.
On the code side, NEC Article 250 sets the technical requirements for grounding and bonding nationwide, and it applies whether you’re in a data center or a spare bedroom. OSHA enforces workplace electrical safety, which matters for small offices but doesn’t extend to private residences. OSHA has noted that equipment secured to and in electrical contact with a grounded metal rack can be considered effectively grounded, a useful reference point, though it doesn’t replace verifying your specific setup meets NEC requirements.
Why I Trust the Boring Method Over the Clever One
Every home lab forum has someone convinced they found a shortcut, usually involving a ground rod driven next to the router closet with no tie back to the service panel. It feels proactive. It isn’t. A rod with no connection to the building’s grounding electrode system doesn’t give fault current anywhere useful to go, and it can create a dangerous potential difference between two “grounded” points that were never actually the same ground.
The boring method wins because it’s the one the electrical code was built around: bond back to the branch circuit or service ground you already have, using hardware and torque specs the equipment manufacturer already tested. That’s not a lack of imagination. It’s decades of NEC revisions distilled into a checklist.
At Cables and Chips, four decades in commercial cabling and rack installation across New York City taught us where DIY grounding runs out of road. If the service equipment is behind a locked electrical room, if you’re dealing with a shared building’s grounding electrode system, or if you genuinely can’t tell whether a conductor terminates where you think it does, that’s not a DIY afternoon. That’s a site visit.
— Ken
Get a Professional Rack Grounding Check from Cables and Chips
If your rack setup has grown past a weekend project, or the building’s grounding path isn’t something you want to guess at, professional services can provide a faster path to a properly bonded, code-aware installation than working it out alone circuit by circuit.

We handle server rack installation for commercial offices and secure facilities across New York City, and grounding and bonding checks are part of that work, not an afterthought bolted on at the end. That includes verifying metal-to-metal contact at every connection point, confirming conductor sizing against code, and running cable testing and certification once the rack is live so you’re not troubleshooting blind six months later.
A site survey starts with a walk-through of your electrical service, existing grounding points, and rack layout, no obligation attached. If you manage a network closet where the grounding situation is unclear, or you’re planning a rack build and want it done right the first time, request a site survey and we’ll tell you exactly what your space needs.
Standards and Vendor Guides Worth Bookmarking
For the technical backbone behind this guide, NFPA’s overview of grounding and bonding walks through NEC Article 250 in plain language. OSHA’s 1910.304 standard covers workplace grounding requirements, and Vertiv’s VR Rack user guide is a solid example of manufacturer-specific torque and hardware guidance worth comparing against your own rack’s manual.
Sources
- Vertiv™ VR Rack user guide
- The basics of grounding and bonding — NFPA
- OSHA standards (1910.304) — grounding requirements
FAQ
How Are Metal Racks Grounded?
Metal racks are grounded by bonding the chassis to the building’s equipment grounding conductor or main service ground using a dedicated conductor, a listed grounding lug, and a torqued connection at a bare-metal contact point. NEC Article 250 governs conductor sizing and connection requirements for this path.
What Is the Best Way to Ground the Chassis?
Use the rack’s dedicated grounding point, usually an M8 insert or labeled ground lug, remove paint or use a star washer for metal-to-metal contact, and torque the hardware to the manufacturer’s spec, around 10 N·m (90 lb·in) on many rack systems. Skipping the paint-removal step is the most common reason a chassis ground fails despite looking connected.
Do I Need to Ground Every Metal Box?
Any noncurrent-carrying metal enclosure that could become energized during a fault needs to be bonded into the ground-fault current path, which in practice means every rack, chassis, and metal junction box in the system. OSHA guidance notes that equipment in solid electrical contact with an already-grounded metal rack can be considered effectively grounded, but that only holds if the rack itself is properly bonded first.
How Do I Ground Myself Before Touching Electronics?
Grounding yourself before handling electronics is a separate practice from rack grounding. It typically involves a wrist strap connected to an ESD mat or grounded point to prevent static discharge into sensitive components, not a substitute for the rack’s electrical bonding described above.