

Labeling patch panels in structured cabling is the process of applying consistent, visible, and durable identifiers to every port, cable, and termination point in your network infrastructure to guarantee traceability and fast fault resolution. The industry term for this discipline is telecommunications administration, governed by ANSI/TIA-606, which defines identification, labeling, and record-keeping requirements across copper, fiber, hardware, and outlets. When you label patch panel structured cabling correctly, you convert a dense rack of anonymous ports into a documented, auditable system that any qualified technician can read and act on. Poor labeling, by contrast, turns routine moves, adds, and changes into extended outages. Your network is only as strong as the infrastructure behind it.
What standards govern label patch panel structured cabling?
ANSI/TIA-606 is the definitive administration standard for structured cabling systems in North America. It focuses entirely on identification, labeling, and record-keeping rather than electrical or safety specifications. That distinction matters: TIA-606 compliance is about documentation discipline, not just physical installation quality.
The standard defines a hierarchical labeling scheme that encodes location data directly into each identifier. A compliant label carries information about the building, floor, room, rack, panel, and port in a fixed segment order. The Silver Fox Labeling compliance guide illustrates this with an example identifier like “2MK01-35:12,” where each segment maps to a specific physical location. That level of specificity means any technician, on any shift, can locate a port without consulting anyone else.
TIA-606 also sets requirements for label durability and placement. Key compliance points include:
- Identifier format: Labels must follow a consistent hierarchical scheme encoding building, floor, room, rack, panel, and port.
- Readability without disconnection: Labels must be readable without unplugging or moving cables. This is a hard placement requirement, not a suggestion.
- Material durability: Labels must maintain adhesion and legibility across the service life of the installation. UL 969 evaluates label stock for abrasion, temperature, and chemical resistance.
- Record synchronization: Physical labels must link to documentation covering all infrastructure components, including fiber, copper, hardware, and outlets.
- Scope of labeling: Every patch panel port, cable, telecommunications outlet, and pathway element requires a unique identifier.
Administration-focused labeling connects physical identifiers to the documentation that supports upgrades, troubleshooting, and audits. That connection is what separates a compliant installation from one that merely looks organized.
How to create a practical patch panel labeling scheme
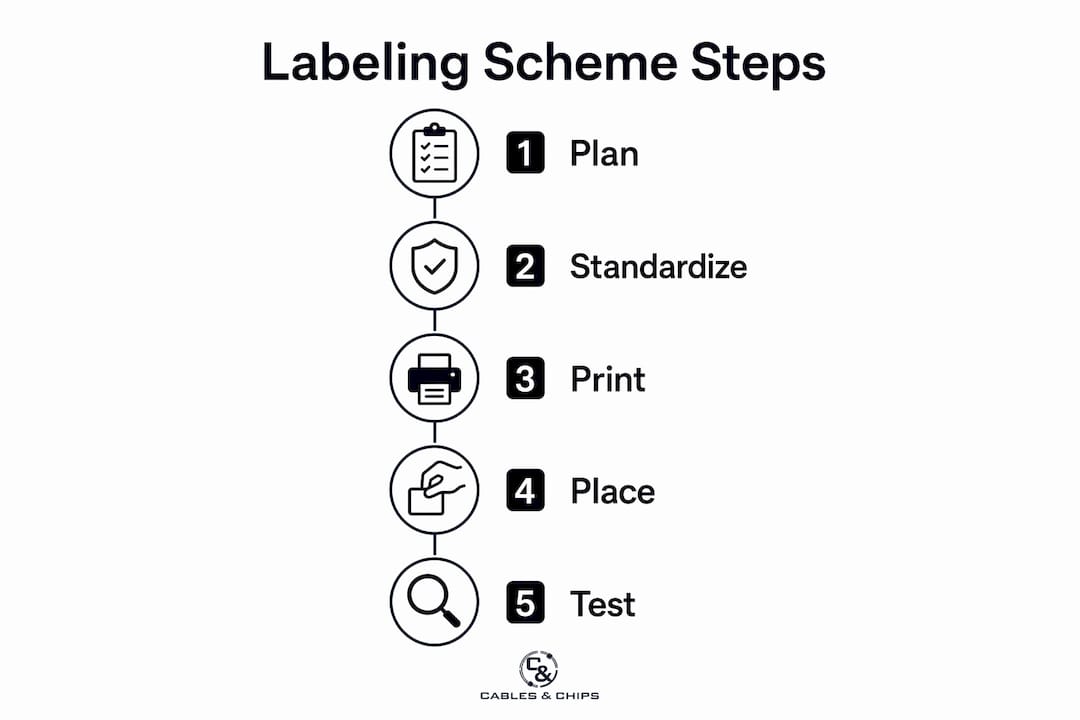
Designing a labeling scheme before installation begins is the single most important decision in cabling patch panel organization. Retrofitting a naming convention onto an existing installation costs far more time than planning it correctly from the start. Follow these steps to build a scheme that holds up across the full lifecycle of your network.
-
Define your identifier structure first. Choose a fixed segment order that encodes location from the largest unit down to the smallest: building, floor, room, rack, panel, port. A format like “B2-F3-IDF01-PP2-P14” is readable, sortable, and scalable. Lock this format before any labels are printed.
-
Keep port labels as unique IDs, not destination descriptions. Field teams often try to cram destination information onto tiny port labels, which reduces readability and creates inconsistency. Store destination details in your port map and keep the physical label as a clean, unique identifier. The AMPCOM labeling guide makes this distinction clearly: the label is the key, the port map is the database.
-
Synchronize labels with port maps and test documentation from day one. Every label ID must appear identically in your port map spreadsheet or network management system and in the file names of your cable test results. A single divergence between these three sources creates ambiguity that compounds over time.
-
Assign identifiers sequentially and never skip numbers. Gaps in port numbering create confusion during audits and make it harder to spot missing or unlabeled ports at a glance.
-
Document every change at the time it occurs. Moves, adds, and changes that go undocumented for even a few days create drift between physical labels and records. Treat documentation as part of the work order, not an optional follow-up task.
-
Avoid mid-project variations. Consistent segment order across all panels, floors, and buildings prevents technician confusion and maintains labeling clarity over the full life of the installation. Inventing new identifier variations mid-project is one of the most common causes of long-term labeling failure.
Pro Tip: Before printing any labels, run your proposed identifier format past the technicians who will be reading them in the field. If they cannot decode a label in under five seconds without a reference sheet, simplify the format.
For a deeper look at how patch panel design decisions affect labeling and port organization in office environments, the 2026 guide from Cables covers current best practices in detail.
What are the best practices for label placement and label types?
Label placement is where many otherwise well-designed labeling schemes fail in the field. Placement rules require labels to be readable without moving or unplugging cables, which means sizing and positioning must be decided before installation, not after patch cords are dressed.
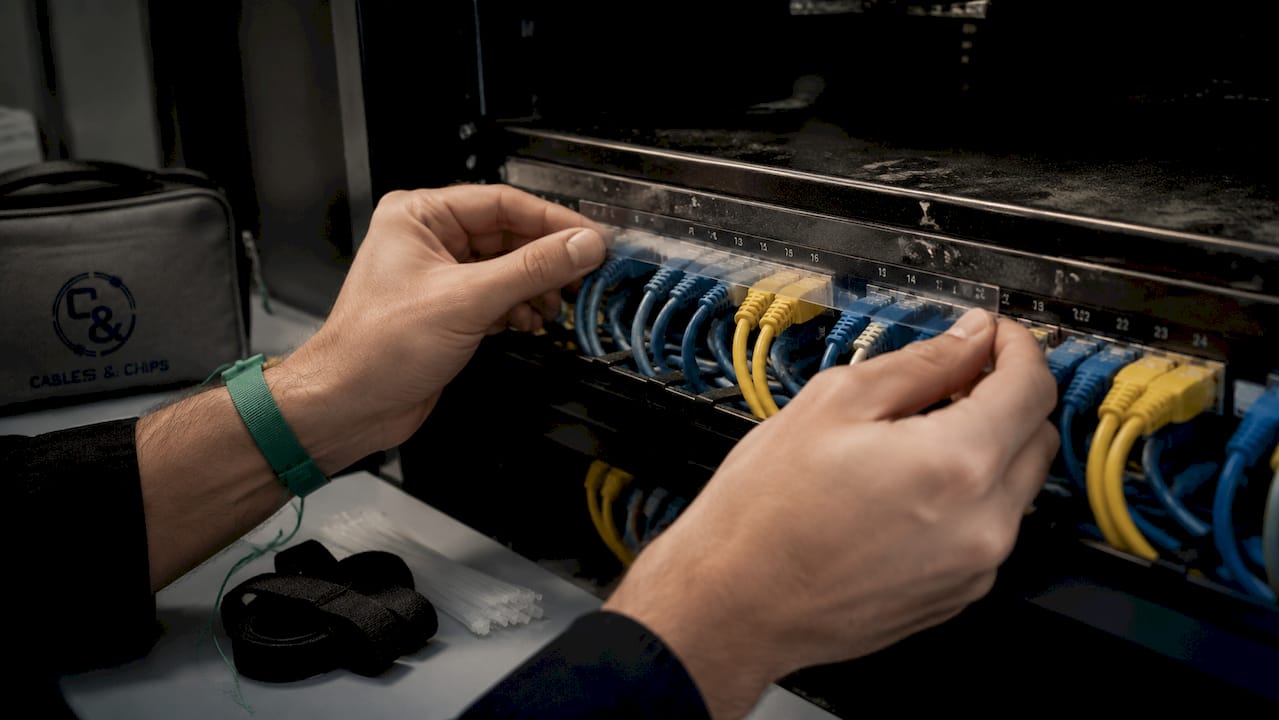
The following comparison covers the most common label types used in structured cabling installations:
| Label type | Best use case | Durability | Readability at density |
|---|---|---|---|
| Wrap-around self-laminating | Individual cables and patch cords | High (polyester/vinyl) | Good on 24-port panels |
| Flat adhesive port labels | Patch panel faceplate or port surround | Medium to high | Good on 24-port, tight on 48-port |
| Color-coded background labels | Circuit type identification on high-density panels | High | Excellent for visual triage |
| Printed label strips | Panel-wide port numbering inserts | Medium | Excellent on any density |
Color-coded labels on a 48-port panel allow technicians to identify circuit types before reading individual labels. That visual layer reduces accidental disconnections during busy change windows, which is one of the most expensive mistakes in a live network environment.
Additional placement and material guidance:
- Position labels above or below the port opening, not directly on the port face, so patch cord boots do not cover the identifier.
- On 48-port panels, use printed label strips rather than individual adhesive labels. Individual labels at that density are difficult to align and prone to peeling.
- Use polyester or vinyl label stock with permanent adhesive rated to UL 969 standards for abrasion, temperature, and chemical resistance.
- Print labels with a dedicated label printer such as Brady BMP61, Dymo Rhino 6000+, or Brother PT-E550W rather than handwriting them. Handwritten labels degrade faster and introduce inconsistency.
- Test label readability with cables fully installed before signing off on any section of the installation.
Pro Tip: Conduct a human workflow test after installation: ask a technician unfamiliar with the project to locate a specific port using only the label and the port map. If they struggle, the label placement or format needs adjustment before the project closes.
Reducing cable clutter in the network closet directly improves label visibility. Dressed and managed cables expose labels; bundled or tangled cables hide them.
How to maintain labeling consistency over the cabling lifecycle
A labeling system is only as reliable as the process used to maintain it. The physical labels installed on day one will drift from reality within months if there is no enforced update process tied to every change in the network.
-
Enforce a single naming convention across all teams and contractors. Every technician working in the space, whether internal staff or a third-party contractor, must use the same identifier format. Deviations create a two-tier labeling system that is harder to audit than no system at all.
-
Tie label updates to work orders. Every move, add, or change should include a mandatory documentation step. The work order is not complete until the physical label, port map, and test record all reflect the new state of the port.
-
Synchronize file names with label IDs. Consistent naming across physical labels, port maps, and test result file names eliminates the ambiguity that slows troubleshooting. A test file named “B2-F3-IDF01-PP2-P14.pdf” is immediately traceable to its physical port without cross-referencing multiple documents.
-
Schedule periodic audits. A quarterly walk-through comparing physical labels to port map records catches drift before it becomes a crisis. Audits also surface labels that have faded, peeled, or been physically damaged.
-
Manage legacy labeling during upgrades. When upgrading sections of an existing installation, do not mix old and new naming conventions in the same panel. Relabel the entire panel to the current standard during the upgrade, even if it adds time to the project. Mixing conventions in a single rack is the fastest way to create a documentation failure.
Synchronizing physical labels with project drawings and port maps also supports cleaner project handover. Resources like the Won2Build Hub blog cover documentation practices for construction and infrastructure projects that translate directly to structured cabling handover workflows.
Common challenges in patch panel labeling and how to resolve them
Even well-planned labeling systems encounter real-world problems. Recognizing these issues early reduces the time spent diagnosing them during a change window or outage.
- Labels hidden behind patch cords. This is the most common compliance failure. Field inspection should include testing label readability with all cables installed. If a label is only visible when a cord is removed, it fails the placement requirement.
- Mismatch between documentation and physical labels. Even a single divergence between the port map and the physical label increases troubleshooting time. Resolve mismatches immediately and trace them back to the process failure that caused them.
- High-density panels with unreadable labels. On 48-port panels, individual adhesive labels at standard sizes are often too small to read without a flashlight. Use printed label strips and color coding to compensate for reduced label real estate.
- Multi-site or campus environments with inconsistent conventions. Each site may have developed its own labeling format over time. Standardize on a single convention during the next scheduled upgrade and document the transition in the port map.
- Technician confusion during change windows. Troubleshooting time drops from 60 minutes to 60 seconds when labels, port maps, and documentation are synchronized. If your team is spending significant time locating ports during changes, the labeling system is the first place to investigate.
For a broader view of how network closet organization supports labeling effectiveness, Cables has published detailed guidance for IT teams managing commercial environments.
Key takeaways
Proper labeling in structured cabling requires a hierarchical identifier scheme, durable label materials, placement that remains readable with cables installed, and documentation synchronized across physical labels, port maps, and test records.
| Point | Details |
|---|---|
| Follow ANSI/TIA-606 | Use hierarchical identifiers encoding building, floor, room, rack, panel, and port for every label. |
| Keep port labels as unique IDs | Store destination details in port maps, not on the label itself, to maintain readability. |
| Use durable label materials | Polyester or vinyl stock rated to UL 969 maintains legibility across the service life of the installation. |
| Synchronize all documentation | Physical labels, port maps, and test file names must use identical identifiers to prevent troubleshooting errors. |
| Test placement with cables installed | Confirm every label is readable without disconnecting cables before signing off on any installation section. |
What 40 years in the field taught me about patch panel labels
After decades of working in server rooms, telecom closets, and MDF/IDF spaces across New York City, the labeling failures I see most often are not technical. They are procedural. A team installs a clean, well-labeled system on day one, then the first contractor who comes in for a change ignores the convention and writes a port number in marker on the faceplate. Six months later, no one trusts any of the labels.
The labeling system that survives is the one that is simple enough to follow under pressure. When a technician is in a rack at 2 a.m. during an outage, they are not going to decode a 14-character identifier with four delimiter types. A clean, short, predictable format that maps directly to the port map is worth more than a technically perfect but unreadable scheme.
The other lesson: label placement is a design decision, not an afterthought. I have seen installations where every label was correct but positioned directly behind the patch cord boot. The labels were useless in practice. Placement must be verified with cables dressed, not in an empty panel.
The installations that hold up over five and ten years are the ones where the labeling convention was documented, enforced, and treated as part of the infrastructure, not a finishing detail.
— Ken
How Cables supports your structured cabling labeling projects
Cables & Chips installs and documents structured cabling systems across New York City following ANSI/TIA-606 administration standards, from initial design through final testing and certification.
Every project includes port-level labeling, port map documentation, and test records with synchronized identifiers so your team can manage and troubleshoot the network from day one. Whether you are building out a new office, upgrading an existing IDF, or cleaning up a legacy installation, Cables delivers CAT6 and CAT6A structured cabling with labeling that meets compliance requirements and holds up in the field. For teams managing larger or multi-site environments, the scalable cabling infrastructure examples on the Cables website show how documented, labeled systems perform across complex deployments. Contact Cables at 20 Vesey Street, Lower Manhattan, to schedule a site survey.
FAQ
What is ANSI/TIA-606 and why does it matter for patch panel labeling?
ANSI/TIA-606 is the North American administration standard for structured cabling that defines how to identify, label, and document every infrastructure component. Compliance with TIA-606 ensures that patch panel ports, cables, and outlets are traceable and manageable across the full service life of the installation.
How should patch panel port labels be formatted?
Port labels should use a hierarchical identifier encoding building, floor, room, rack, panel, and port in a fixed segment order. The label itself should carry only the unique ID; destination details belong in the port map, not on the label face.
What label materials meet structured cabling standards?
Polyester or vinyl label stock with permanent adhesive, rated to UL 969 for abrasion, temperature, and chemical resistance, meets the durability requirements for structured cabling installations. Handwritten labels do not meet compliance standards for long-term legibility.
How do I keep patch panel labels readable on a 48-port panel?
Use printed label strips rather than individual adhesive labels on 48-port panels, and add color-coded label backgrounds to allow visual circuit identification before reading individual identifiers. Position all labels above or below the port opening so patch cord boots do not cover them.
How often should patch panel labeling be audited?
A quarterly audit comparing physical labels to port map records is sufficient for most commercial environments. Any move, add, or change should trigger an immediate update to both the physical label and the associated documentation.