
Document Existing Cabling Before Renovation: A Checklist
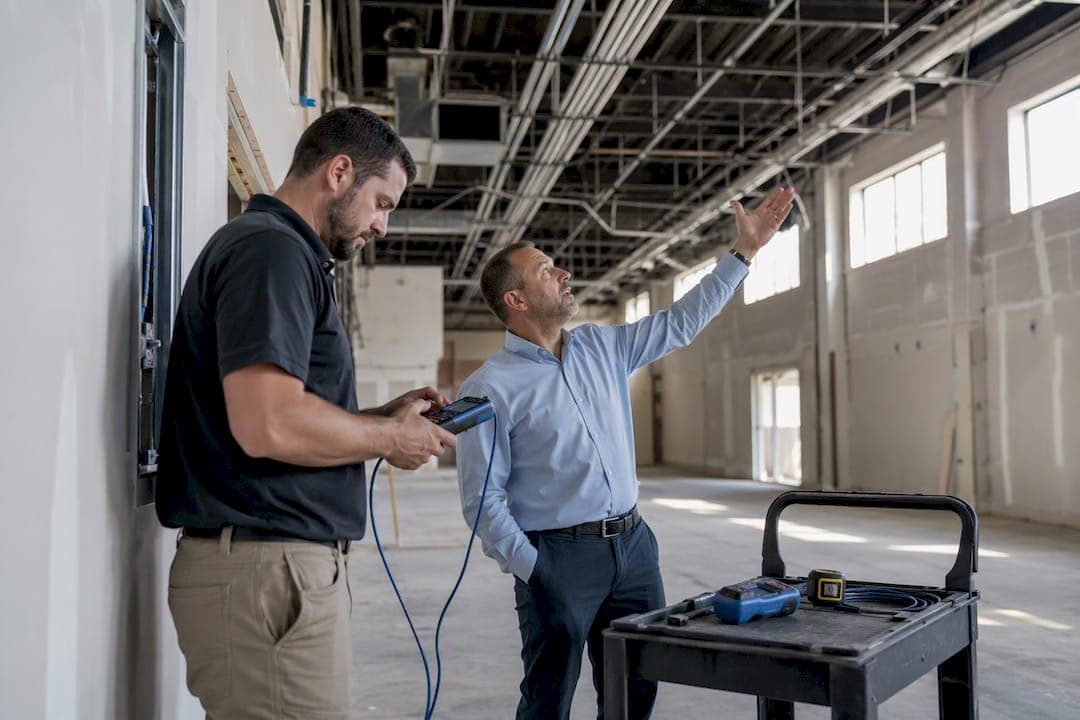
Before a single wall comes down, six actions determine whether your renovation stays on budget: run a full site survey, photograph and physically protect every cable that stays in service, reconcile the physical inventory with the logical network map, label every run to a consistent standard, test and certify anything you plan to reuse, and document a clear reuse-or-replace decision for each cable segment. Skip any one of these and you risk paying twice for the same work once drywall closes over an undocumented problem.
Each step protects something specific. The survey protects your budget by catching pathway and access issues before a bid is finalized. Photographing and tagging protects the cable itself from demolition crews who have no way of knowing what’s live. Reconciling physical and logical records protects uptime, since unplugging an unlabeled cable can take down a device nobody accounted for. Labeling protects the next technician who has to trace a run six months from now. Testing protects your reuse decision with data instead of guesswork. And a documented reuse/replace call protects you from a change order mid-project.
- Site survey and floorplan markup
- Photograph and tag cables that stay in service
- Reconcile physical inventory with logical network data
- Apply consistent, TIA-606-style labeling
- Test and certify critical runs
- Document the reuse-or-replace decision, in writing
The facilities manager or IT director should sign off on a completed cabling assessment before renovation demolition begins, and that sign-off should reference a specific as-built document, not a verbal walkthrough.
Key Takeaways
Accurate cabling documentation before renovation depends on combining a physical site survey, a reconciled logical inventory, standardized labeling, and tested reuse decisions into one signed-off package.
| Point | Details |
|---|---|
| Survey before demolition | Walk the site with IT, facilities, and the GC to record pathways, ceiling type, and drop locations. |
| Protect what stays live | Tag and photograph in-service cable, and brief demolition crews before any cutting starts. |
| Reconcile physical and logical | Cross-reference patch-panel mapping with automated device discovery for a single accurate inventory. |
| Test before you decide | Certify copper and fiber runs, and let failed results or fire-rating mismatches drive replacement. |
| Require signed-off as-builts | Make floorplans, rack elevations, test reports, and photos a condition of final payment. |
| Work with a specialist | Cables and Chips performs site surveys, testing, and as-built documentation for commercial renovations in New York City. |
How Do You Document Existing Cabling Before Renovation?
Documenting existing cabling before renovation starts with a coordinated site walkthrough, not a spreadsheet. Get the right people in the room first: an IT representative who knows the logical network, a facilities manager who knows the building’s history, the general contractor who will sequence the work, and a tenant representative if the space is leased. Each person catches something the others miss. IT knows which closet feeds the trading floor. Facilities remembers the ceiling was replaced in 2019 and the tile grid doesn’t match the original drawings.
During the walk, record the physical facts that drive both pricing and protection. That means every MDF and IDF location, telecom room dimensions, conduit and pathway types (cable tray, J-hook, EMT), ceiling classification (plenum versus non-plenum), wall and floor penetrations, and any obstruction that will force a reroute. A comprehensive site survey of this kind is what produces the marked-up floorplans and rack elevations a contractor actually bids from, not a rough guess at drop count.
Set recording rules before you start, not after, to avoid common scheduling and coordination issues during renovations as detailed in Common property manager renovation mistakes:
- Photograph every telecom room, rack face, and cable bundle, with filenames tied to room number and date
- Mark every drop and pathway directly on a printed or PDF floorplan, not a mental note
- Reference each drop by room number or grid coordinate so a second person can locate it without you
- Flag any cable of unknown origin with a distinct color or symbol for follow-up
Protective action happens the same day as the survey, not after. Tag every cable that remains in service with a bright, visible label, and apply “DO NOT DISTURB” tape at accessible points. Brief the demolition crew directly, because a laborer with a reciprocating saw has no way to distinguish a live fiber trunk from abandoned Cat5. This single step, tagging and protecting cabling before demolition, prevents more accidental cuts than any spec document ever will.
What Belongs in the Cabling Inventory and Network Map?
A reconciled inventory answers two questions at once: which cable is that, and what breaks if you unplug it. Getting there means combining two records that usually live in separate systems, the physical wiring map and the logical network inventory, into one cross-referenced document.
Every inventory row needs a consistent set of fields: cable ID, origin patch panel and port, destination outlet, cable category (Cat6, Cat6A, OM4 fiber), estimated length, visible jacket condition, fire rating, and the date of the last certification test. On the logical side, automated network discovery tools pull IP address, MAC address, and device model directly from the wire, and tying that discovery data to physical patch-panel records is what turns a static drawing into something you can actually trust six months later.
A minimal deliverable table looks like this:
| Location | Cable ID | Physical Origin | Physical Destination | Logical Endpoint | Device Type | Test Status |
|---|---|---|---|---|---|---|
| Room 4A | 4A-A12 | MDF Rack 2 | Outlet 4A-B | 10.10.x.x | VoIP phone | Pass |
| IDF-3 | 3B-C08 | IDF-3, Panel B | Server Rack 3, Ux | 10.10.x.x | Access switch | Fail, retest needed |
Naming and port conventions matter more than most teams assume. A pattern like Floor-Room-PanelPort keeps every technician reading the same language, and following TIA-606 labeling conventions is what stops a “temporary” naming scheme from becoming permanent ambiguity three renovations from now.
What Cabling Tests Determine Reuse or Replacement?
Testing turns a reuse decision from a guess into a documented fact. For copper, that means full permanent-link certification against Cat6 or Cat6A performance specs. For fiber, it means OTDR traces and insertion-loss measurements on every strand, not a spot check. Add continuity and polarity checks on anything going back into service, plus a Power over Ethernet spot check on runs feeding cameras, access points, or phones.
Certain results should end the reuse conversation immediately:
- Visible jacket damage, cracking, or discoloration
- Wrong fire rating for the space, plenum cable in a non-plenum return air path or vice versa
- Failed certification on length, attenuation, or crosstalk
- Fiber strands with no labeled origin or destination
- Bundles that are brittle, over-tied, or show signs of heat exposure
Every test result needs to attach to the cable inventory record with metadata that makes it defensible later: tester model, calibration date, technician name, and test date. A certification report without that metadata is close to worthless if a warranty dispute comes up in year three.
When you weigh reuse against replacement, work the decision in order: safety and code first, since a jacket-rating problem isn’t negotiable, then performance against your actual bandwidth needs, then lifecycle cost. NFPA’s research on non-home electrical fires is a useful reminder of why fire-rating verification isn’t a paperwork formality. Cables & Chips’ cable plant testing process applies exactly this sequence on commercial jobs across New York City.
Which Standards and Labels Should the As-Built Package Include?
Your project spec should name standards explicitly, not gesture at “industry best practices.” Reference the TIA-568 family for cabling performance, TIA-606 for administration and labeling, ANSI/TIA-569 for pathway and space design, and the NEC/NFPA family for fire rating and clearance requirements. Naming these in the contract gives you language to enforce if a subcontractor cuts corners.
Labeling rules should be non-negotiable: a unique ID on both ends of every cable, formatted to TIA-606 conventions, plus matching labels on patch-panel ports and outlet faceplates. A sample pattern like IDF3-B08 on one end and the corresponding outlet ID on the other removes any need to trace a cable by hand.
The full as-built package should include:
- Updated CAD floorplans showing every drop location
- Rack elevations for each MDF and IDF
- Patch-panel schedules cross-referenced to outlet IDs
- Per-run test reports in PDF, with tester metadata attached
- A photo book of every telecom room and rack face
- A signed scope confirmation from the general contractor
Make the as-built documentation package a condition of final payment, not a nice-to-have. Once drywall closes, the cost of recreating missing records climbs fast.
How Should Cabling Work Fit the Construction Schedule?
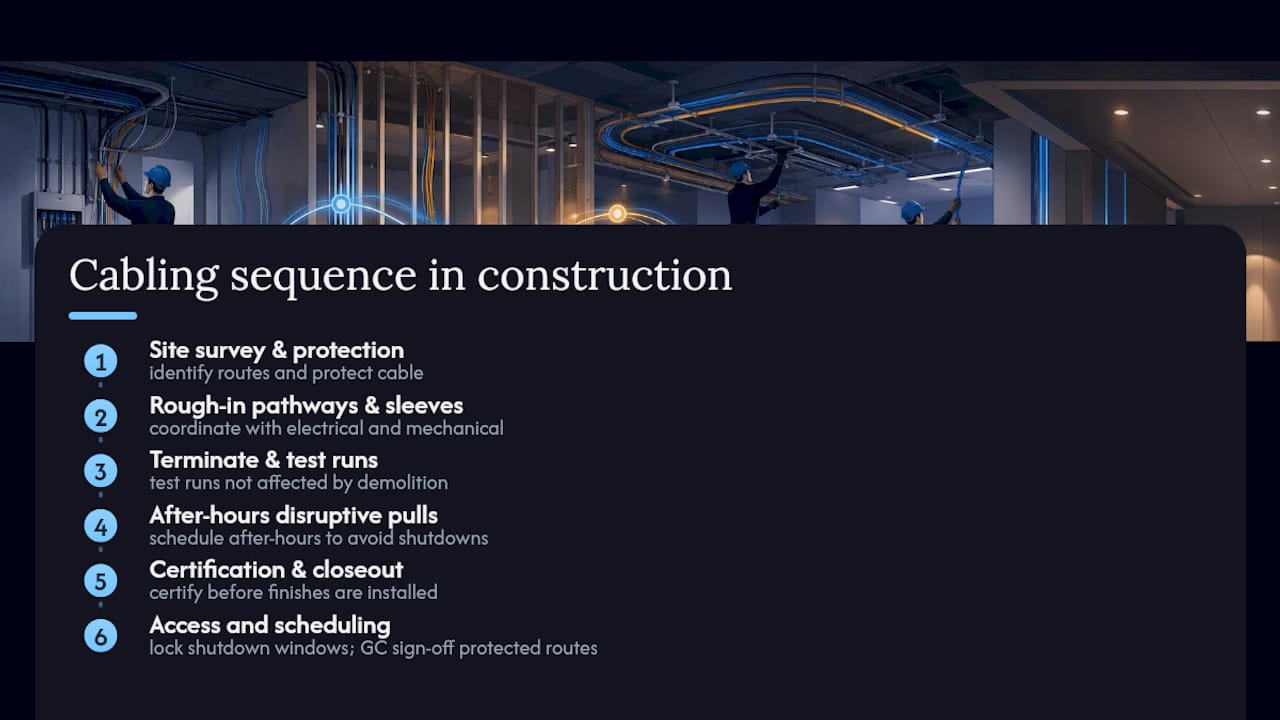
Cabling has to move in step with the rest of the trades, not around them. A workable sequence runs: site survey and cable protection first, then rough-in of pathways and sleeves alongside the electrical and mechanical trades, then termination and testing of any run not affected by ongoing demolition, then scheduled after-hours work for the disruptive pulls that would otherwise shut down a live floor, and finally certification and closeout before finishes go up.
Access and scheduling deserve their own attention. Lock in HVAC and electrical shutdown windows early, since cabling crews often need the same access. Provide a protected walk path for demolition crews that keeps them clear of tagged, in-service cable. Require general contractor sign-off on which routes are protected before demolition starts, not after the first cut is made.
Run a wireless pre-survey before ceilings close, not after. A heatmap of proposed WAP locations, done while the space is still open, catches coverage gaps that are expensive to fix once tile is back in place. Fold that heatmap directly into the cabling scope so WAP drops land where the signal data says they should, not where the original floorplan happened to show a ceiling grid.
Circulate a short coordination checklist to the general contractor and every trade involved: who owns each task, when it happens relative to rough-in, and what pass/fail criteria close it out. Cables & Chips covers this sequencing in more detail in its guide to low voltage rough-in scheduling.
What Tools Does a Field Survey Team Actually Need?
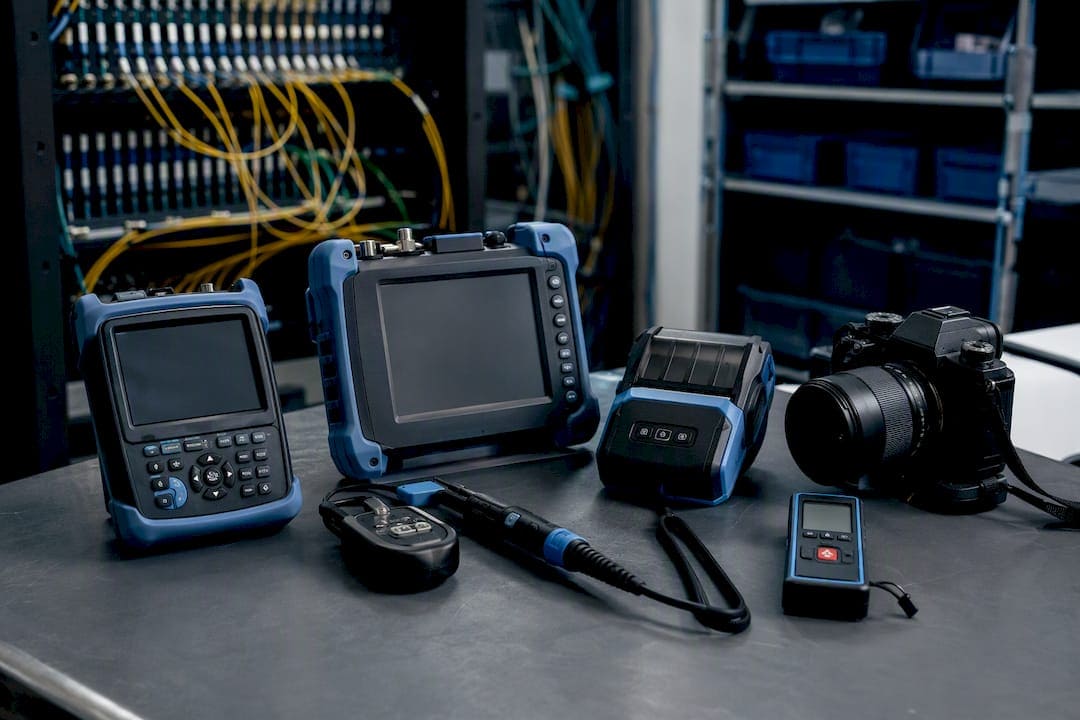
A two-person team can produce a defensible inventory in a single walkthrough with a fairly short tool list: a calibrated cable certifier for copper, an OTDR and power meter for fiber, a tone generator and probe for tracing unlabeled runs, a portable label printer, a high-resolution camera or phone, a measuring wheel or laser distance meter, and a floorplan markup kit, whether that’s a clipboard or a tablet app.
The survey form itself only needs a handful of fields to be useful: room, drop ID, visible condition notes, photo filename, and test ID. Export it as a simple CSV with those five columns and you have something any discovery tool can ingest later without reformatting.
Pro Tip: If your team doesn’t own a calibrated fiber OTDR, rent one for the survey window instead of skipping fiber testing. A short-term rental costs far less than replacing fiber that turns out to have been reusable.
Who Owns Cabling Documentation After the Project Closes?
Documentation goes stale the moment nobody owns it. Assign a single documentation owner, IT or facilities, and require every change ticket to include an updated record before it closes. A ticket that adds a drop or reroutes a cable without touching the as-built package should not be allowed to close at all.
Set an audit cadence and stick to it: quarterly spot checks against a sample of racks, and a full documentation audit annually or immediately after any major renovation. Where possible, connect your discovery and documentation tools to existing monitoring or PSA systems so new devices populate the inventory automatically instead of waiting for someone to notice. Automated discovery tied to change management is consistently the difference between records that stay accurate and records that quietly drift for years.
Pro Tip: Require delivery of machine-readable exports, CSV or JSON, alongside the PDF as-built package. A future contractor or discovery tool can ingest structured data instantly; a scanned PDF has to be retyped.
Where Can You Find the Standards and Templates Referenced Here?
- TIA-568 and TIA-606 standards overview for cabling performance and labeling
- NFPA’s non-home electrical fire research for fire-rating context
- A sample structured cabling installation checklist for closeout criteria
Project contracts should also reference the NEC/NFPA family directly, and every test report should carry tester metadata as a baseline requirement.
What the Checklists Get Wrong
Most cabling checklists treat documentation as paperwork to complete after the real work is done. That gets the order backward. The documentation gap, the distance between what’s on record and what’s actually in the ceiling, is where renovation budgets quietly bleed out, not in the demolition or the drywall.
The conventional advice tells facilities teams to “survey the space” and “label everything,” as if those were separate, sequential tasks. They aren’t. A label without a corresponding logical inventory entry tells you nothing about what breaks when you cut that cable. A survey without a signed reuse-or-replace decision just delays the argument to week three of construction, when it costs more to resolve.
What actually matters, based on how these projects go wrong, is sequencing the physical and logical records together from day one and assigning a single owner who’s accountable for keeping them synced. Skip the ownership question and even a perfect initial survey rots within a year. Facilities and IT teams that get this right treat documentation as infrastructure in its own right, not an afterthought to it.
Get a Documented Cabling Assessment Before You Break Ground
A punch list and a hopeful phone call to whoever installed the original cabling isn’t a survey, and it won’t hold up when a general contractor asks what’s behind that ceiling tile. Cables and Chips runs site surveys, testing, and as-built documentation as standard practice, not an add-on, for commercial offices, secure facilities, and server rooms throughout New York City.

That means a team that shows up with certified test equipment, photographs and tags every run before demolition starts, and delivers a signed-off package, floorplans, rack elevations, patch-panel schedules, and PDF test reports with tester metadata attached, before you pay the final invoice. If your renovation touches structured cabling, fiber, WiFi access points, or security infrastructure, start with a structured cabling assessment or request a site survey directly through Cables and Chips before your contractor closes a single wall.
Sources
- Network documentation — why it matters and how to do it | Domotz
- Non‑home electrical fires | NFPA research and statistics
- Structured cabling installation: 6‑phase guide | Unió Digital
- Office renovation cable install checklist | CrimpShop
- Structured cabling installation checklist | MegaServices LLC
FAQ
Which document details the requirements for electrical installations?
For low-voltage and network cabling specifically, the TIA-568 family covers cabling performance requirements, while the National Electrical Code (NEC) governs installation safety, including fire-rating and clearance rules that apply during renovations.
What are the three most commonly followed standards for constructing and installing cabling?
The three most referenced standards are TIA-568 for cabling performance, TIA-606 for labeling and administration, and ANSI/TIA-569 for pathway and telecom space design, all of which belong in a renovation project’s scope language.
What three parties must be satisfied with a completed electrical installation?
On a commercial cabling project, the building owner or facilities manager, the general contractor overseeing the renovation, and the IT department relying on the network typically all need to sign off before work is considered complete.
How do you run CAT6 cable in new construction?
Cat6 should run through dedicated pathways, cable tray, conduit, or J-hooks, rated for the ceiling classification (plenum or non-plenum), with service loops left at both ends and termination deferred until walls or ceilings are ready to close. Cables and Chips handles this sequencing directly as part of its CAT6 installation service for commercial projects.
Do I need to document cabling that will be replaced anyway?
Yes. Even cable slated for removal needs a record showing its origin, destination, and condition, since that data feeds the reuse-or-replace decision and protects against disputes over what was removed versus what was left in place.