
A Conference Room AV Cabling Checklist for a Certified Handover
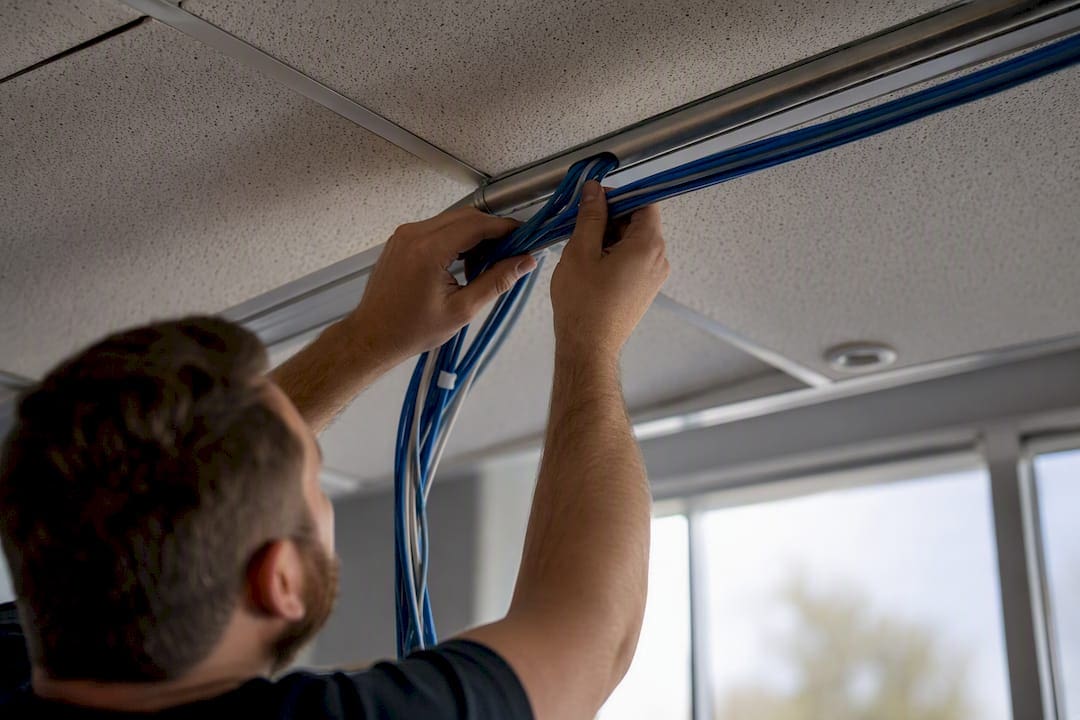
A commissioning-ready conference room AV cabling checklist has one job: turn a raw install into a tested, labeled, and documented handover package. That means every run gets certified, every device gets logged, and every deviation gets recorded before the client signs off.
What the checklist covers:
- Cable types, channel limits, and termination standards
- 12-inch low-voltage separation rules
- Network and PoE readiness
- Test certification and recordkeeping
- Final sign-off documentation
Pro Tip: Before anyone pulls a single cable, walk the room with a tape measure and a camera. A five-minute pre-install sweep catches the blocking, conduit, and power gaps that cause the most expensive rework later.
Key Takeaways
A commissioning-ready conference room AV cabling checklist works because it forces every run to be pulled to spec, tested against a standard, and documented before handover.
| Point | Details |
|---|---|
| Run the pre-install sweep first | Verify blocking, conduit, and power locations before pulling any cable to avoid rework. |
| Respect the 12-inch separation rule | Keep low-voltage AV raceways at least 12 inches from 120V power circuits. |
| Certify every link, not just test it | Record tester model, calibration date, and technician name with every result. |
| Document the full handover package | Deliver as-built drawings, device inventory, test reports, and photos together. |
| Work with a documented cabling partner | Cables and Chips delivers certified, fully documented conference room AV cabling installs across New York City. |
Conference Room AV Cabling Checklist: The Master List
Use this master checklist as the working document for every phase of the install, from rough-in to final commissioning.
Pre-install: Confirm approved drawings, cable schedule, bill of materials, and floor/table box locations. Verify blocking and mount anchorage for displays and cameras.
Rough-in and pull: Route Cat6A for AV-over-IP endpoints, single-mode fiber for long or high-bandwidth runs, and short factory HDMI/DisplayPort/USB-C patches at the table only. Maintain the 12-inch minimum separation between AV raceways and 120V circuits.

Termination and patching: Terminate to TIA-568 standards, dress and strain-relieve every bundle, and label both ends of each run with a matching run ID.
Rack and power: Ground the rack, place AV gear on a dedicated circuit or UPS, and confirm PoE budget against switch capacity.
Network mapping: Assign VLANs and IP addresses per device before the rack goes live, not after.
Testing and certification: Run continuity, wiremap, and channel certification on every copper and fiber link. Recorded results, not a verbal “it works,” are what make a link certifiable under structured cabling checklist standards.
Commissioning handover: Deliver test reports, device inventory, as-built drawings, and a signed punchlist.
Pro Tip: Photograph every termination before you close the box. A photo takes ten seconds and settles most warranty disputes before they start.
What Should You Verify Before Pulling Cable?
Confirming site readiness before the first pull prevents the two most common causes of AV rework: wrong cable path and no power where you need it.
- Verify floor, ceiling, and wall construction, plus blocking and anchorage at every mount point.
- Confirm existing conduit and IDF/MDF locations and measure actual distances against the design.
- Map power locations against the intended floorbox and table box placement.
- Collect signoffs from other trades (electrical, millwork, drywall) before pulling.
Pull the approved drawings, cable schedule, and BOM into one project file before work starts. Order spare factory-terminated patch cords now. A missing patch cord on install day costs a full trip; a spare in the bin costs nothing. For renovation projects layered on existing infrastructure, a renovation cabling plan helps coordinate trades before conduit gets closed up.
Which Cable Types and Termination Standards Apply?
Specify Cat6A or better for every AV-over-IP endpoint and PoE-powered device. Fiber, ideally single-mode, handles long backbone runs or anything approaching 4K/60 bandwidth over distance. HDMI, DisplayPort, and USB-C stay as short, factory-made patch cables at the table. Field-terminated video cable is a reliability risk nobody needs.
Respect the channel length limits for copper and fiber, and follow bend-radius and pull-tension limits during the pull, not after a cable already shows a kink. Crestron’s structured cabling guidance recommends factory-terminated patch cords between permanent links specifically because field terminations introduce the most variability in certification results.
Label every run with an alphanumeric convention that ties back to the rack: something like CR2-DISP1-P14 for Conference Room 2, Display 1, Patch Panel Port 14. A run without a two-end label is a run someone will re-trace by hand later. The cabling types spec guide breaks down channel budgets by cable class if you need the exact numbers for a specific run length.
Pro Tip: Label at both ends the day you pull, not the day you terminate. A cable pulled through three walls looks identical to five others by the time termination day arrives.
How Much Separation Do You Need From Power Circuits?
Keep a minimum of 12 inches between 120V power circuits and low-voltage AV raceways wherever they run parallel, whether in slab, ceiling, or floorbox. This spacing is specified directly in conference room AV standards as the baseline defense against electromagnetic interference on audio and video signal paths.
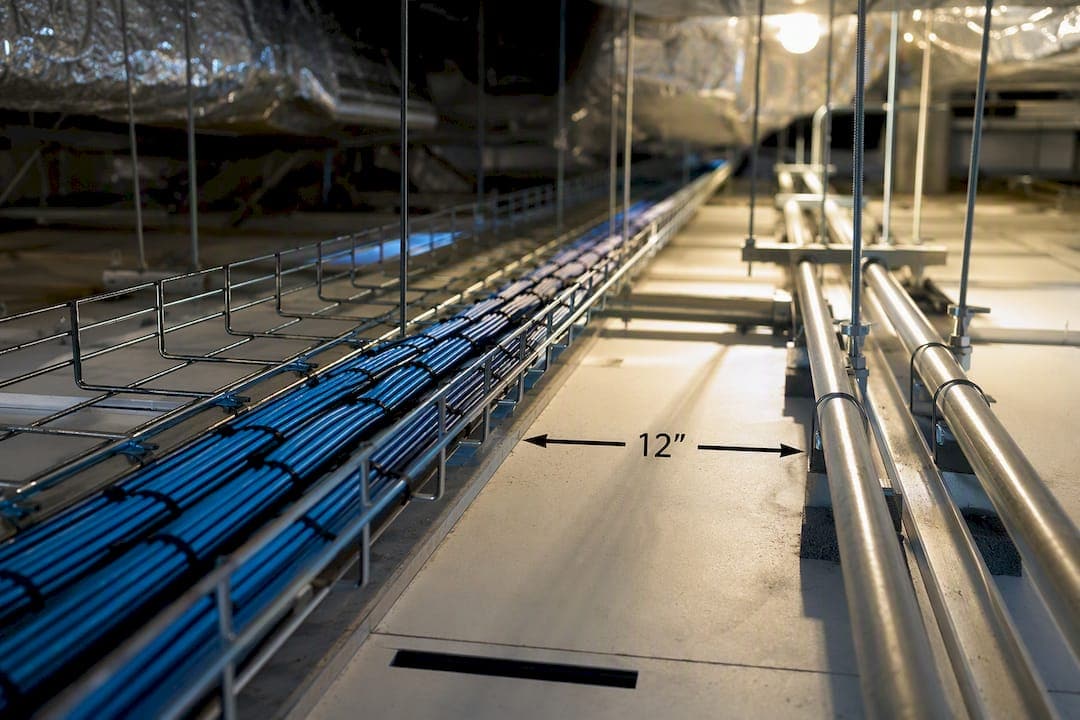
Size conduit stubs for table boxes and credenzas with room to spare. AV racks and PoE switches deserve dedicated circuits, not a shared drop with the coffee machine. Ground the rack properly and put critical AV gear on a UPS so a brief power blip doesn’t drop a call mid-meeting.
Any deviation from NEC or your local AHJ requirements needs to be documented, not just remembered. Write it into the closeout file with a reason and a date.
Pro Tip: If a raceway has to cross power conduit, cross it at 90 degrees. A parallel run for even two feet can introduce enough noise to show up as audio hum weeks later.
Is the Network Ready for AV-Over-IP and PoE Devices?
A switch that looks fine on paper can still choke a conference room if nobody planned the PoE budget. Specify per-port wattage against every camera, touch panel, and PoE-powered speaker before ordering the switch, and reserve at least two spare ports per room.
Calculate uplink capacity with real headroom. A single room running multiple 4K video streams over IP can saturate a 1Gb uplink fast; plan for 10Gb uplink capacity where you expect more than one high-bandwidth stream at a time. Reference IEEE 802.3bt power-over-Ethernet standards when sizing PoE budgets for higher-draw endpoints like PTZ cameras.
Plan VLANs and IGMP snooping for multicast video, and set DSCP/CoS values so voice and video traffic gets priority over a guest laptop’s file download.
A simple switch port map keeps this honest:
Pro Tip: Pull one or two spare Cat6A runs to every endpoint location during rough-in. A future camera upgrade or a second display shouldn’t require opening the wall again.
What Tests Confirm a Link Is Actually Certified?
A cable that “works” and a cable that’s “certified” are not the same thing. Certification means a tester produced a pass/fail result against a known standard, and that result got saved.
Run continuity and wiremap on every copper link first. Then certify the full channel with a Fluke-class certifier for Cat6A, and OTDR plus insertion loss testing for fiber. On the video side, run EDID and HDCP handshake tests end to end. A display that won’t negotiate resolution during commissioning almost always traces back to a skipped handshake test, not a bad cable.
| Link Type | Required Test | Tool Class |
|---|---|---|
| Cat6A copper | Channel certification | Fluke-class certifier |
| Fiber | OTDR / insertion loss | OTDR tester |
| HDMI/DisplayPort | EDID/HDCP handshake | HDMI protocol tester |
Record the tester model, its calibration date, and the technician’s name alongside every result. Structured cabling checklist standards treat this recordkeeping as inseparable from the test itself: a result with no calibration date is not a defensible certification. Export CSVs and screenshots and attach them to the as-built package rather than filing them separately.
What Belongs in the Final Handover Package?
The handover package is the proof that the room was built to spec, not just that it happens to work today. A complete installation readiness checklist confirms standards adherence, continuity test results, and device inventory before anyone signs off.
Include in the package:
- As-built CAD or PDF drawings and the final cable schedule with labels
- Full test reports (continuity, certification, OTDR, HDMI handshake)
- Device inventory with serials, MAC addresses, and IP assignments
- Photos of every termination and the finished rack elevation
- Firmware/software versions and access credentials, delivered through a secure channel
Before the client walks in, run the functional tests that actually simulate a meeting:
- One-touch join on the primary conferencing platform
- A live dial test on the secondary platform, if the room supports both
- Camera PTZ preset recall
- Microphone coverage and echo-cancellation check across the full table
- Audio/video sync verification on the main display
Resolve every punchlist item and capture sign-off on a simple template listing each item, its resolution, and the client’s initials. Anything left open gets a date and an owner, not a verbal promise.
How Do You Keep a Room Reliable After Handover?
A certified room doesn’t stay certified on its own. Build a light recurring schedule: a monthly visual sweep, a quarterly check of PoE draw and switch logs, and an annual recertification of a sample of runs, heavier if the room saw renovation or a hardware refresh.
| Interval | Check |
|---|---|
| Monthly | Visual sweep, label check, rack cable management |
| Quarterly | PoE draw review, switch logs, spare port audit |
| Annual | Recertify a sample of copper and fiber runs |
Keep a small spares kit on hand: a couple of factory-terminated patch cords, a spare PoE access switch, a short HDMI/DisplayPort patch, and basic termination tools. Most conference room outages get resolved in minutes when the right spare is sitting in a bin instead of on a purchase order.
What Does an Installation-Ready Deliverable Look Like?
A site-acceptance template maps each checklist item to a sign-off column, so nothing gets marked complete without a name and a date attached. Add space for digital markup references tying back to the CAD file, plus a field for attaching the relevant test file for that item.
Photo documentation follows a simple rule: shoot rack elevations, every termination before it’s closed up, and each floor or table box before and after cable dressing. Name files by room and run ID, matching the labeling convention already on the cable, and store them in the same folder as the test reports rather than scattered across phones and laptops.
Pro Tip: Build one CSV with MAC address, serial number, and IP for every device in the room. Paired with the test report and a one-page executive summary of open items, it turns a messy handover into a five-minute review. A completed project like the conference room boardroom upgrade shows what that finished package actually looks like in practice.
Why Documentation Discipline Matters More Than the Install Itself
Most conference room failures I’ve seen traced back to a documentation gap, not a bad cable. A room can be pulled cleanly and still turn into a support nightmare if nobody logged which port maps to which VLAN. Systematic cabling and a signed test report are what let a facilities team fix a problem in fifteen minutes instead of a half-day of guesswork. That discipline is the actual product of a good installer, more than the cable itself.
How Cables and Chips Turns a Checklist Into a Certified Room
Running this checklist yourself is possible. Running it with a crew that has certified thousands of runs across New York commercial buildings over more than 40 years is faster and leaves nothing to chance on sign-off day.

Cables and Chips designs, pulls, terminates, and certifies conference room AV cabling for commercial offices and enterprise facilities throughout New York City, and delivers the full documentation package: test reports, device inventory, as-built drawings, and photos, all included, not billed as an add-on. If your infrastructure is closer to a full rebuild than a single room, the structured cabling components guide walks through what a proper backbone requires. For the conference room itself, get a project quote on Cat6A structured cabling installation and request a sample installation readiness report before your next room build starts.
Sources
FAQ
What Is a Conference Room AV Cabling Checklist?
It’s a phased document covering pre-install verification, cable pulls, termination, testing, and commissioning handover, used to confirm every AV cable meets standard and gets certified before sign-off.
What Cable Type Should I Use for Conference Room AV-Over-IP?
Cat6A or better handles AV-over-IP and PoE endpoints reliably, while single-mode fiber covers long backbone runs, and HDMI/DisplayPort/USB-C stay as short factory patches at the table.
How Far Should AV Cabling Be From Power Circuits?
Maintain at least 12 inches of separation between low-voltage AV raceways and 120V power circuits to avoid electromagnetic interference.
What Tests Are Required to Certify a Cable Run?
Every copper run needs continuity, wiremap, and full channel certification, while fiber needs OTDR and insertion loss testing, and video links need EDID/HDCP handshake verification.
Who Should Handle Conference Room AV Cabling Installation?
A structured cabling contractor with testing and certification capability should handle it. Cables and Chips installs, tests, and documents conference room AV cabling for commercial facilities across New York City.