
AP-on-a-Stick Survey: How It Works and When to Use One
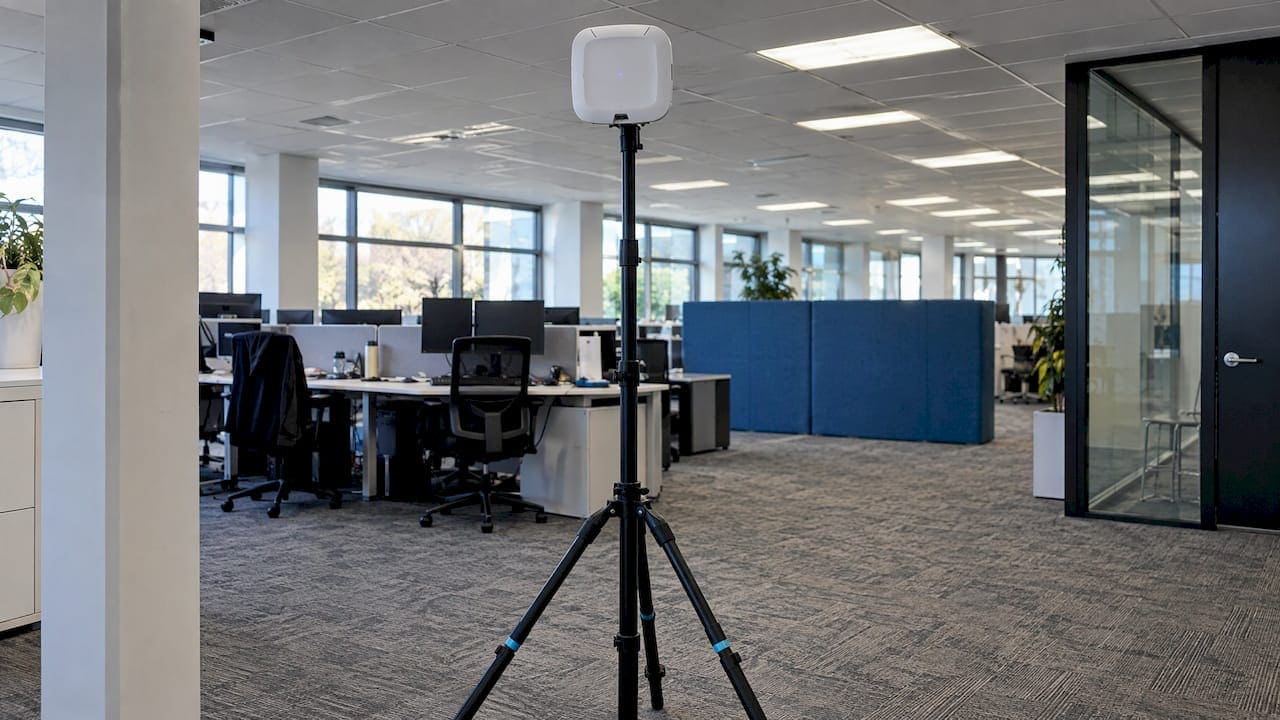
An AP-on-a-stick (APoS) survey is a pre-deployment Wi-Fi survey. You mount a real access point on a tripod at a planned location, walk the floor, and measure the coverage it actually produces. You then move it and repeat. Ekahau describes it as a survey that emulates the coverage of the AP you plan to deploy, used to validate and improve the predictive model so the right number of APs end up in the right places. For a commercial office, that means you find out where cable drops belong before anyone pulls a single run.
This guide covers the equipment, the step-by-step method, how to read the results, what the software costs and when a survey is worth the time. We write it from the cabling side, because the survey’s output is what an installer builds from.
TL;DR
- An APoS survey uses one temporary access point, moved between candidate spots, to measure real coverage and confirm AP count and placement before installation.
- You need a tripod that holds the AP near ceiling height, a mount, a portable PoE battery pack, a floor plan and survey software on a laptop or phone.
- Configure the AP at the transmit power you plan to use, survey around it, and stop in each direction when signal nears -82 dBm.
- It records only the current state of the space, so close doors, place furniture and finish the layout when you can, and verify the live network after install.
- The result should flow straight into a cabling plan: drop locations, mounting height, PoE budget and documented labeling.
What an AP-on-a-stick survey actually tells you
A predictive design is a software model. You import a floor plan, draw walls, assign materials, and the software estimates where signal will go. It is fast, and it is only as accurate as the assumptions in it. An APoS survey replaces assumptions with measurements taken in the real building.
Hamina’s documentation calls it an alternative to predictive modeling. It uses measurements from real AP placements to build heatmaps for the network proposal. Usually only one access point is used. It is placed, surveyed around, moved and surveyed around again until every AP location is settled.
NetAlly’s AirMapper best practices describe the same loop. A single test AP goes on a tripod in an anticipated installation location. The surveyor walks the area to learn the coverage limits and the attenuation factors, then the AP moves and the steps repeat. The results are merged into a virtual heatmap.
The survey answers three practical questions:
- How far does the signal really travel from this spot? Concrete cores, elevator shafts, fire-rated partitions and glass behave differently than a default material setting suggests.
- How many APs does the floor need? The count in the predictive model is a hypothesis. The survey confirms or corrects it.
- Where exactly should each AP and its cable go? You see the spot, the height and the obstacles, which is the information a cabling crew needs.
The equipment you need
The kit is simple and portable. Hamina’s guide says the setup usually includes a good tripod that places the AP very close to or against the ceiling, a stand to mount the AP to the tripod, and a portable PoE battery pack. In practice, the checklist looks like this:
| Item | Why it matters |
|---|---|
| Tripod or telescoping pole | Puts the AP at the height it will have on the ceiling, so the signal path matches the final install |
| AP mount or Wi-Fi stand | Holds the AP securely and at the right orientation |
| Portable PoE battery pack or injector with battery | Powers the AP without running cable across the floor |
| The actual AP model you plan to deploy | Antenna patterns and radio behavior differ between models |
| Floor plan (PDF or image, to scale) | Survey software needs a scaled map to place your measurements |
| Survey software and a laptop, tablet or phone | Records signal strength as you walk |
| Survey adapter or the least capable client device you support | Gives realistic readings from the user’s side |
| Tape measure, camera, notebook | Captures ceiling type, obstacles, and likely cable paths |
Some teams build a rolling cart so the AP, battery and mast move together. That is worth doing on large floors where you will reposition dozens of times.
Matching mounting height to the real install
The tripod height should reflect where the AP will live. Ceiling-mounted APs in a typical office sit at a very different height than those in a warehouse, and the difference changes coverage. Our AP mounting height guide lays out the ranges installers work with for offices and warehouses, so you can set the survey mast to the same height you will install at.
Power matters too
A battery pack that cannot deliver enough PoE will cause the AP to run in a reduced mode, which skews results. Confirm the pack supports the PoE class your AP needs. Our PoE requirements for access points page covers what installers budget per AP, and the PoE power budget guide shows how it adds up across a switch.
Preparing before you walk the floor
Good surveys are mostly decided before the tripod is unfolded.
Get a scaled floor plan. Request the current architectural plan from the building or the tenant’s architect. Confirm the scale and mark any walls, shafts and partitions that were built after the drawing date.
Mark candidate AP locations. Start from your predictive design, or from a simple grid, and add locations near conference rooms, open areas and corners. Consider where cable could reach: telecom closets, ceiling space, cable trays. The survey is also the moment to check that a candidate spot is feasible to cable.
Configure the AP like the final deployment. Hamina instructs you to put the access point in offline mode, sometimes called survey or configuration persistence mode, and set the transmit power you intend to use in the final deployment. An AP left at full power will show larger cells than the final network will provide, and you will under-count APs.
Pick the right bands. If the design includes 5 GHz and 6 GHz, survey those. The 6 GHz band attenuates faster through walls than 2.4 GHz, so a 2.4 GHz-only survey can be misleading.
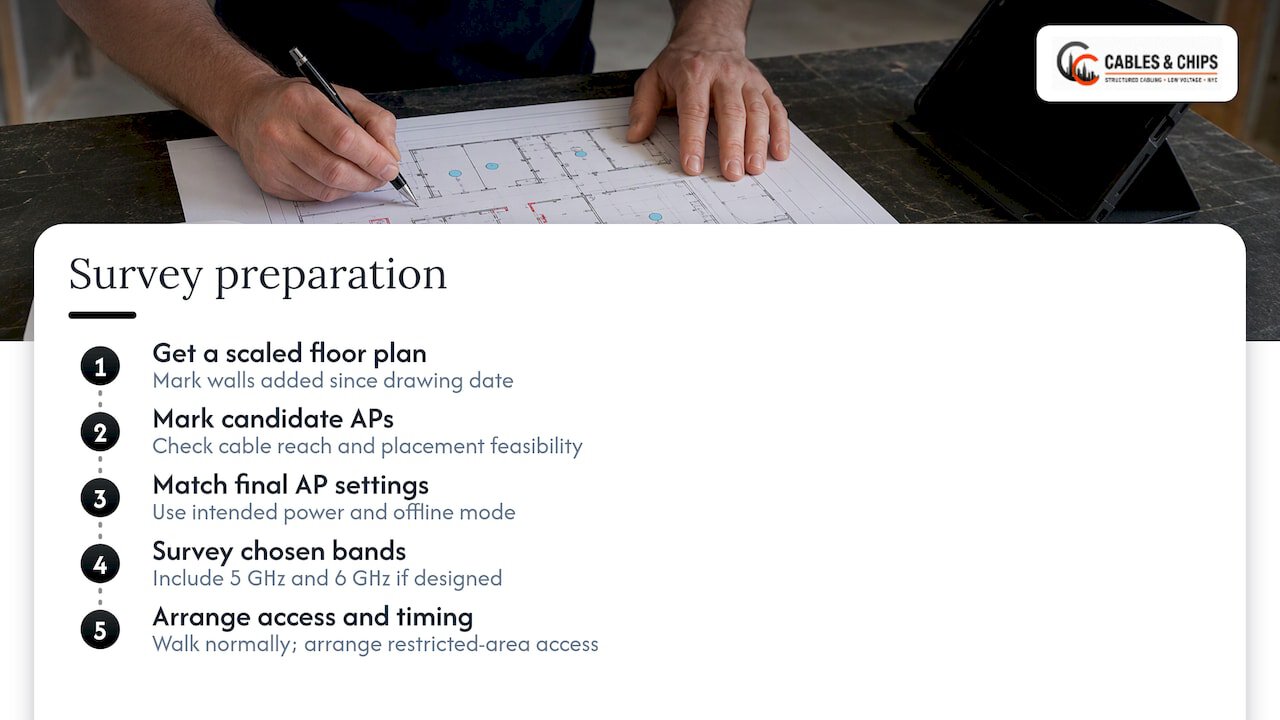
Check access and timing. Walk in during normal conditions if you can. Arrange access to closed offices, server rooms, stairwells and restricted areas. In secure facilities, plan escorts in advance.
How to run the survey, step by step
- Set up at the first candidate location. Mount the AP on the tripod at the planned ceiling height, power it from the battery pack and confirm it is broadcasting.
- Start a survey in the software and calibrate it to the plan. Mark your starting position on the map.
- Walk around the AP. Tap your location on the map as you move, covering the area the AP is meant to serve. Walk in each direction, through doorways and into adjacent rooms.
- Watch the signal strength graph. Hamina’s guidance is that when signal strength nears or exceeds -82 dBm, you are at the very edge of the coverage cell, and you do not need to continue in that direction.
- Save the data and move the AP. Place it at the next prospective location, then repeat steps 2 through 4.
- Run a passive survey with the same AP. NetAlly’s AirMagnet Survey guide says to conduct as many active surveys as needed per location, save after each, then conduct one passive survey with the same AP and merge all the files in Display view.
- Freeze the AP position. Per Ekahau, after the passive survey determines how far the signal propagates and the optimal location is chosen, you freeze the AP, move it to the next location and repeat.
- Record installation notes. Photograph each spot, note ceiling type and height, nearby obstructions and the likely cable route back to the closet.
Active versus passive: use both
A passive survey listens and records received signal strength. An active survey associates with the network and measures throughput, retries and latency. The distinction matters. Metis.fi’s Petri Riihikallio points out that access points are more powerful than typical user devices, so signal strength alone says little about connection quality, and active surveys should use the least capable device the network will support. For an office full of laptops, phones and the occasional older handheld, that advice is practical: survey with the weakest client you expect on the floor.
Reading the results
The heatmaps give you coverage cells for each tested location. The goal is to choose a set of locations that cover the floor with enough overlap for roaming, without so much overlap that APs interfere with each other.
Work from requirements, not colors. Decide your target first, such as a minimum signal level and signal-to-noise ratio for voice, video and general use. Then compare each heatmap with it. Riihikallio’s caution is worth remembering: a lot of green on a heat map does not automatically prove the network performs well.
Look for gaps and edges. Walk the merged map and mark spots below target. Typical trouble areas are stairwells, elevator lobbies, interior conference rooms and corners behind service cores.
Mark where cells overlap. A client moving between APs should find a stronger signal before it loses the first. Plan for that overlap along main walking routes and into conference rooms.
Turn the map into a cabling plan. Each confirmed AP position becomes a drop with a label, a cable route, a mounting height and a PoE load. Our WiFi access point cabling plan guide walks through that translation, and the commercial WiFi cabling best practices cover the installation standards that follow.
Check the cable run, not just the signal
A perfect AP location is only useful if the run to it is sound. Newer APs can pull multi-gig speeds, and older runs may not support them. Before you commit to a layout, check what is in the ceiling. Our guides on WiFi 6E cabling and testing existing runs and Cat6A for Wi-Fi 6E explain when existing cable is enough and when new runs are justified.
When an AP-on-a-stick survey is worth it
Not every project needs one. Ekahau’s article on why and when to use APoS surveys says predictive modeling alone may be enough for small or simple buildings where an onsite visit is not cost-effective, but without onsite testing you lose the detailed installation notes that guide cabling and mounting decisions.
A survey earns its cost when the environment is hard to model. Nile’s wireless site survey guidelines recommend validating design assumptions with an AP-on-a-stick test before finalizing AP count when conditions are unusual or materials are unknown. Their examples are:
- High ceilings or atriums
- Glass facades
- Warehouse racking or cold stores
- Heavy machinery
- Lift lobbies
- Listed or retrofitted buildings
New York City offices hit several of these regularly: pre-war buildings with thick masonry, renovated floors with unknown partition materials, glass-heavy conference rooms, and older structures where drawings no longer match reality. Ekahau’s second article adds that on big, complex projects an APoS survey in the middle of the process can save significant time and money when the plan is adjusted before final deployment. That is the sweet spot: after the predictive plan, before cable is pulled, and before validation at the end.
Limits to plan around
The survey is a snapshot. It records the space as it was on the day you walked it, so changes such as new furniture, metal cabinets or door positions can change the results later. Riihikallio gives a plain example: if doors are kept open during the survey but closed in daily use, the results will not match what employees experience.
The working fixes are simple:
- Survey with doors in their normal position, and note any that cannot be closed.
- Wait until large fixtures, such as filing cabinets and server cages, are in place, or add a margin for them.
- Keep a record of the conditions on survey day.
- Treat the survey as a design input, then verify the finished network.
That last point is the post-deployment step. Ekahau explains that a live-network survey confirms the deployed network matches the design. It also identifies coverage gaps, interference, performance problems and rogue APs, and it provides a baseline for later improvements. The APoS survey and the validation survey are two halves of one process.
What survey software costs
The software choice shapes the budget more than the hardware does.
Professional platforms. Ekahau AI Pro, a widely used enterprise tool, is listed by a major reseller at an MSRP of $5,995 as a perpetual license that requires a one-year subscription at purchase. Prices change, so confirm with the vendor or a reseller before budgeting.
Mid-range tools. NetSpot has desktop editions for macOS and Windows. Its version comparison page shows the free edition is for discovering and analyzing nearby networks, while survey and heatmap work sits in the PRO and Enterprise editions. The free edition is also licensed for non-commercial use, so a business project needs a commercial edition.
Vendor tools. Several access point manufacturers include survey features in their management apps, and some survey tools can use the same AP you plan to deploy. Check what your chosen AP vendor provides.
For a one-off office project, many organizations do not buy any of this. They bring in a contractor who already owns the tools and the experience to read the results. That is usually less expensive than buying a license, and the person holding the tripod is the same person who will plan the cable.
Who should run the survey
If your IT team survey wireless networks regularly, owning the tools makes sense. If you are moving into a new floor, expanding, or renovating once every few years, the stronger option is a contractor who can combine the survey with cabling design. The same visit that confirms AP positions can record ceiling heights, closet capacity, cable pathways and the condition of existing runs.
For general contractors and project managers, this fits into the bid walk. Our low voltage bid walk page covers what estimators need to capture on site, and our checklist for documenting existing cabling before renovation helps when walls and ceilings are about to be opened.
Our perspective
Most Wi-Fi complaints we are called about are not radio problems alone. They are infrastructure problems: a drop in the wrong place, an old run that was never tested, a closet nobody documented. Your network is only as strong as the infrastructure behind it.
That is why we treat a survey as the first step of cabling, not a separate exercise. When the survey tells you where each access point belongs, the next questions are practical. How does the cable get there, at what height, on what power budget, and how will the next technician find it? A survey that stops at a heatmap leaves those questions open.
In New York commercial space, we see the conditions that make surveys valuable: dense cores, glass, renovated floors and drawings that no longer match the building. Our approach is to walk the space, record what we find, plan the drops, install clean, test and certify every run, and label everything so it can be maintained. Our WiFi design work is built on that sequence.
If you are planning a new office, an expansion or a refresh, we recommend settling AP positions before ceilings close and before cable is ordered. It is much less costly to move a tripod than to move a cable run.
Ken
From survey to installed network
Once the AP positions are confirmed, the work moves to cabling, and that is where we come in. Cables & Chips is a licensed and insured low voltage contractor at 20 Vesey Street in Lower Manhattan, with more than 40 years of experience in commercial environments in New York City. We handle WiFi access point cabling, structured Cat6 and Cat6A installation, testing and certification, and closet cleanup, so the plan from your survey ends up as a documented, tested installation.
If you want a second set of eyes on your AP layout or a cabling plan built from it, schedule a site survey with our WiFi design team. We offer a no-obligation site survey process.

You can also see the full list of what we install on our services page, or read how we approached a financial services WiFi and security upgrade.
A quick pre-survey checklist
- Scaled, current floor plan with candidate AP locations marked
- The exact AP model and firmware you plan to deploy, set to final transmit power and survey mode
- Tripod height matched to the planned ceiling mount
- Charged PoE battery pack that meets the AP’s power class
- Survey software licensed for commercial use, with the bands you plan to run enabled
- The least capable client device you support, for active tests
- Building access, escorts and quiet hours arranged
- Doors closed and furniture in place, or a note on what will change
- A camera and notebook for installation notes at every location
- A plan for a validation survey after installation
FAQ
What does AP on a stick mean?
It is a survey method where a real access point is mounted temporarily on a tripod or pole and moved between planned locations. You measure the coverage it produces at each one. The data validates or corrects the predictive design before permanent installation.
How is an APoS survey different from a predictive survey?
A predictive survey is a software simulation based on a floor plan and material assumptions. An APoS survey measures real signal in the actual building. Predictive design is quicker, and the APoS survey adds the real-world detail, including installation notes for cabling and mounting.
How much does a Wi-Fi survey cost?
It depends on floor area, building complexity and whether you buy tools or hire a contractor. The software alone can be significant, with one leading platform listed at an MSRP of $5,995 through a reseller. For a project quote, a contractor will usually want to walk the space first.
Is there a free tool for Wi-Fi surveys?
Free editions of some tools can scan and analyze nearby networks, but full survey and heatmap features are generally in paid editions. Free editions may also be limited to non-commercial use, so check the license before using one on a business project.
Do I still need a survey after the network is installed?
Yes, a validation survey is recommended. It confirms that the live network matches the design and finds coverage gaps, interference and rogue APs. It also gives you a baseline for future changes.
Sources
- What is AP on a stick survey? How do you do an AP on a stick survey? (Ekahau)
- AP-on-a-Stick Surveys – why & when to use them? (Ekahau)
- AP-on-a-Stick Surveys (Hamina Knowledgebase)
- AirMapper Site Survey Best Practices (NetAlly)
- AirMagnet Survey User Guide (NetAlly)
- Wireless Site Survey Guidelines (Nile)
- WiFi heat maps (Metis.fi)
- Ekahau AI Pro license listing (CDW)
- NetSpot versions comparison