
8–12 ft Offices, 20–30 ft Warehouses: Installer AP Height Rules
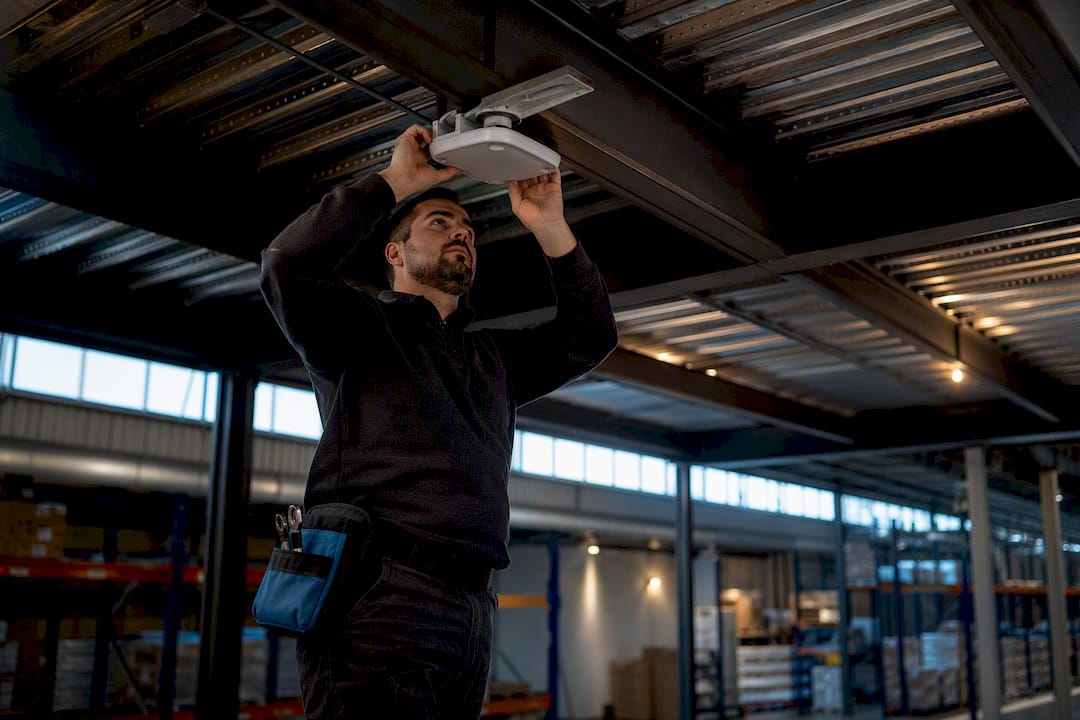
For most commercial indoor spaces, mount ceiling access points at 8 to 12 feet. In high-bay or warehouse environments, keep indoor-rated APs between 20 and 30 feet, staying under 40 feet whenever possible. Outdoor installs should start around 15 feet and generally stay within 15 to 30 feet. Every one of those numbers is a starting point, not a final answer: ANSI/BICSI 008-2024 calls for a predictive site survey and post-install verification before Cables and Chips or any contractor signs off on placement.
TL;DR:
- Mount ceiling access points at 8 to 12 feet in standard offices, but consider 20 to 30 feet in warehouses and high-bay spaces, always verifying with a site survey.
- Lower mounting or specialized antenna positioning benefits conference rooms and high-density environments to prevent overloading and ensure consistent coverage.
- Outdoor access points should typically be installed between 15 and 30 feet, avoiding heights over 40 feet to maintain optimal client device performance.
- Proper spacing, interference control, and cable slack are critical during installation to prevent signal degradation and facilitate future maintenance.
- Post-install verification involving walk tests and signal measurements is essential to confirm the placement delivers reliable coverage, especially after reconfigurations or space changes.
Recommended AP Mounting Heights By Environment
Every commercial space has a default AP height range, but the right number depends on ceiling type, user density, and what sits between the antenna and the people trying to connect.
- Standard office: a typical range near the ceiling grid suitable for most setups.
- Conference rooms: generally lower mounting or supplemented APs for enhanced video collaboration.
- Classrooms and training spaces: positioned centrally over seating areas for optimal coverage.
- Wall-mounted APs: 7 to 10 feet, angled to avoid ceiling-tile shadowing.
- Suspended or open ceilings: mounted at heights that correspond to the deck elevation above occupied areas.
- Warehouse and high-bay: mounted within a recommended range to ensure effective floor-level coverage.
- Outdoor pole or light-pole mounts: typically mounted starting near 15 feet up to a moderate height for coverage.
Treat every figure above as a starting point for the site survey, not a final installation spec. Ceiling obstructions, wall density, and inventory levels in a warehouse can shift the ideal number by several feet in either direction.
How Ceiling Type and User Location Change the Ideal Height
Most indoor access points radiate in a roughly donut-shaped pattern, sending signal outward and downward from the antenna. Mount an AP too high and that pattern spreads into empty ceiling space instead of the desks or aisles below it. That’s the core reason “higher is better” is one of the more persistent myths in wireless design, according to installation guidance from WiFi OEM: height should follow where people actually work, not the tallest available mounting point.
Standard offices call for 8 to 12 feet because that range keeps the coverage cone centered on desks and walkways. An atrium or double-height lobby breaks that assumption. In those cases, a suspended mount or a directional antenna pointed at the occupied zone usually beats pushing a standard omni AP up to the deck.
Conference rooms often need a different approach entirely. High-density video collaboration performs better with a lower mount or a supplemental AP dedicated to the room, since one ceiling AP serving an open floor plan can get overloaded when a dozen laptops in one conference room all join a call at once, according to Chatsworth’s guidance on high and open ceiling environments.
Warehouses and high-bay spaces are where the 20 to 30 foot range comes from, with a hard practical ceiling under 40 feet in most vendor guidance from Aruba’s warehouse design documentation. Beyond that, signal degrades faster than the extra coverage radius justifies.
A few habits separate a clean install from a callback:
- Confirm sightlines from the mount point to the primary work zones before drilling anything.
- Keep APs clear of adjacent metal shelving, ductwork, or structural beams that can reflect or absorb signal.
- Match the mount hardware to the ceiling type: T-bar clips for drop ceilings, structural hangers for open decks, junction boxes for hard-lid walls.
Pro Tip: Walk the space with a ladder before you commit to a height. What looks clear on a floor plan often has a sprinkler line, HVAC duct, or steel joist sitting exactly where the AP needs to go.
How High Should Outdoor Access Points Be Mounted?
Outdoor pole-mounted APs generally start around 15 feet, with most installations settling somewhere between 15 and 30 feet. Vendor and field guidance consistently advises staying under 40 feet unless the deployment is specifically engineered for a taller mount, according to 7signal’s outdoor mounting recommendations. Mounting an outdoor AP unusually high seems like it should extend coverage, but it usually does the opposite for the clients that matter most: the ones on the ground.
Client-side performance depends on the angle between the antenna and the device, not just raw line-of-sight distance. A pole AP mounted at 45 feet aimed down at a parking lot creates a steep angle that many client radios handle poorly, especially phones and tablets with modest antenna gain. A denser layout of lower, closer APs almost always outperforms a single tall unit trying to cover the same footprint.
A few operational factors matter as much as the height number itself:
- Maintenance access. Anything above what a standard extension ladder or bucket truck can reach turns routine service into a bigger job every time.
- Weatherproofing. Outdoor enclosures need to handle wind load, precipitation, and temperature swings without compromising the seal around cable entry points.
- Grounding. Pole-mounted equipment needs proper bonding to protect against lightning-induced surges.
- Mechanical attachment. Anti-rotation hardware keeps the antenna aimed correctly after wind events, which matters more at height than it does at ground level.
Mounting Best Practices That Prevent Callbacks
Spacing and interference control matter as much as height. A common rule of thumb keeps APs roughly 20 feet apart to limit co-channel interference between units on the same frequency, per MegaServices’ installation guide, though a predictive design tool should confirm the final layout rather than a tape measure alone.
Interference sources are predictable once you know what to look for:
- HVAC ducts and equipment: metal ductwork reflects and scatters signal; keep APs at least a few feet clear.
- Suspended lighting fixtures and digital signage: both can degrade signal quality when mounted close to an AP, according to Chatsworth’s mounting guidance.
- Acoustic panels and baffles: absorb and scatter RF unpredictably in open-plan offices.
- Metal shelving and structural beams: create dead zones in warehouses and industrial spaces.
Serviceability deserves its own checklist:
- Fasteners rated for the AP’s weight, not just what happened to be on the truck.
- A quick-release mount so future firmware or hardware swaps don’t require re-drilling.
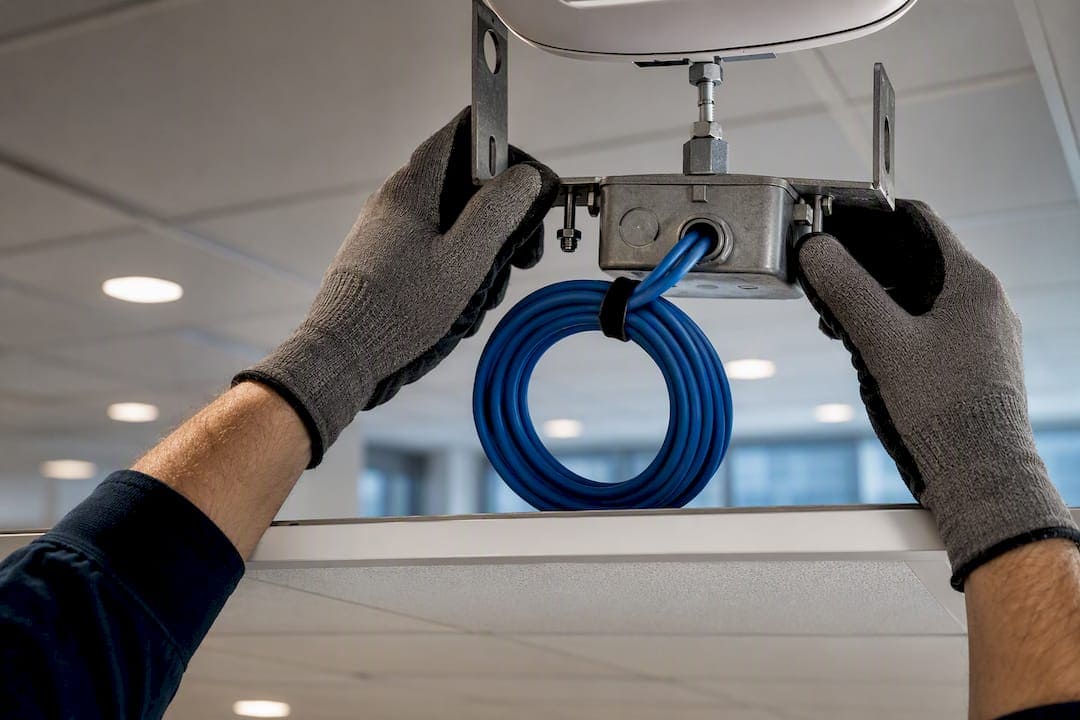
- Cable slack looped and secured, not stretched tight to the port.
- A documented location for every AP, tied to a floor plan and cable ID.
Pro Tip: Label every AP location on the as-built drawing the day it goes in. Facilities teams that skip this step end up hunting for units behind ceiling tiles years later.
Cabling and Hardware That Support the Mounting Height You Choose
The mounting height decision doesn’t end with the bracket. Cable routing needs enough slack for future adjustments, and the choice between a ceiling tile bridge and a hard-mounted junction box depends on whether the space allows tool-free access later. Label every run at both ends; a network closet full of unmarked Category 6 cable is a maintenance problem waiting to happen, and it’s one of the more common issues Cables and Chips finds during AP cabling planning work in existing buildings.
Power planning matters more with each Wi-Fi generation. Higher-throughput APs draw more current, and fault-managed power systems are becoming a bigger part of PoE planning as deployments scale. Mechanical support needs the same attention: standard ceiling-grid clips work fine for lightweight APs, but Wi-Fi 7 units are larger and heavier, and Chatsworth’s guidance on Wi-Fi 7 mounting and enclosures recommends rated hangers or anchors instead. Outdoor pole mounts need grounding, a weatherproof enclosure, and anti-rotation hardware to keep the antenna aimed correctly for years, not months.
Why Predictive Surveys and Post-Install Testing Matter
Every height range in this article assumes the final placement gets validated, not just measured with a tape and installed on faith. ANSI/BICSI 008-2024 recommends predictive site surveys and integrator-led design specifically because generic height ranges can’t account for every building’s quirks.
A practical verification sequence looks like this:
- Run a predictive survey using floor plans, ceiling heights, and construction materials before any AP goes up.
- Install at the recommended height, then walk the space testing RSSI, SNR, throughput, and roaming behavior between APs.
- Flag any zone where signal strength or throughput falls below the design target and adjust height, position, or add a supplemental AP.
- Document results with as-built maps, photos, and cable test reports for future reference.
Warehouses need a second look at full inventory. Stored goods and metal racking attenuate signal differently than an empty floor, which is why Cisco’s deployment guidance recommends surveying at maximum stock levels. Plan to re-validate after major tenant changes, furniture reconfigurations, warehouse inventory shifts, or a move to a new Wi-Fi standard.
What Cables & Chips Sees on the Job
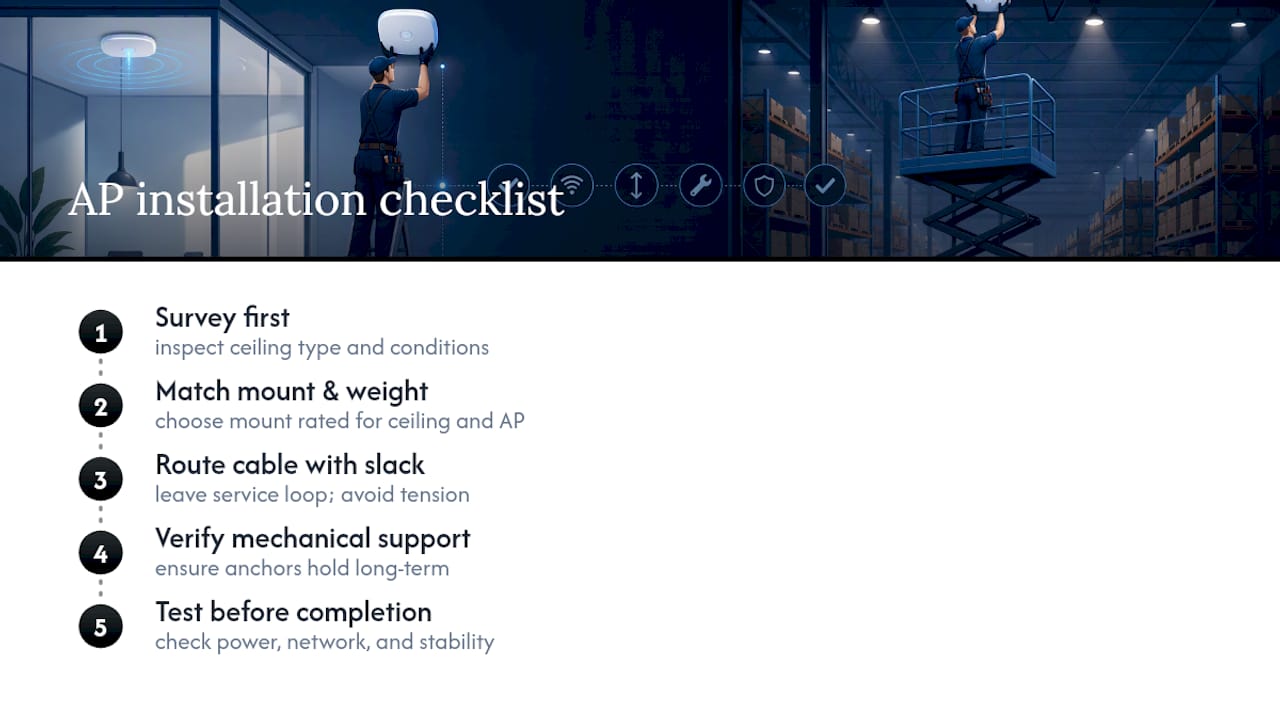
Experienced low-voltage contractors have mounted access points in nearly every ceiling type this article describes, from drop-tile offices to open-deck warehouses. The checklist stays consistent: survey first, match the mount to the ceiling and AP weight, route cable with real slack, confirm mechanical support can hold the unit long-term, and test before calling the job done.
What the Height Charts Don’t Tell You
Most guidance on this topic treats mounting height like a lookup table: pick your ceiling type, find the range, drill the hole. That’s not wrong, but it skips the part that actually determines whether the install performs. The number matters less than the survey that confirms it.
Here’s what gets underweighted in the conventional advice. Facilities teams often default to the tallest available mounting point because it looks cleaner and clears more foot traffic, especially in warehouses. That instinct works against the physics. An AP mounted at 35 feet in a high-bay space with racking at 30 feet is aiming most of its useful signal into empty air above the product, not into the aisles where scanners and handhelds actually need coverage.
The other habit worth breaking: treating the initial install as the finish line. A height that worked at move-in can fail six months later once cubicles get rearranged or a warehouse fills to capacity. Post-install testing isn’t a formality. It’s the difference between a network that works on paper and one that works on the floor. If there’s one thing to prioritize before anything else, it’s the predictive survey, because every height decision downstream depends on getting that input right.
— Ken
Get Your AP Placement Right the First Time
Professional service providers avoid guessing at AP height with a tape measure and a ladder. Every WiFi cabling and design project starts with the same discipline covered above: survey the space, plan the cable path, mount to the ceiling type and AP weight, and test before signing off.

The services page covers the full scope: WiFi design, AP cabling and mounting support, cable testing and certification, and the site survey work that turns a height range into a placement that actually performs. Offices dealing with dead zones in conference rooms, IT teams planning a warehouse rollout, or facilities managers inheriting a network with no documentation can all start the same way. Request a no-obligation site survey through the services page and get a placement plan built around your building, not a generic chart.
Sources
FAQ
Do access points need to be ceiling mounted?
No. Ceiling mounting generally delivers the most even coverage because signal radiates downward across the room, but wall mounts work well in hallways, retail aisles, and spaces where ceiling access is limited or the deck is too high to be practical.
What is AP mounting height and why does it matter?
AP mounting height is the vertical distance between an access point and the floor, and it directly affects how well signal reaches the devices below it. Mount too low and coverage shrinks; mount too high, especially past the ranges in the Aruba warehouse guide, and signal quality at floor level actually drops.
What is the optimal height for mounting an access point indoors?
Standard offices do best with APs at 8 to 12 feet, while high-ceiling or warehouse spaces need 20 to 30 feet, staying under 40 feet whenever possible. The right number for any specific room still depends on a predictive site survey, since ceiling obstructions and floor layout shift the ideal height in either direction.
How many access points does a 10,000 square foot space need?
There’s no single number, because AP count depends on ceiling height, wall density, user count, and the applications running on the network, not square footage alone. A predictive site survey, the kind ANSI/BICSI 008-2024 recommends, is the only reliable way to size a deployment for a specific building.
How do I verify an AP is mounted at the right height after installation?
Run a post-install walk test checking RSSI, signal-to-noise ratio, throughput, and roaming behavior between access points. If any zone underperforms, adjust the mount height, reposition the unit, or add a supplemental AP, then document the final results with an as-built map and cable test report.